We recommend your staff use our Front Desk iPad app to check members in. This app was designed for teenage guards / attendants to not need training to use it (searching members and checking them will be self-explanatory for most users).
When checking members in, your attendants can add guests. If the member does not have Pre-Paid Guest Passes, the toggle under the guest picker lets attendants choose if the guests are paid for at the front desk or if they will be added as an outstanding guest balance on the member account. If your club has a concession stand, the app can also be used to create orders and deduct Pre-Paid Credit from members.
All this information is of course logged in the Front Desk Module of your PoolDues powered site.
Setting up the iPad App
Step 1: From the iPad, go to https://pooldues.com/frontdesk and download the app. If you had a past version of the app, update it. Or delete it and reinstall it.
Step 2: Find your organization. You will only have to do this once. Just type in the first couple of letters then click the appropriate club below.
Step 3: Enter the initial Attendant name, Organization Secret Key, and a nickname for the device.
The device nickname and attendant name will be logged when creating orders or other activities. The Organization Secret Key can be found in the Front Desk module of your website. Enter the exact key, including capitalization (do not enter any spaces).
Step 4: Once the device is registered, it will now need to be Enabled in the Devices & Settings section of the Front Desk module of your website.

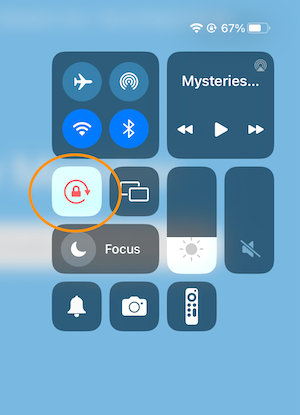
Step 5: Say “Hey Siri, turn off Dark Mode”.
Last step: The app works best in “portrait” mode. Ensure you’re holding the iPad so it’s taller than it is wide, then swipe/pull down from the upper right corner (where the battery life is) and lock the orientation. It will look like what’s circled below:
You’re done!
Checking Members In
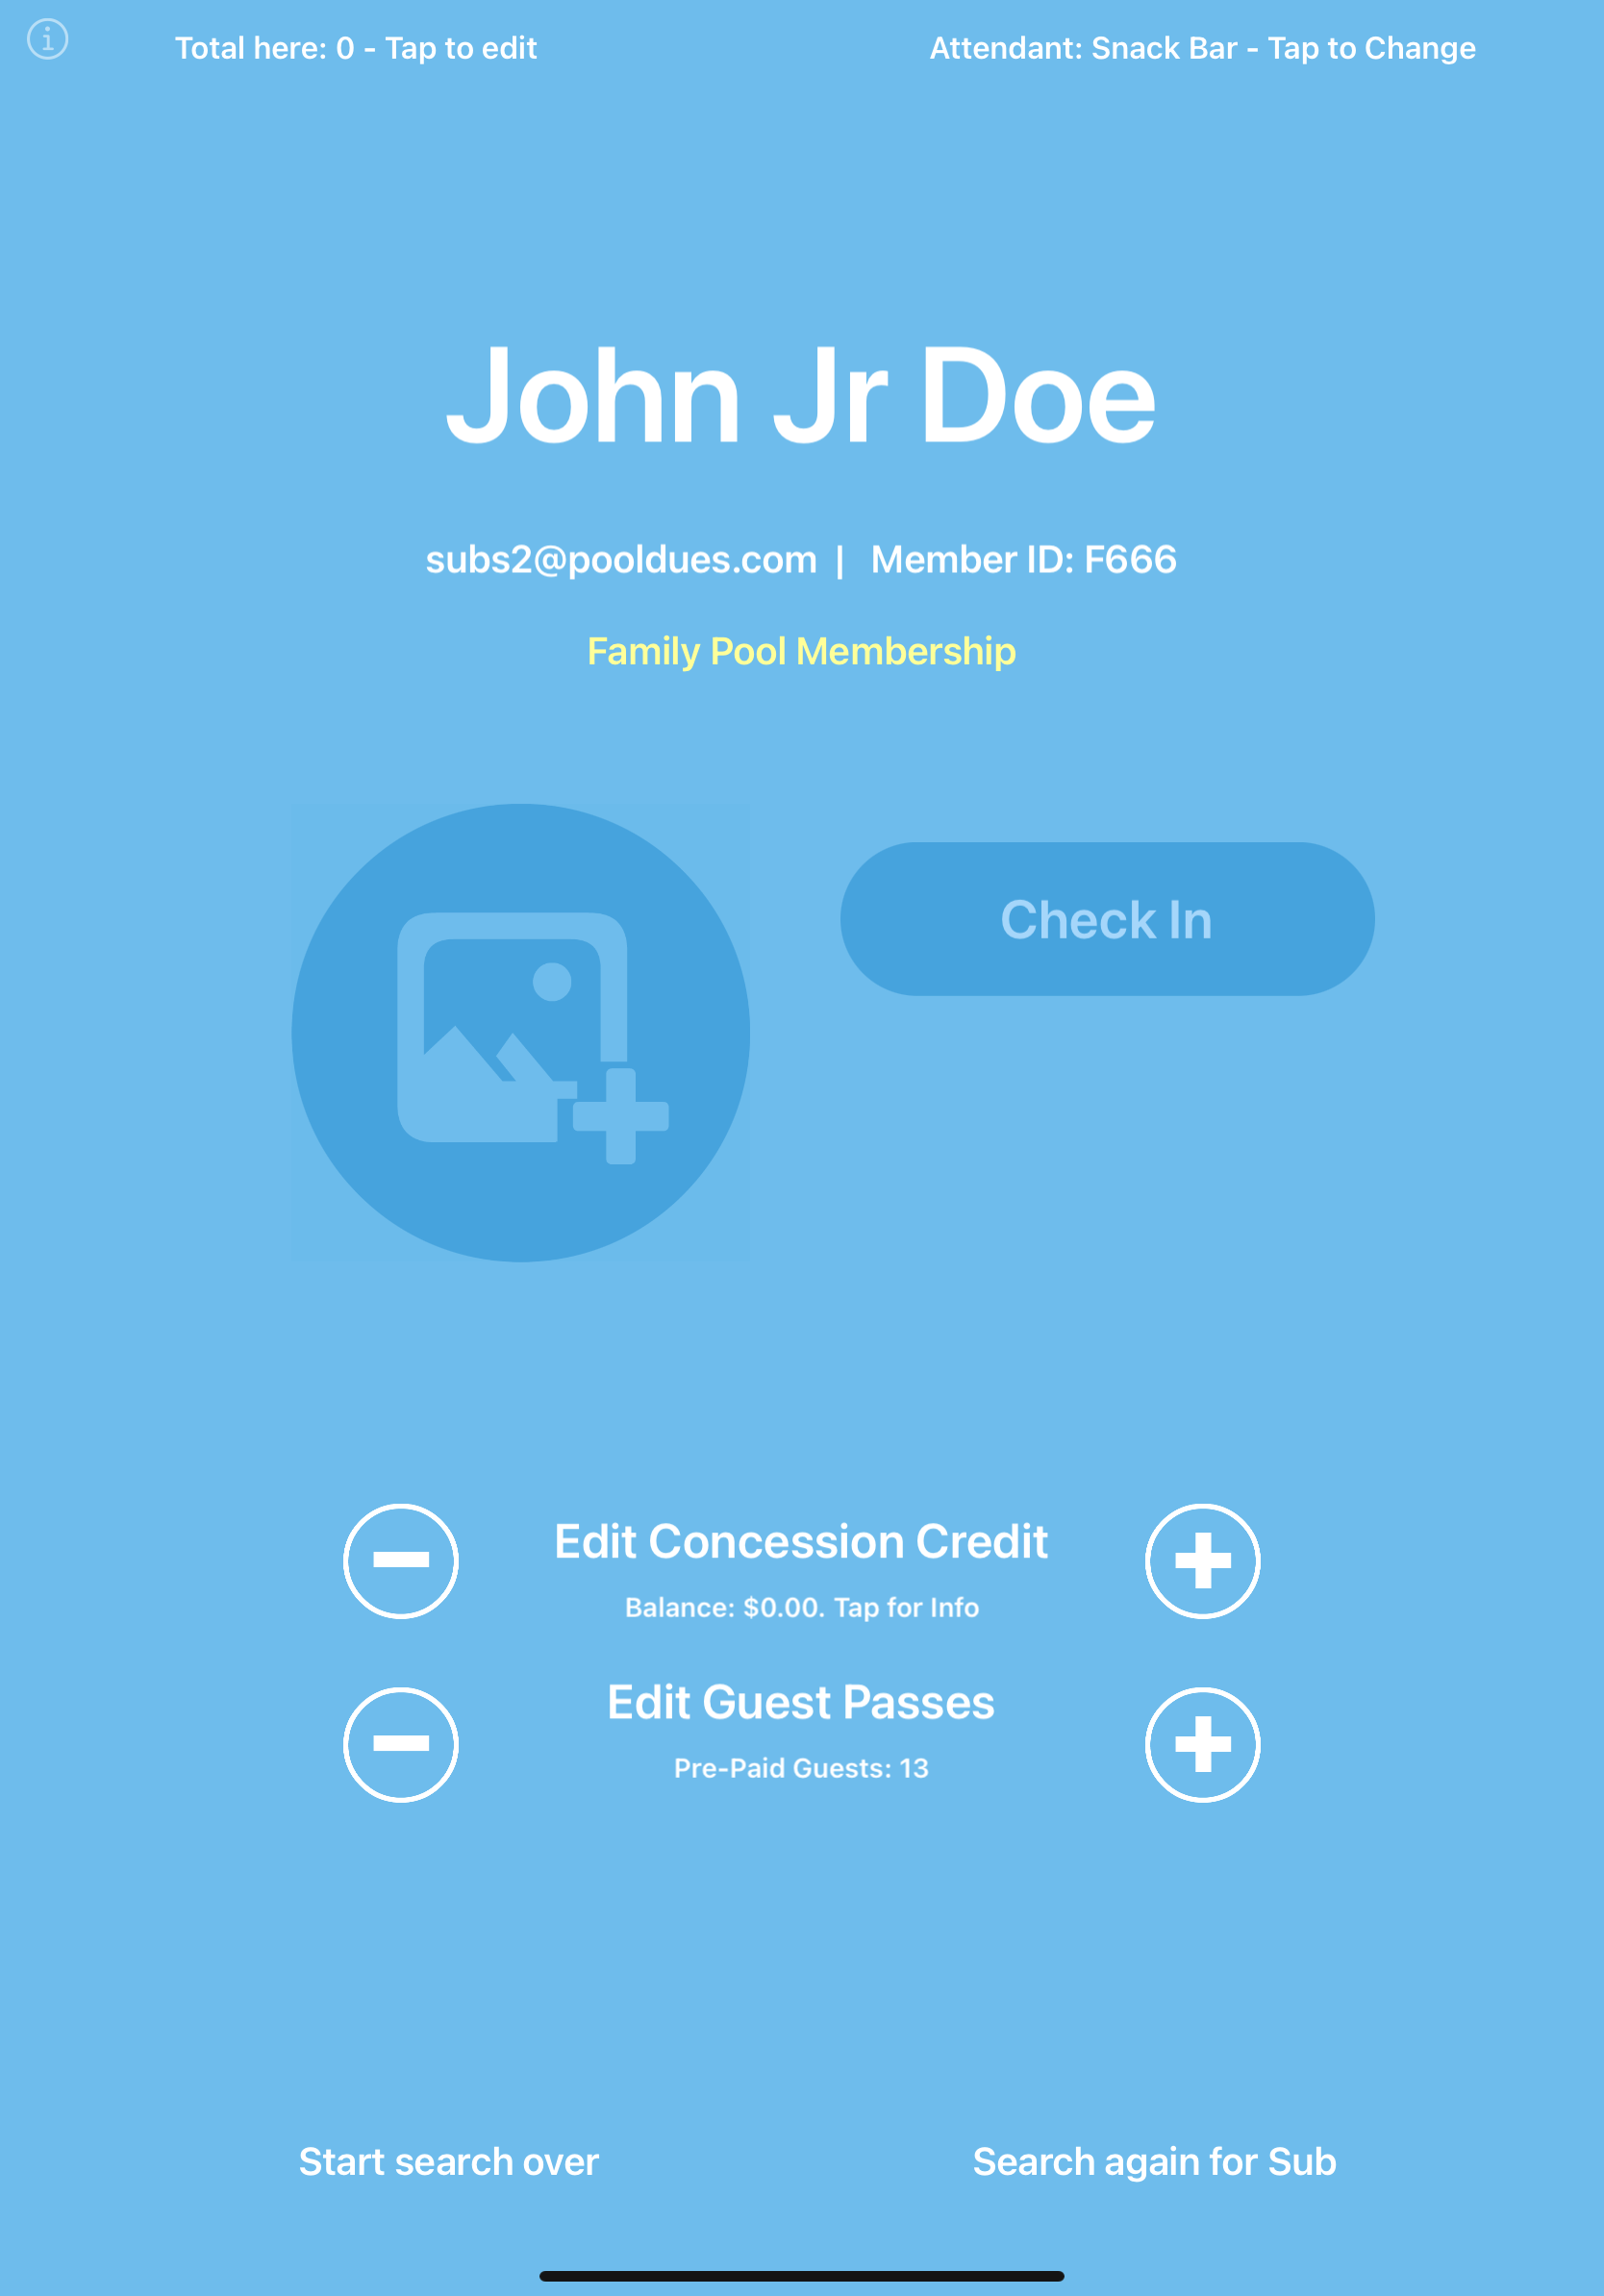
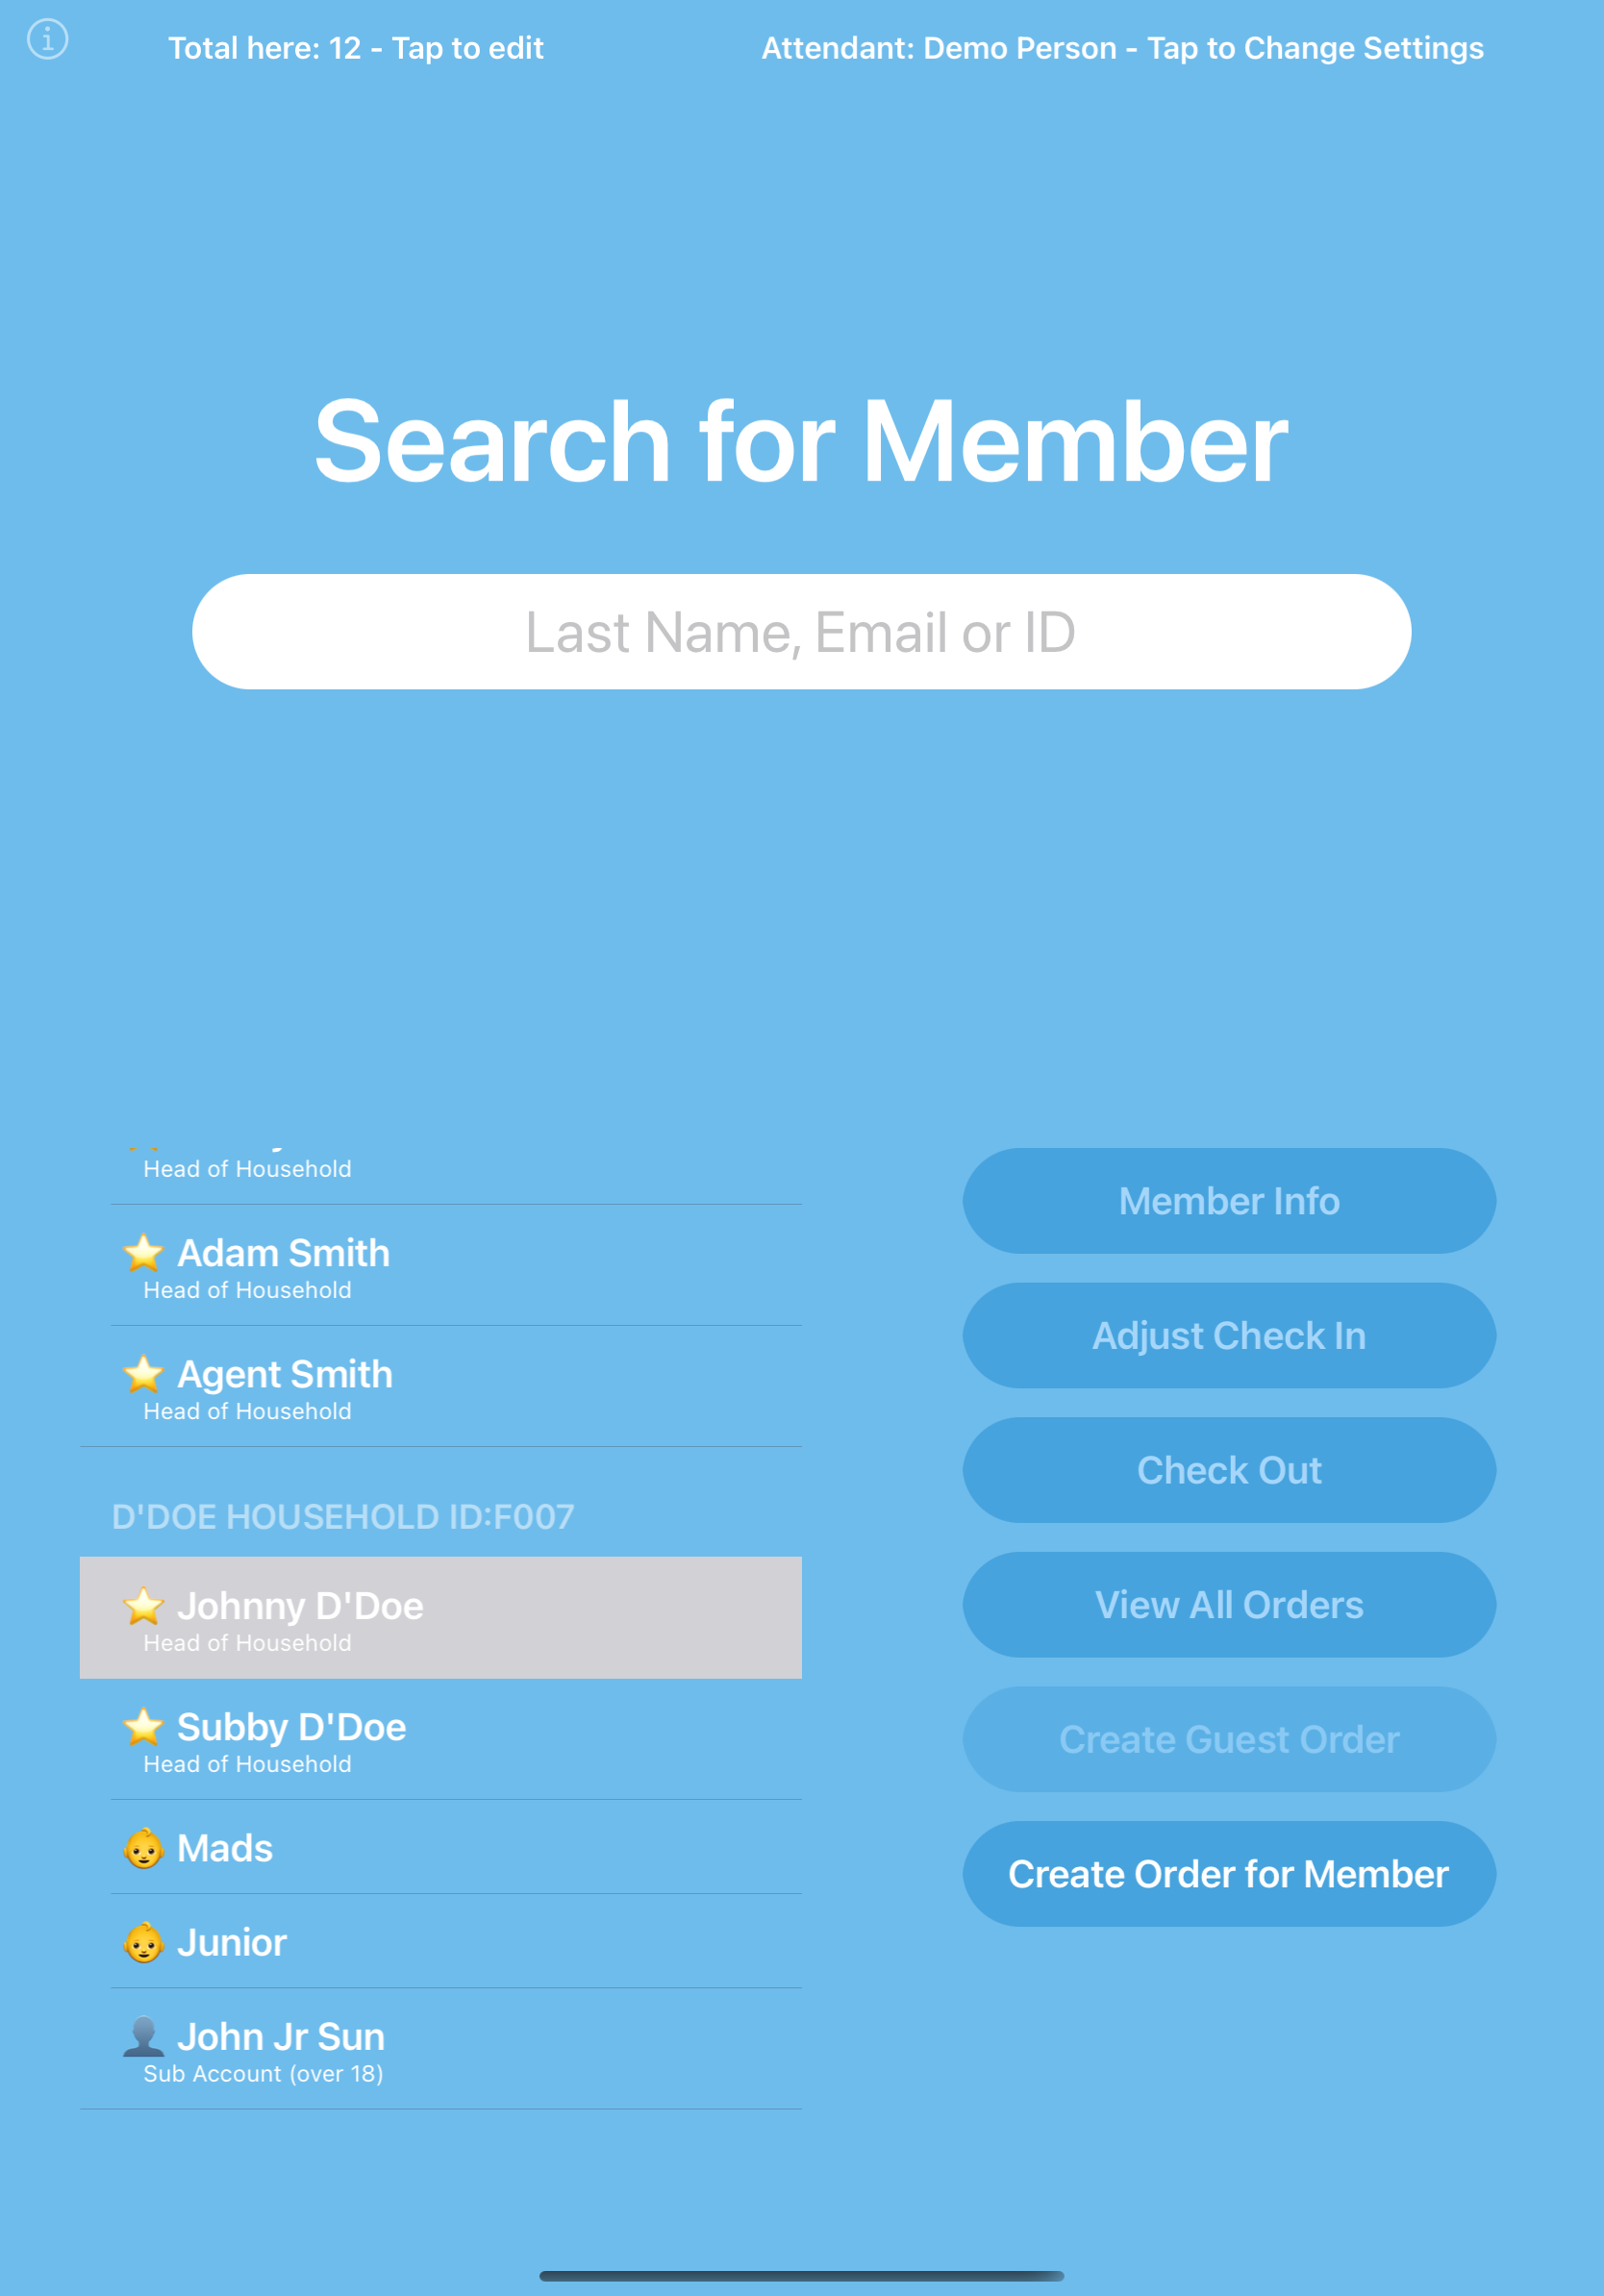
To check members in, all the attendant(s) need to do is search for the member, tap the member’s name, then tap the Check In button. Prior to checking in a member, they can take the member’s / family’s photo (tap the circle with the image / plus icon seen in the screenshot below).
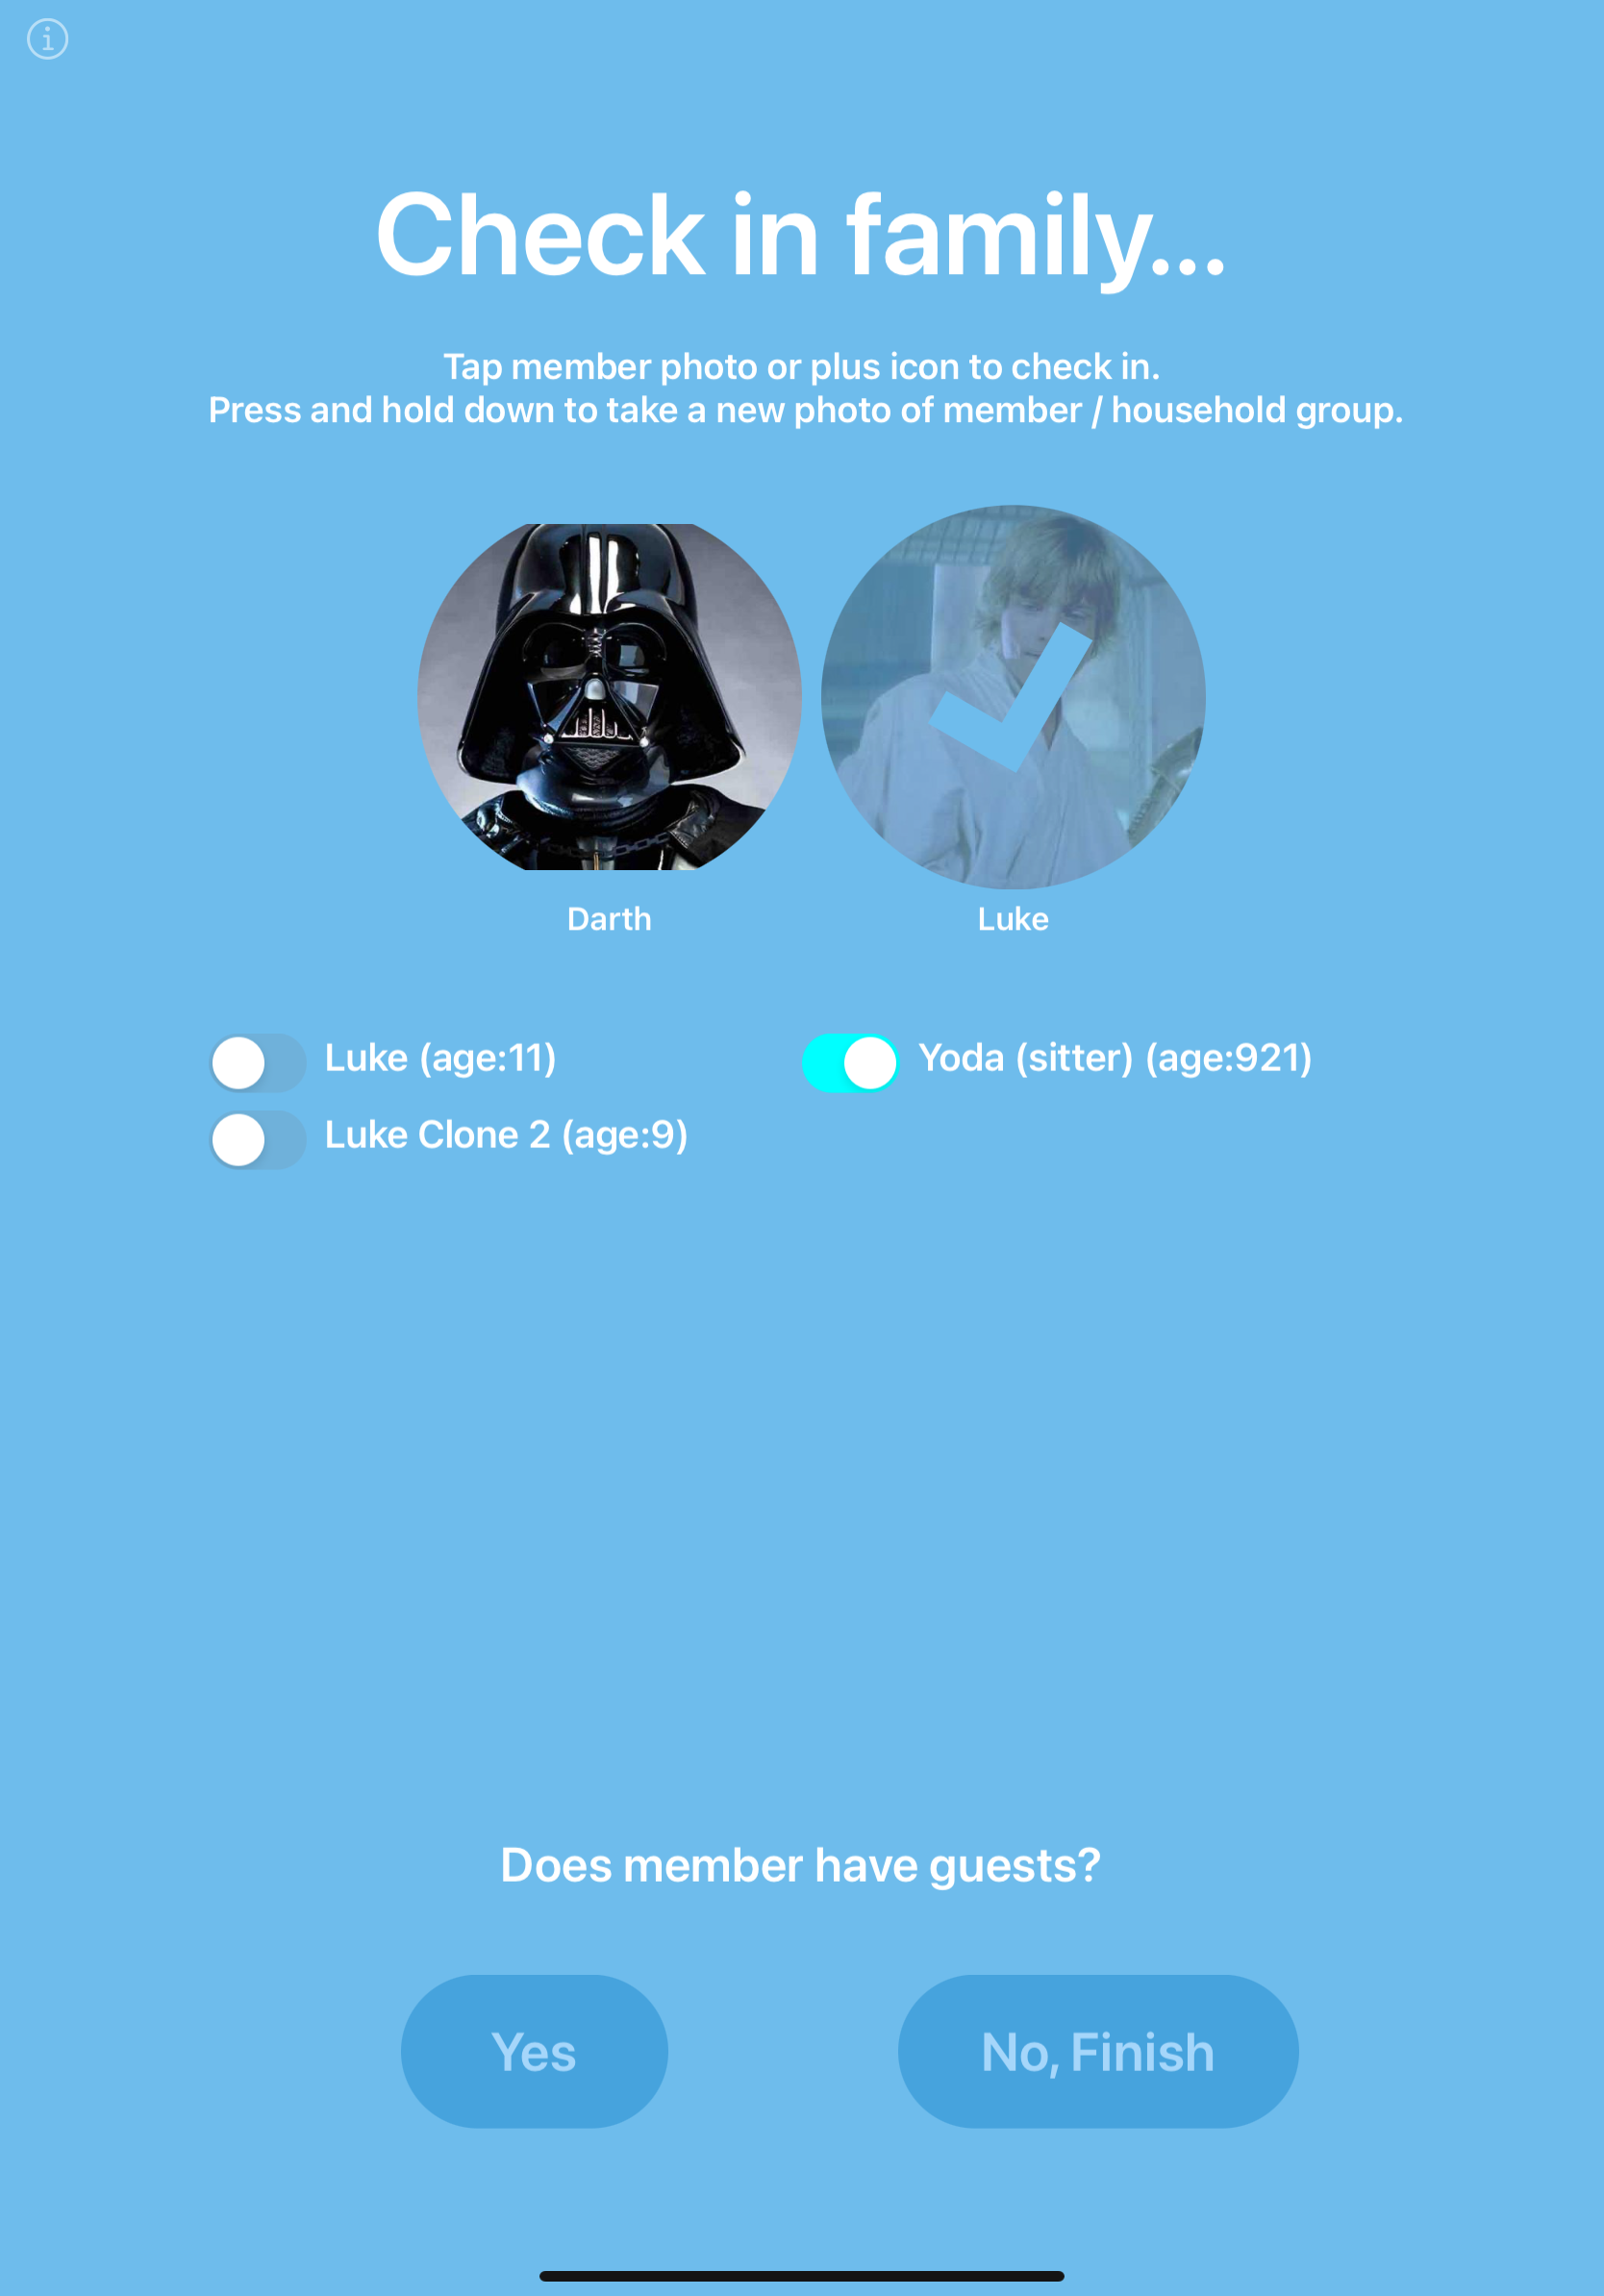
After tapping the Check In button, the attendant must select the members in the household actually coming into the pool. This is done by tapping their photo if it is an account holder, or toggling the switch next to a child or babysitter. In the screenshot below, Luke and Yoda are being checked in.
Bringing Guests
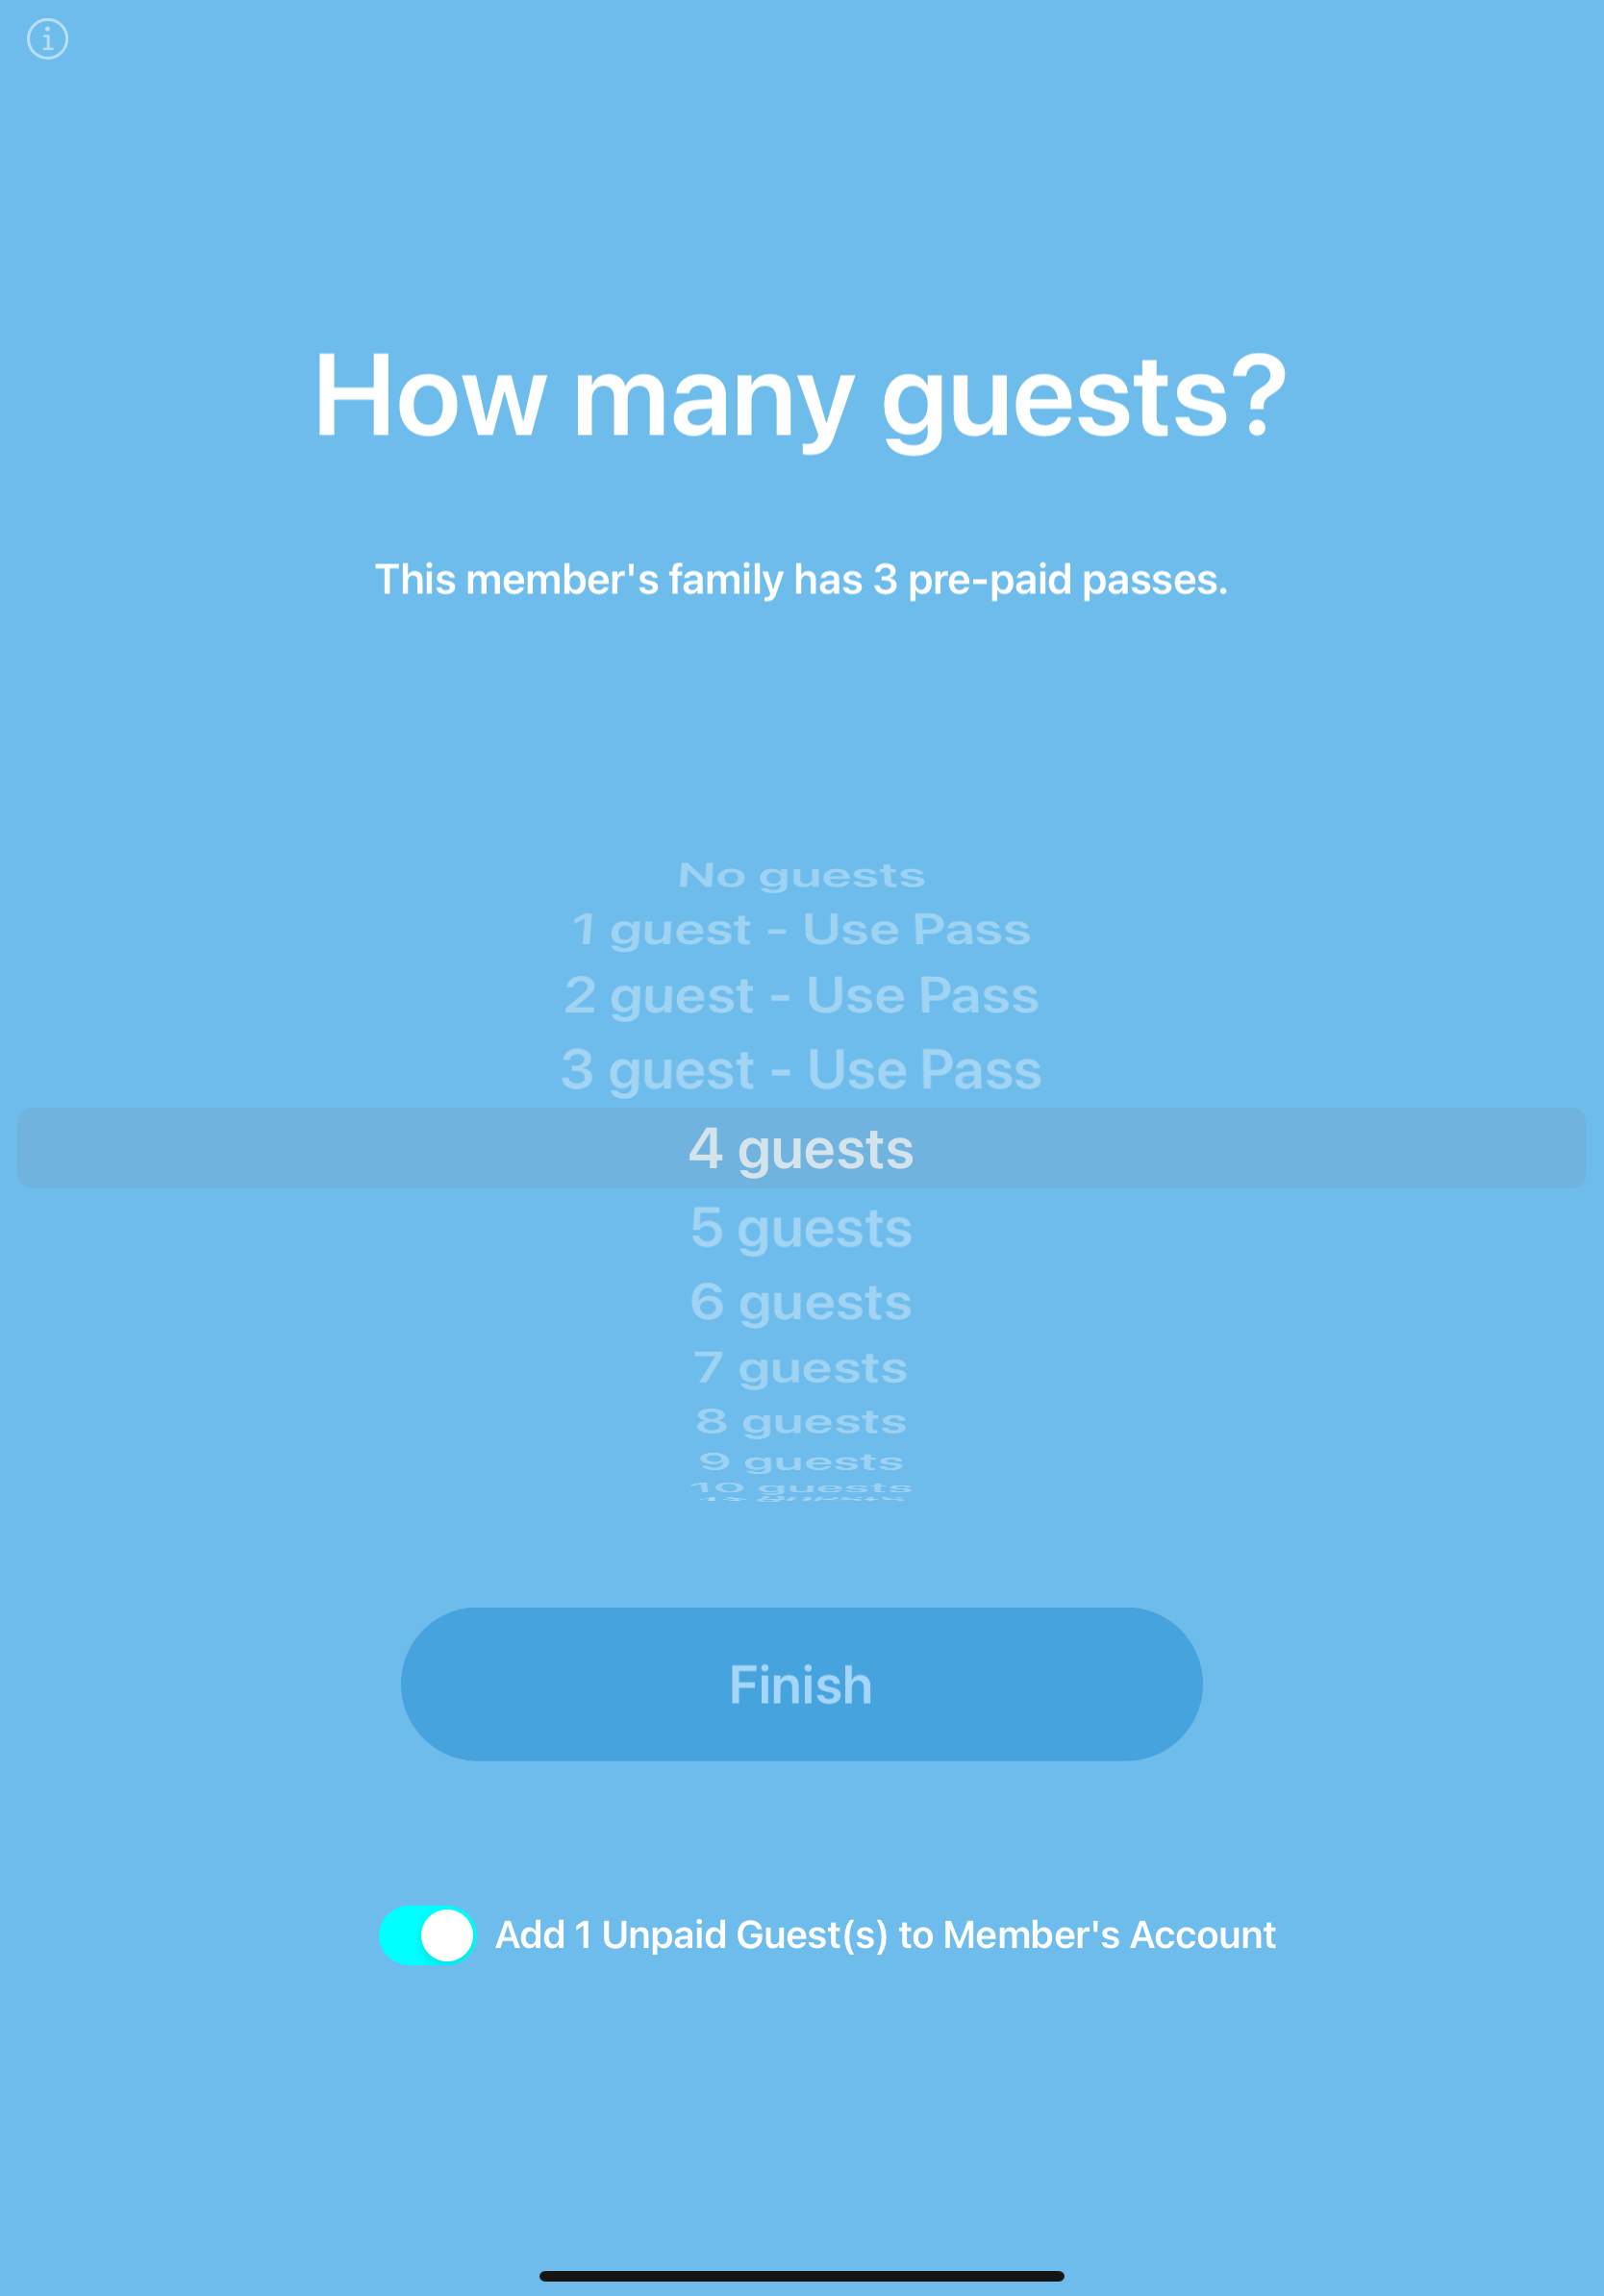
If the member is bringing guests, tap the Yes button seen in the screenshot above. On this screen the attendant will note how many guests are coming in with the member. If their account has Pre-Paid Guest passes, these will be noted in the scroll wheel (as seen below).
If the number of guests exceeds the number of Pre-Paid Guest passes, a toggle appears below the Finish button. The attendant is given two choices with this toggle.
- Note the guests were paid for at the Front Desk.
- Add unpaid guests to the Member’s account. Your Treasurer can invoice for unpaid guests later.
As of v.9 option 1 can be disabled in the Settings mode of the app.
Checking out Members
Once members are checked in at the pool, the main screen will have a list of everyone currently checked in. Attendants can quickly scroll to the member leaving, then press the Check Out button.
Alternatively, by tapping the “Total here” text in the top left of the screen, attendants can check out everyone currently at the pool, or subtract a specific number leaving. The Total Here value is updated in the app as well as the Member Dashboard of the website.
To change attendant names (who is using the app for logging purposes), tap the text in the upper right.
To learn about adding or subtracting from a member’s concession balance go here.