Updated Nov 15, 2023
Unlike our mass invoicing module for annual dues, this module is used to send an invoice for a specific set of products to an individual or small group. The invoice email could be sent to existing members, non-members, or the past buyers of a product.
- Case example 1 – Sending to an existing member: A member has just received a mass invoice for their annual dues, but asks to change their membership from a Couples Membership to a Family Membership. You can send this member a new invoice for the Family Membership. After paying, that household’s future annual dues invoices will be for the Family Membership.
- Case example 2 – Sending to non-members: The Tennis Director sends the Treasurer a list of 8 non-members that want to play on a team. The Treasurer can paste in all 8 non-member emails and send an invoice for an existing product called Tennis Team Dues.
- Case example 3 – Sending to past buyers: The club is holding their annual crab fest and space is limited. The Treasurer could give priority access to past attendees from the year before by sending an invoice for Crab Fest 2024 to buyers of the Crab Fest 2023 product.
Invoice with the right tools! Remember we have separate tools to email the entire membership that currently owe their annual dues, as well as an invoice toolset for Wait List applicants.
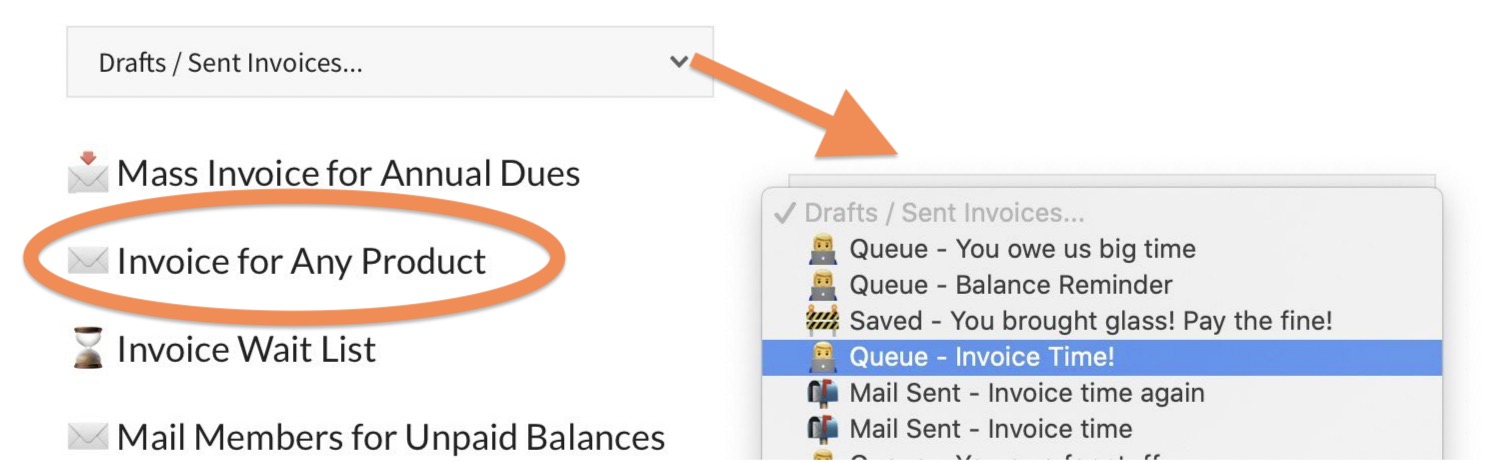
To get started go to the Board Member Dashboard > Financial module, then Invoice for any Product. While here, notice your past invoices (and their status) can be viewed from the pulldown above the invoice links. Read more on past invoices here.
Let’s create an invoice…
When entering this module, you will initially land on the Recipients options (on right in the screenshot below). The left side of the screen will always show navigation buttons to other options for this particular invoice (these are highlighted in the orange box below).
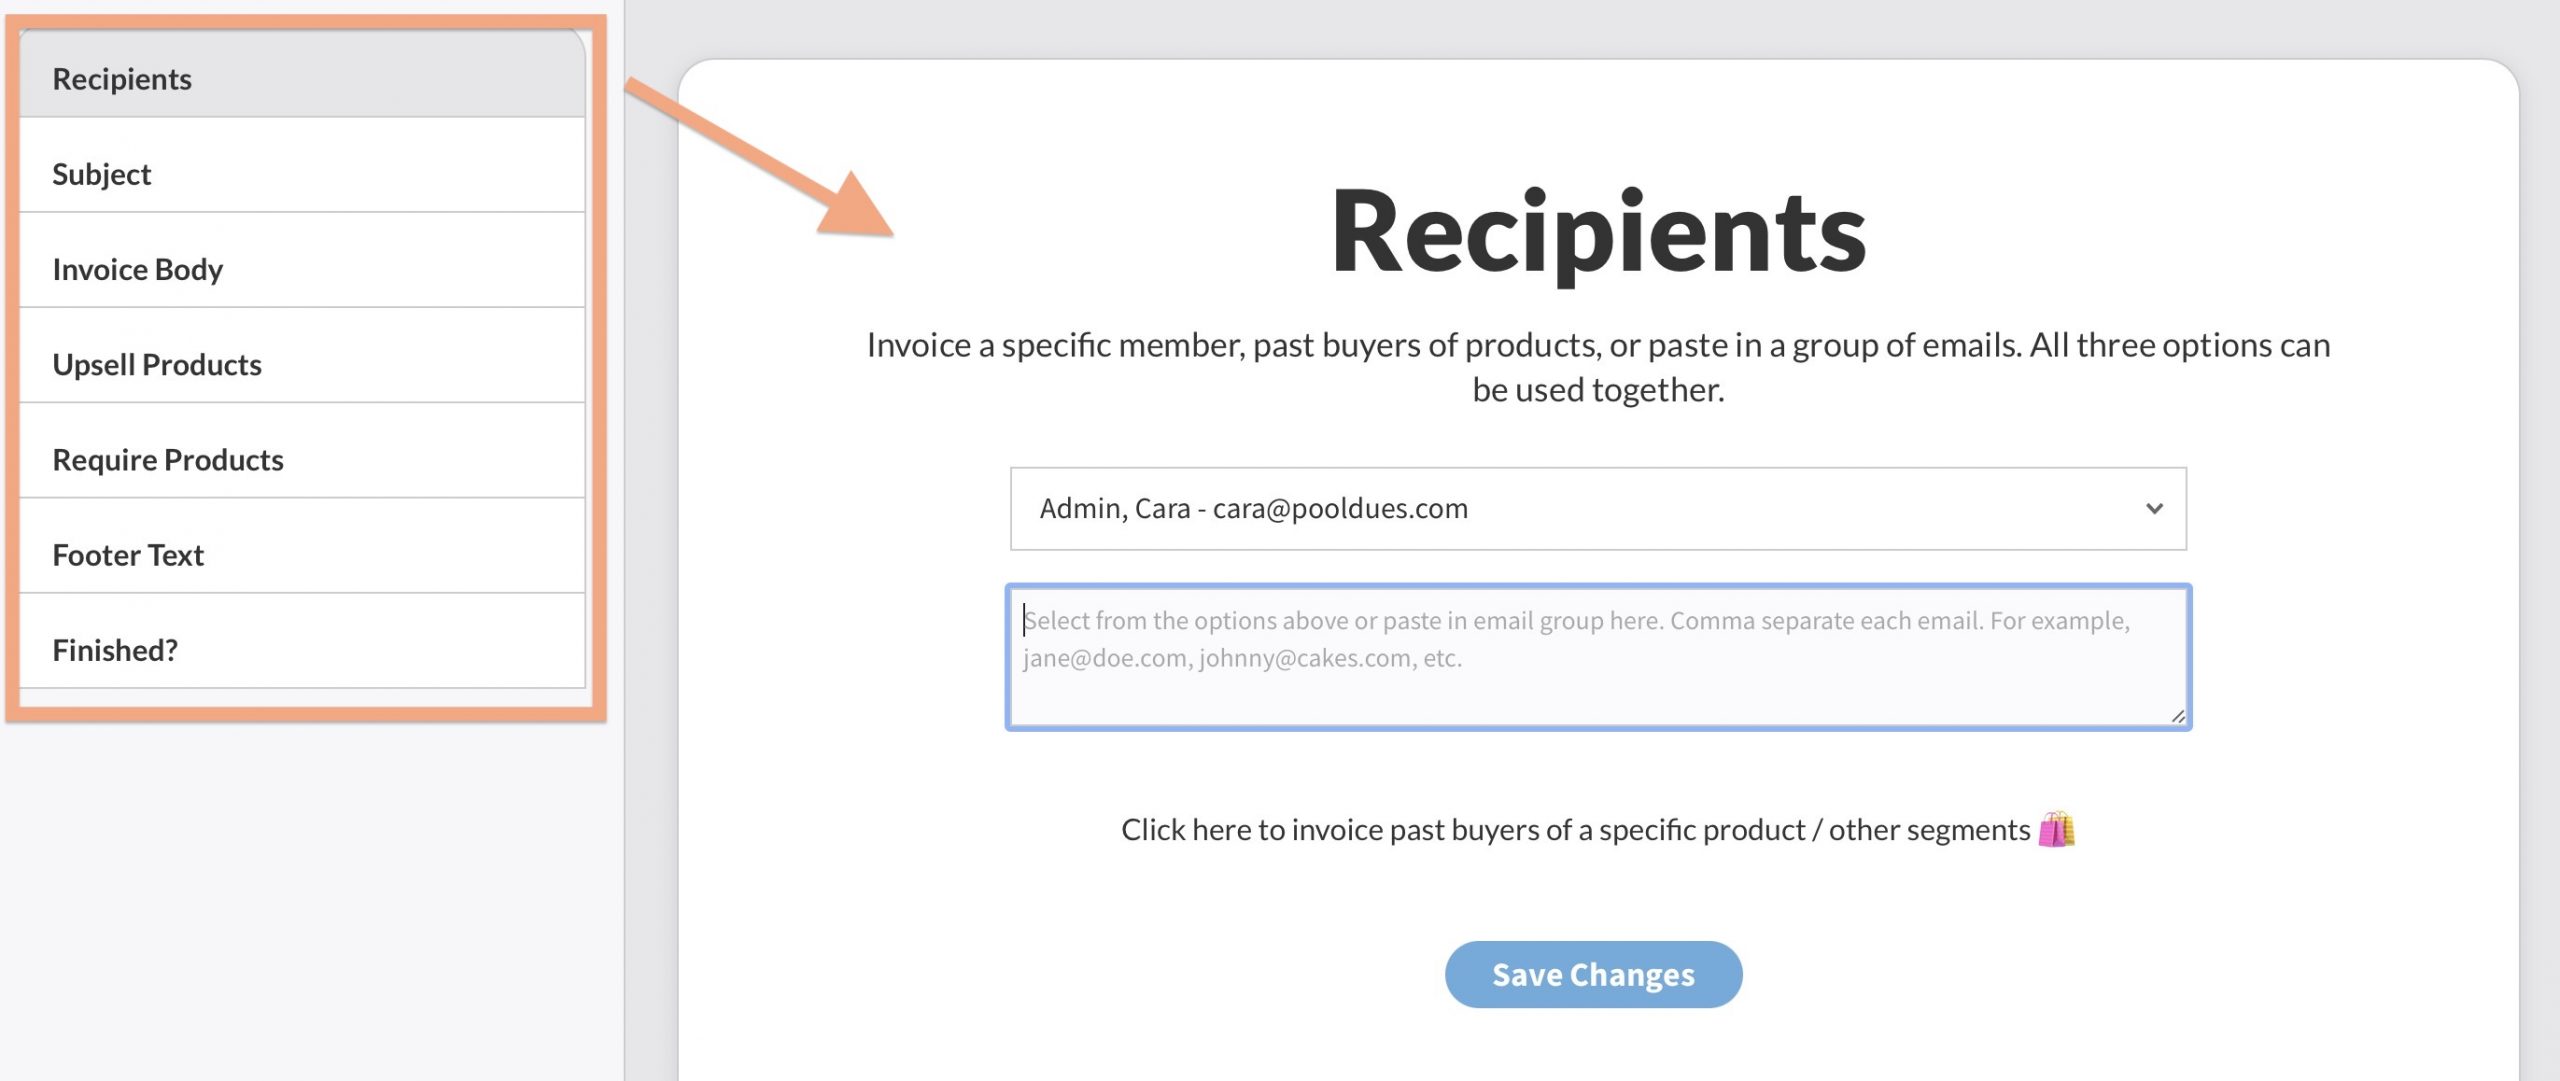
At a minimum, every invoice will require you to navigate to these 3 sections…
- Recipients – to set who is getting the invoice.
- Invoice Body – to choose the products you are invoicing for.
- Finished – to send the invoice to the Review Queue to actually deliver the invoice(s) or send a test email to yourself.
This article will discuss each section but if you don’t want to get bogged down those three main sections are self-explanatory by simply going to them on your live site.
Recipients (basic options)
In this section you will choose who you want to send invoices to. Again we should remind you that annual dues invoices should be sent from the Financial Dashboard > Mass Invoice for Annual Dues module and if you are invoicing wait list applicants that is best done by going to Financial Dashboard > Wait List Invoice.
For most other invoices you are at the right place.
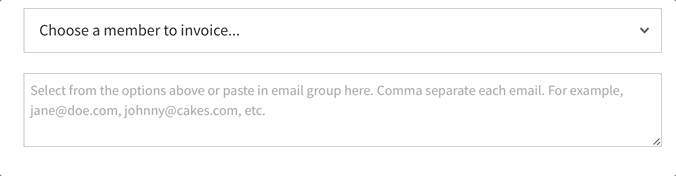
In the example image below, you can see we are sending an invoice to 3 different recipients (email addresses). The first, Cara, has been selected from the Member pulldown (pointed to in the top arrow). This pulldown will list all of your members (even expired ones). This is obviously useful because their email is already in the database, so you can just scroll to the member’s last name to find them.
The second arrow is pointing to a text field that you can paste any email addresses into (be sure to comma-separate each one). This field is where you would paste in non-member email addresses or any custom group.
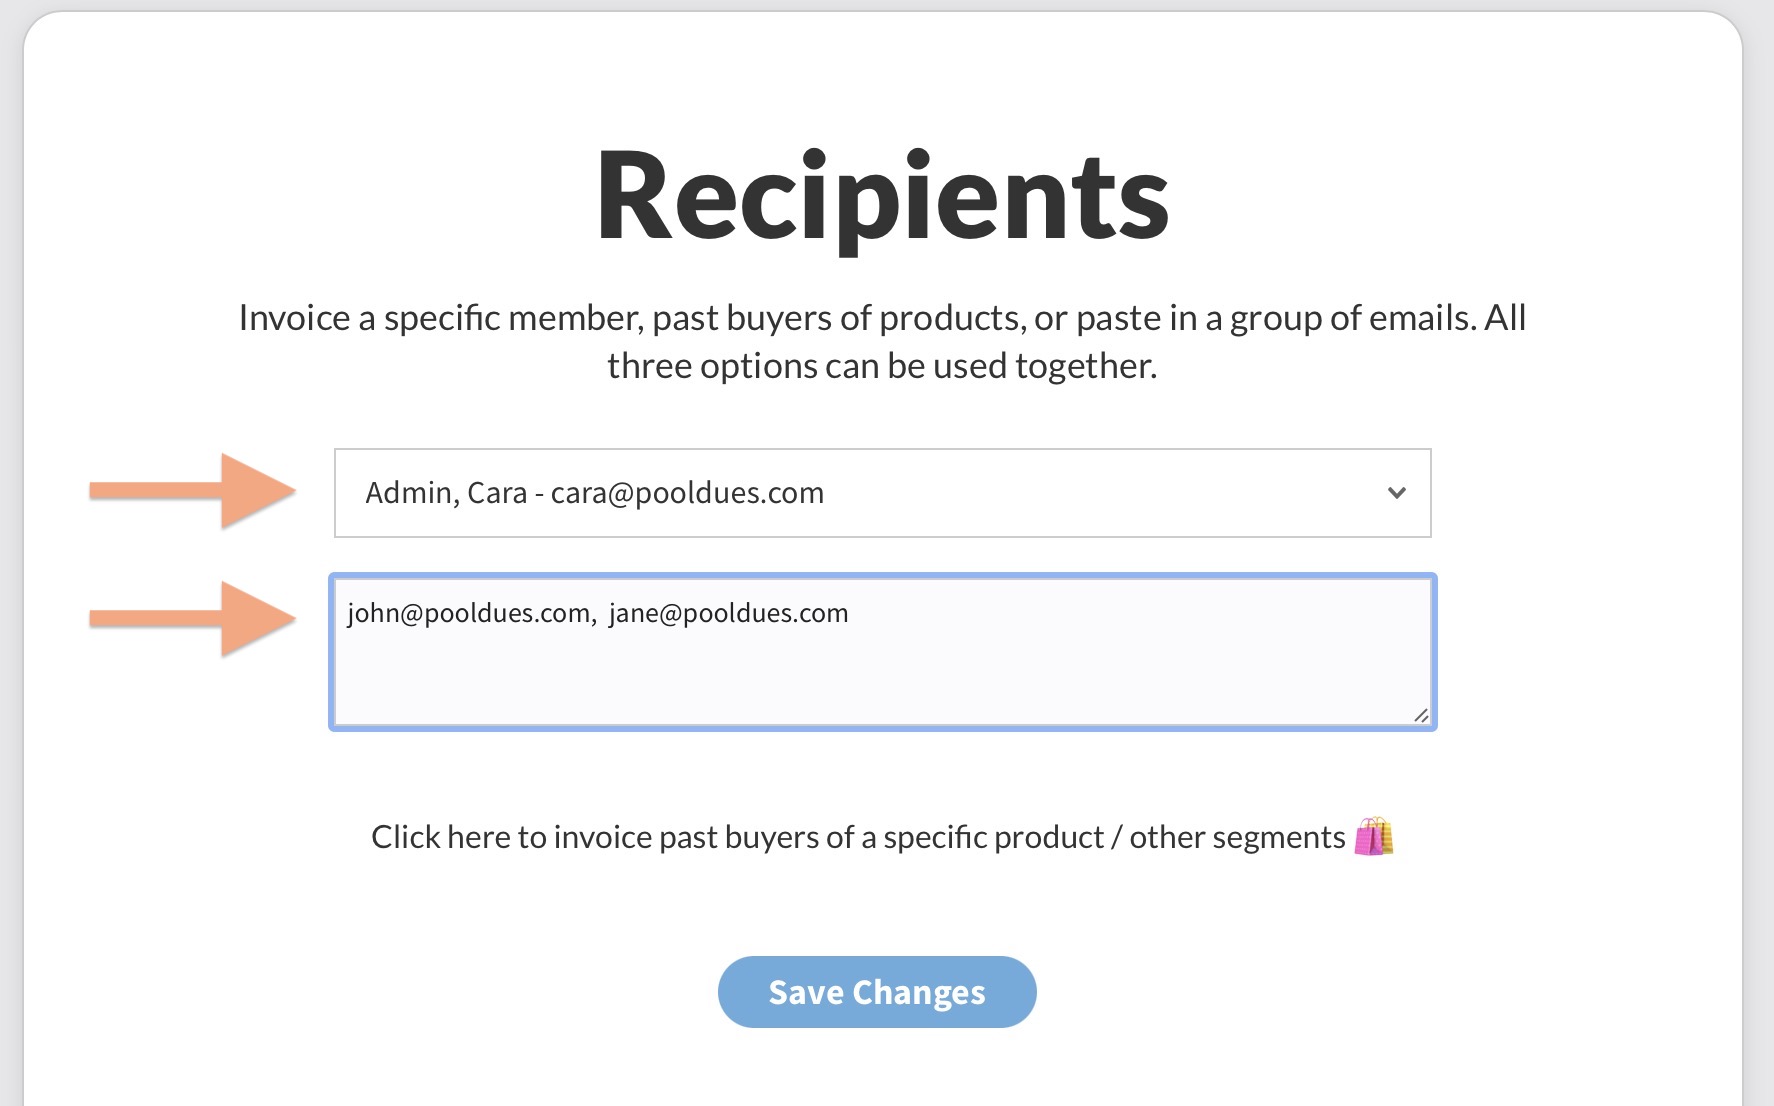
Time saver tip! You may have noticed anytime you select a member from the top pulldown, their email address will magically appear in the text field below. In this fashion, you can easily grab multiple member’s email addresses to create a custom group right here. Watch the looping gif below for reference…
Recipients (expanded options)
There is a third option, tucked under the label “Click here to invoice past buyers of a specific product / segments”. Doing so will expand to show more options, primarily a list of products to target past customers…
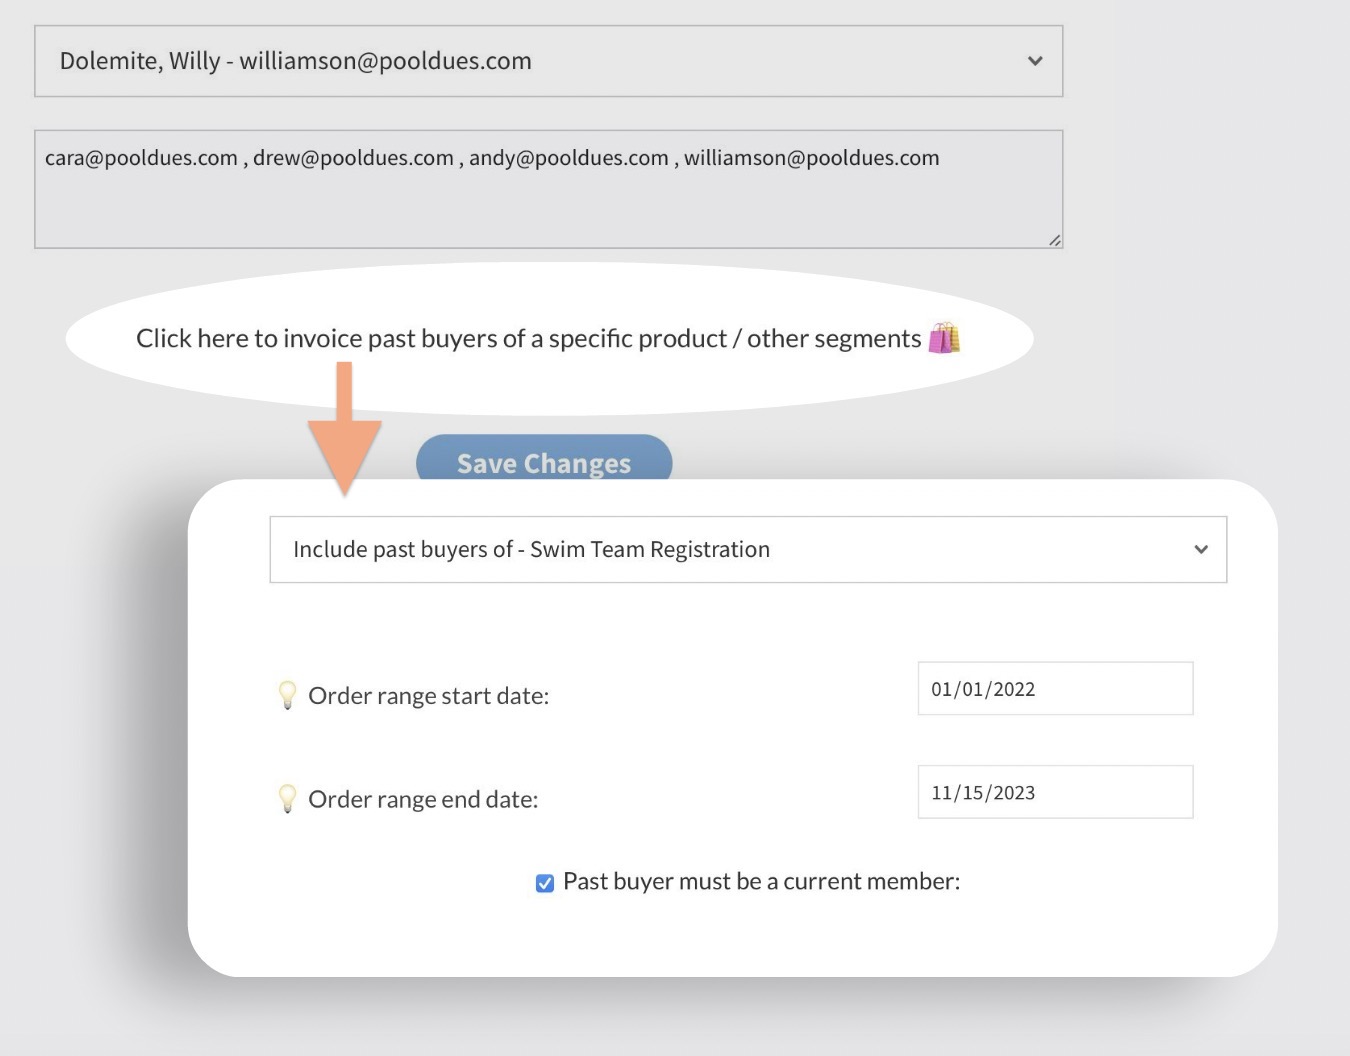
In the example above, the list of recipients will be generated based on past buyers of the product titled “Swim Team Registration”. The Order date range is from Jan 1, 2022 to November 15, 2023 so buyers that bought outside of that range will be excluded. And finally there is a checkbox option to exclude buyers that are not currently members.
You can also choose from other segments, for example, you may want to invoice only members marked as Bond Holders…
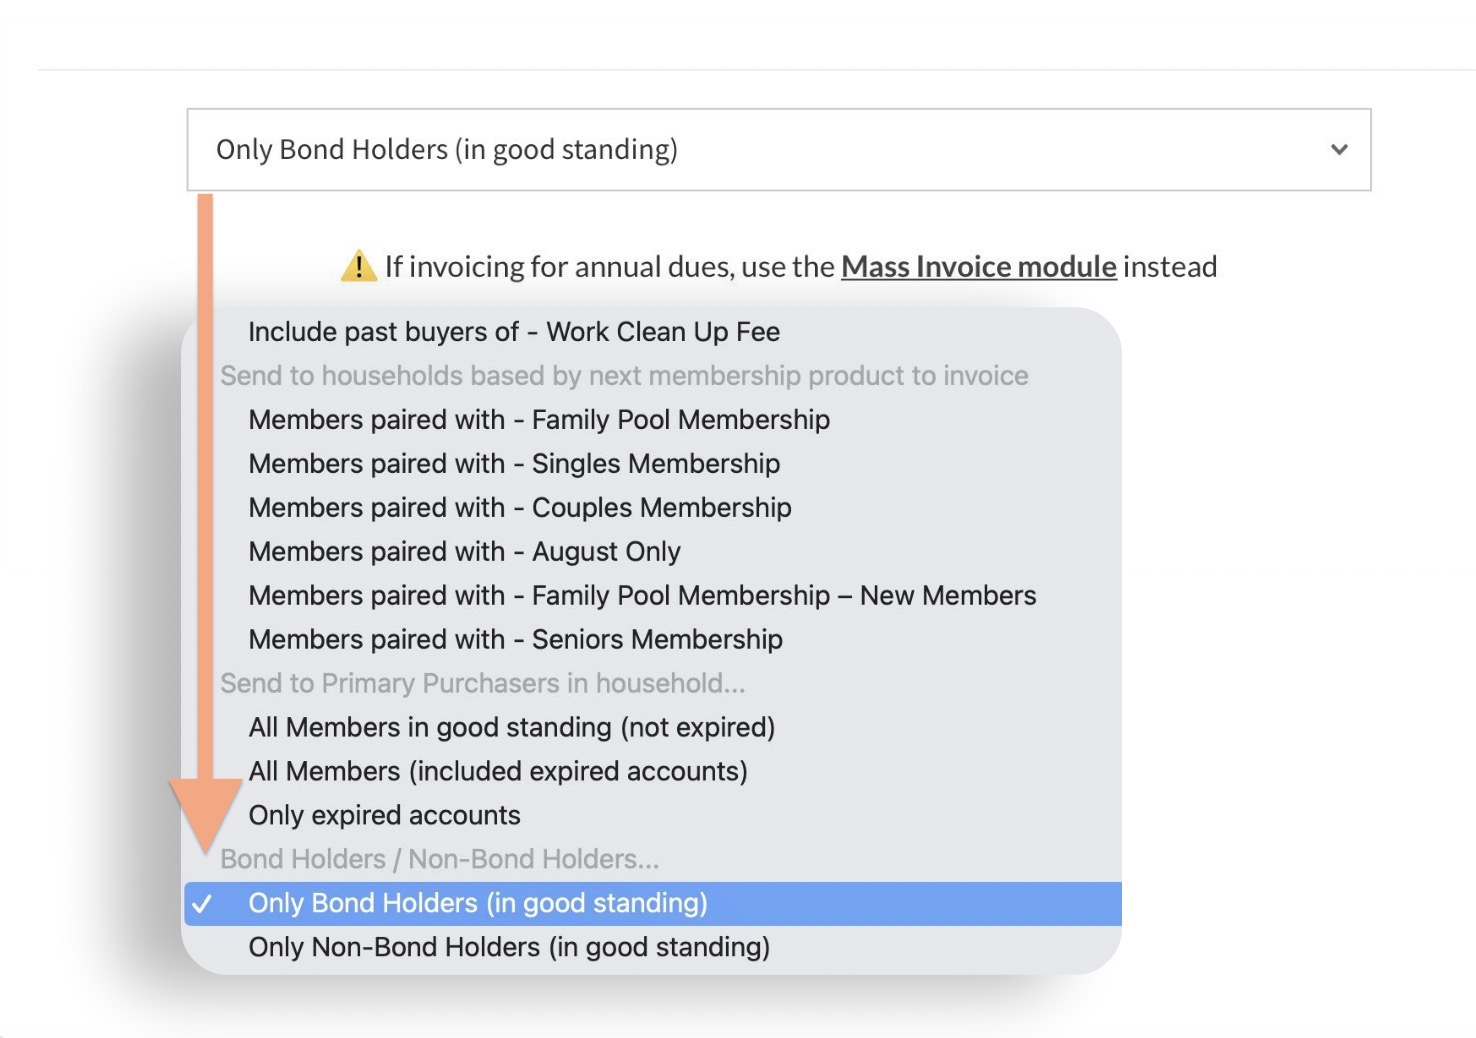
As you can see from the ⚠️ emoji in the screenshot, the system will remind you that if you are invoicing for Annual Dues this is NOT the best way to do it.
All three options in the Recipients section. can be used together. So you could select a group of past buyers and use a custom group of emails in the text field.
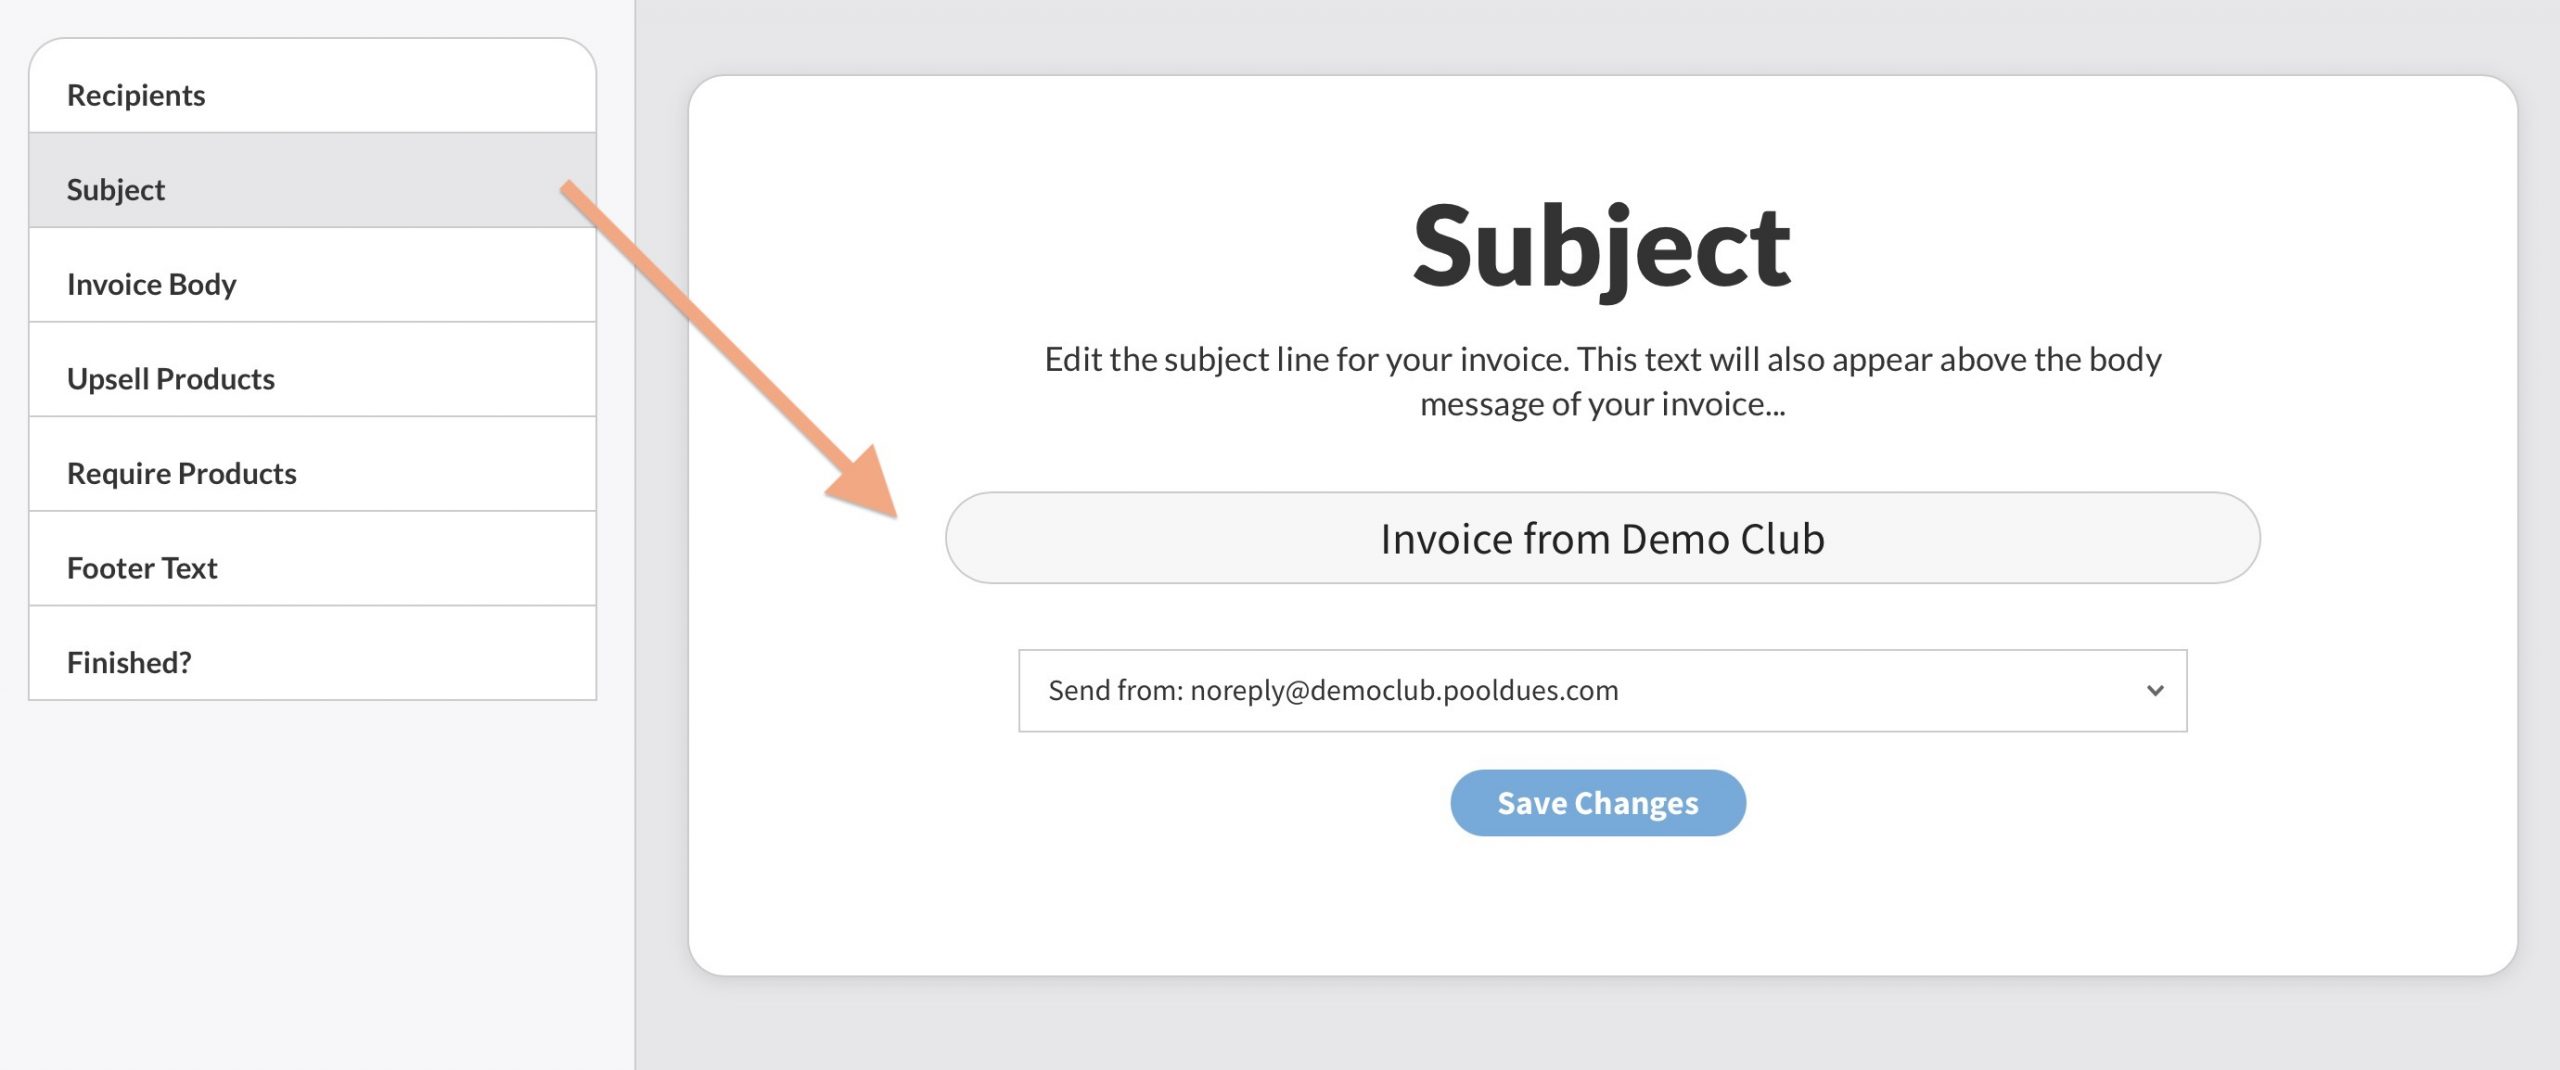
Subject and From Options
This optional section allows you to give your invoice a custom Subject line. By default it will be “Invoice from [your club name]” so if you forget to customize it, thats okay. You can also change the “Send from” email address as well. So for example, instead of the invoice coming from “noreply@yourclub.com” it can come from “treasurer@yourclub.com”.
Invoice Body
Next let’s move onto the required Invoice Body section where you will do the most important part of invoicing – pick the products you want recipients to purchases. This section will also give you an idea of what the actual body of the email will look like as you customize it.
The arrow in the screenshot below points out where you can enter optional text that will appear above the products you are invoicing for. For example, you might write “Thank you paying this invoice in a timely fashion”.
Below that field, you will select from existing products in your store to invoice.
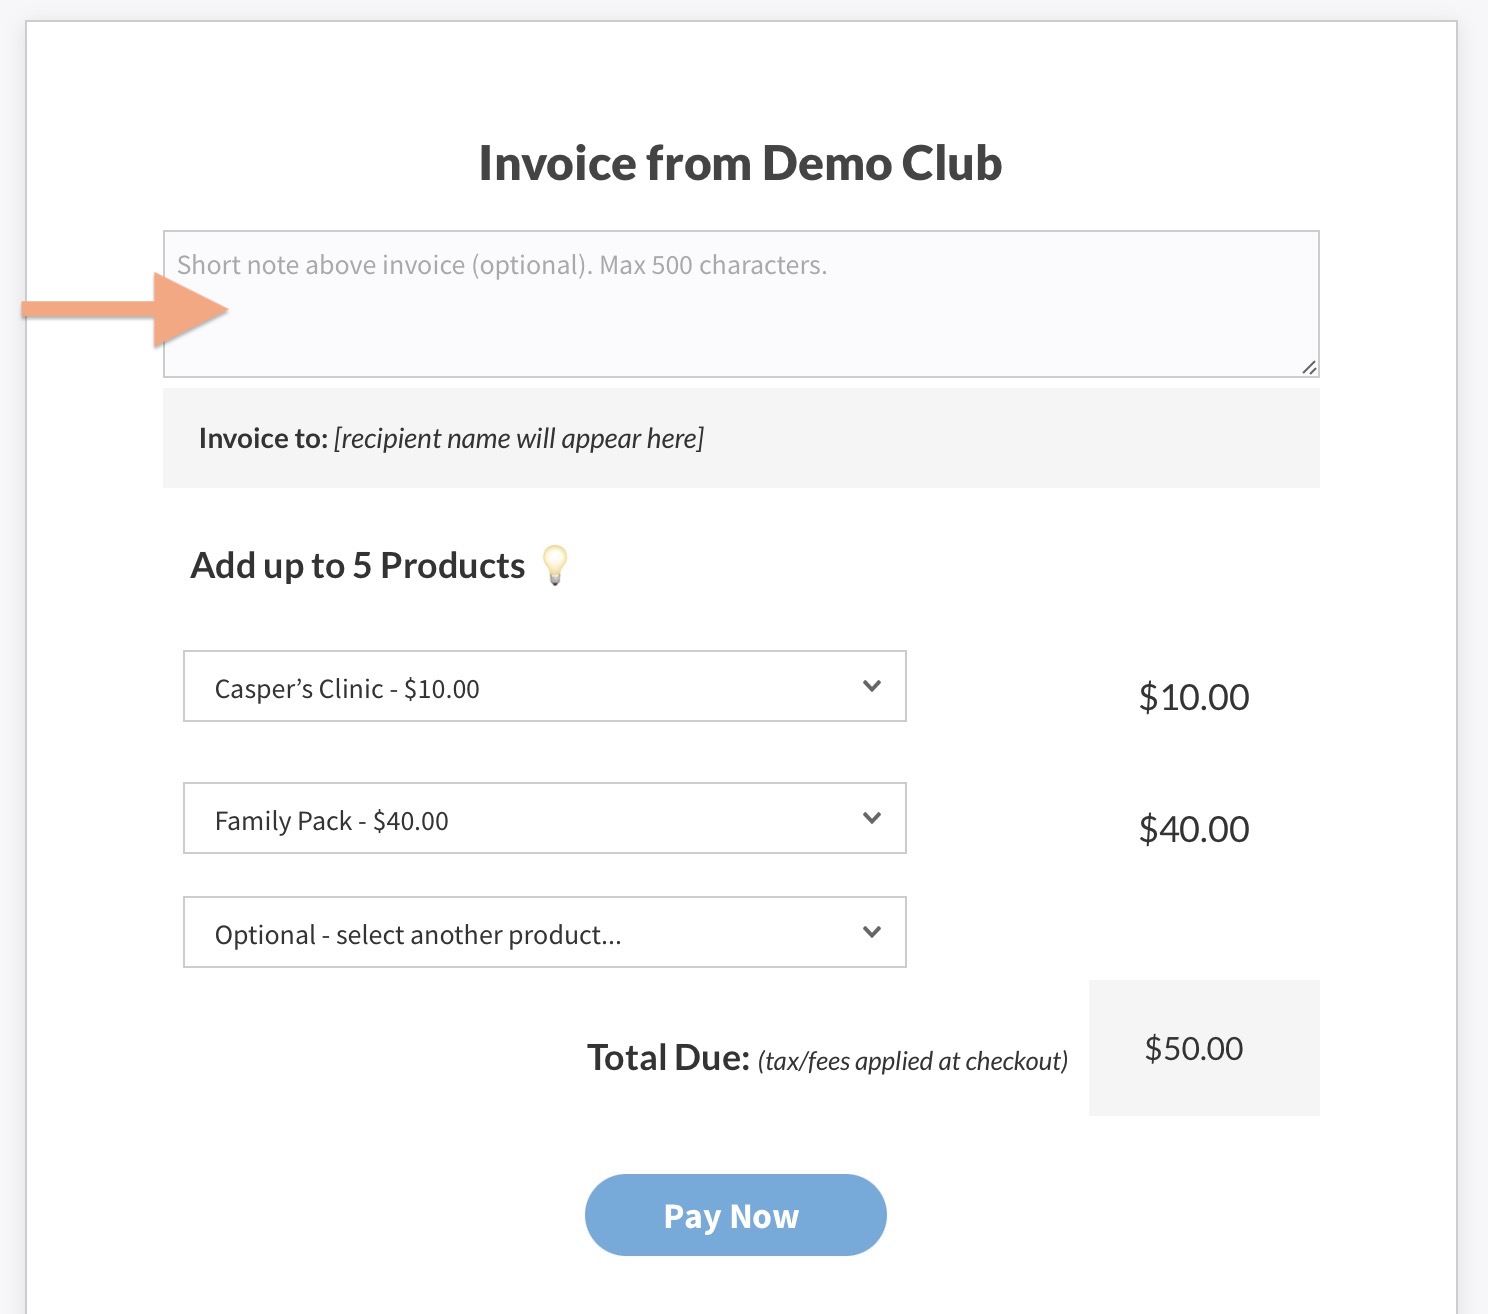
As you can see above, we are adding existing products to the invoice (not an arbitrary amount). When the person invoiced chooses to pay, they will click the “Pay Now” button link in their email, which will then add up to 5 products into their shopping cart on the website. At this point they will checkout the same as they would if they had purchased anything through your website.
💡Big concept time! Do not think of the buyer as paying for an invoice (because they aren’t). They are paying for the products they were invoiced for. To see if a buyer paid for something you would never search invoices, you would look at their payment history or for a broader search, the Product Order History.
This concept may need to sink in with Quickbooks users that send invoices for specific amounts, and not familiar with managing an e-commerce based store. It’s all about product sales here!
Upsell Products
In this section you can select up to two products you think recipients might also like or want to choose instead. So for example, maybe you want to upsell members on pre-loading their accounts with Guest Passes. The recipient does not have to click the links to add these products to their cart, but they could.
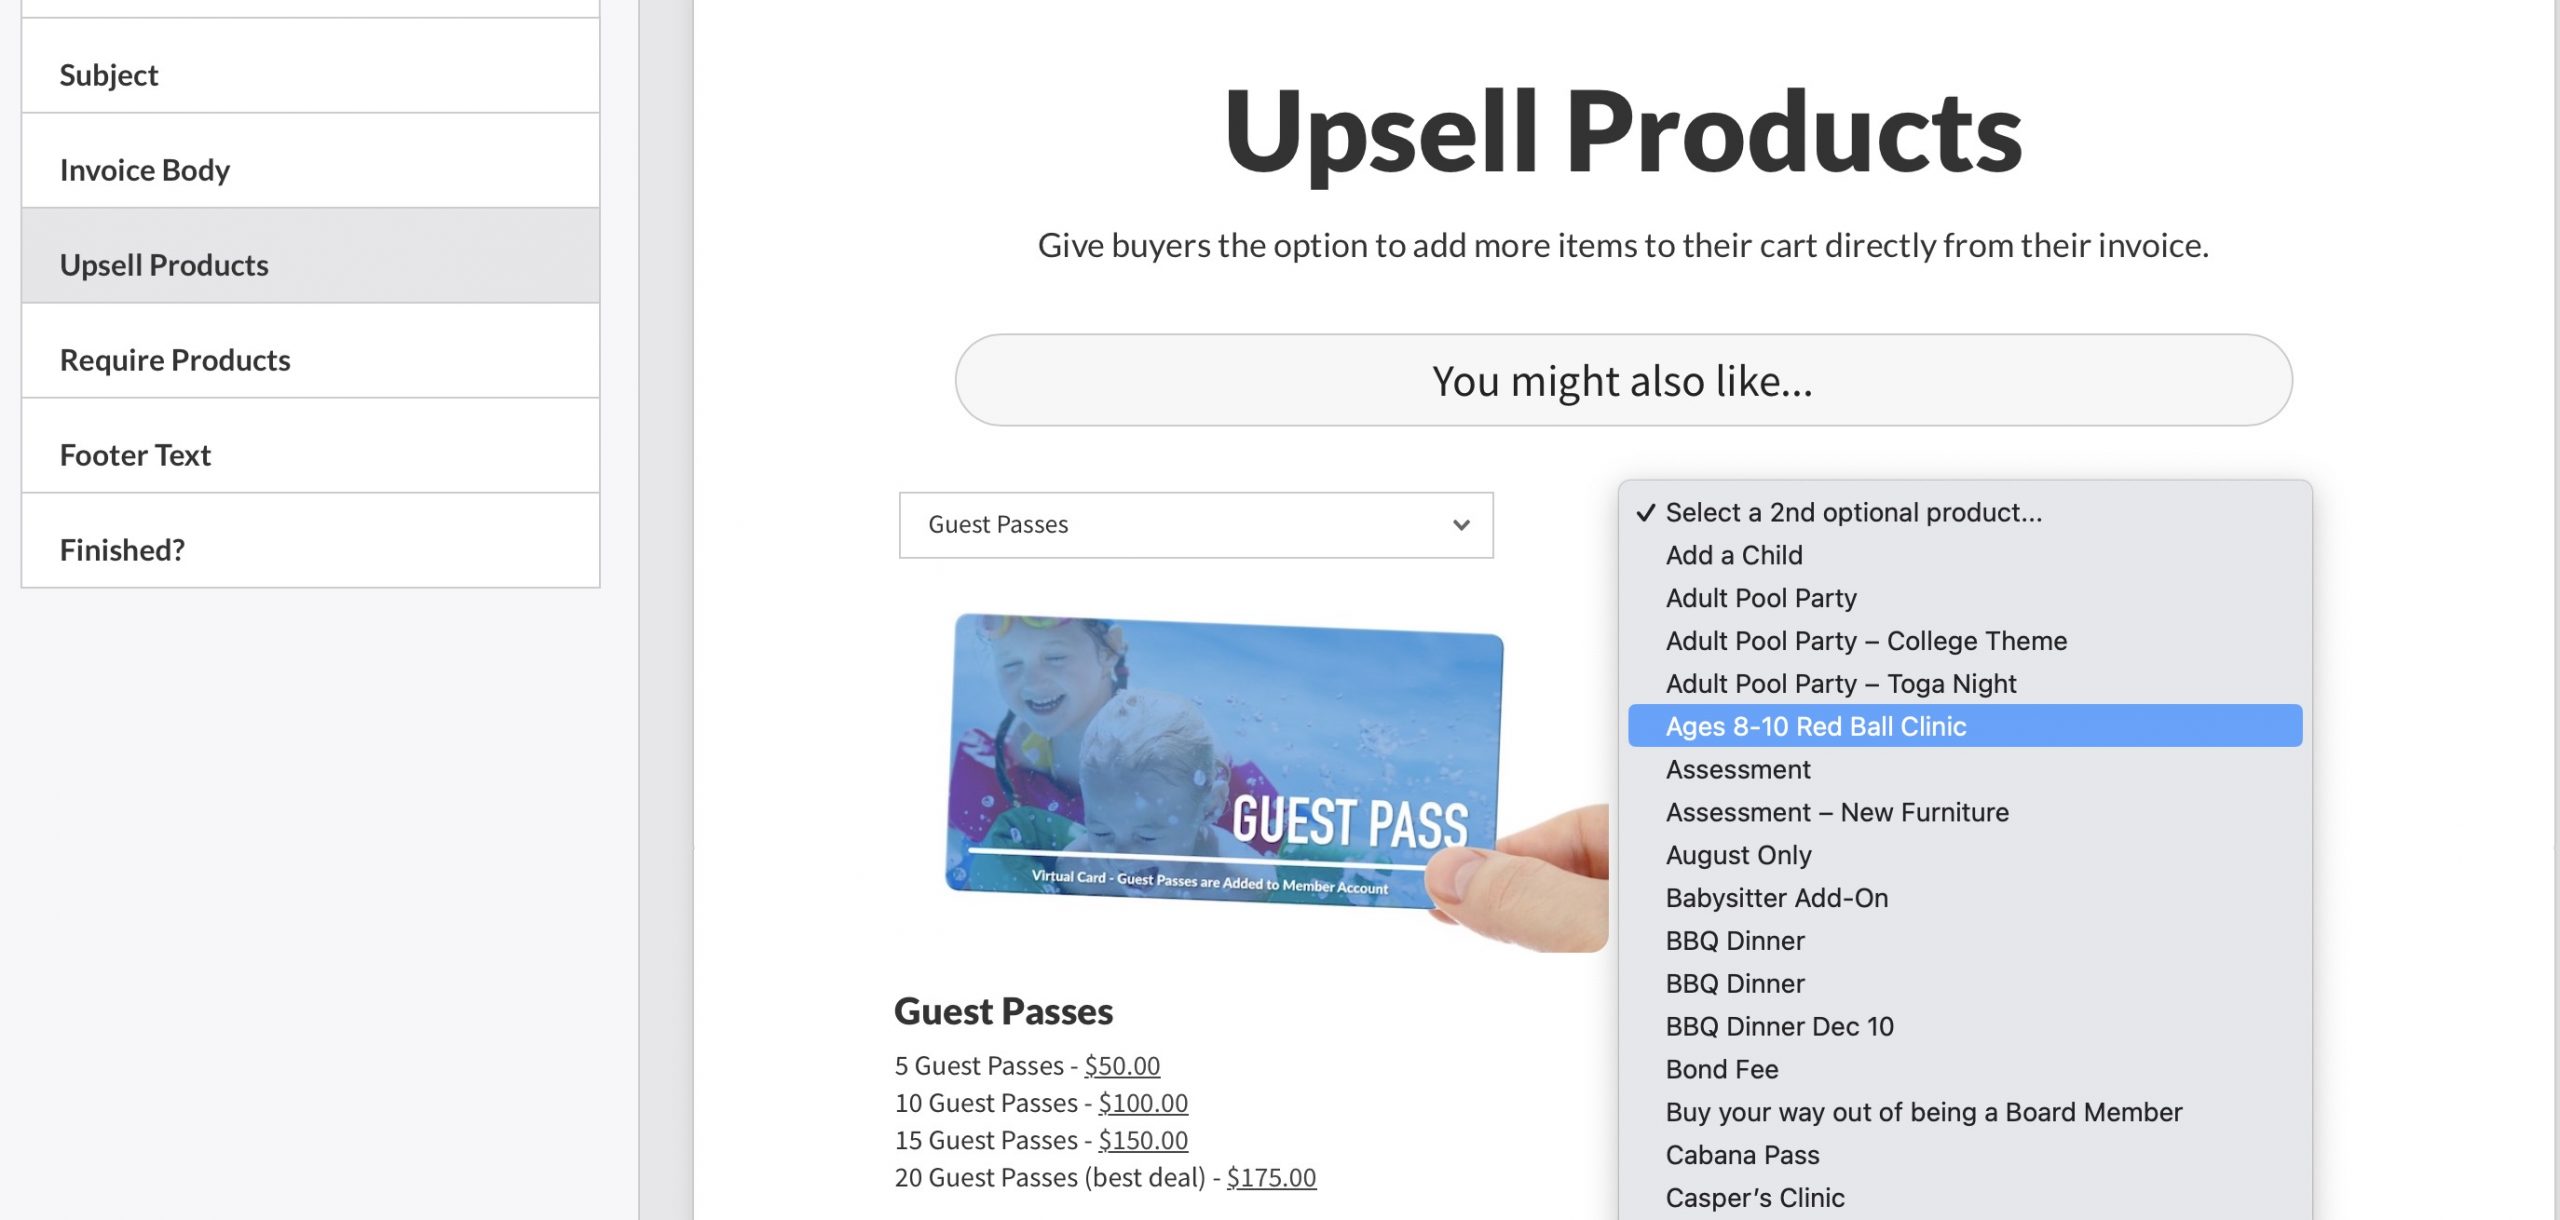
Please keep in mind, some products like Guest Passes and Concession Credit are intended for members only as they credit amounts in their accounts (a non-member does not have an account to credit).
Footer Text
Finally at the bottom of your invoice email you can add some optional footer text.

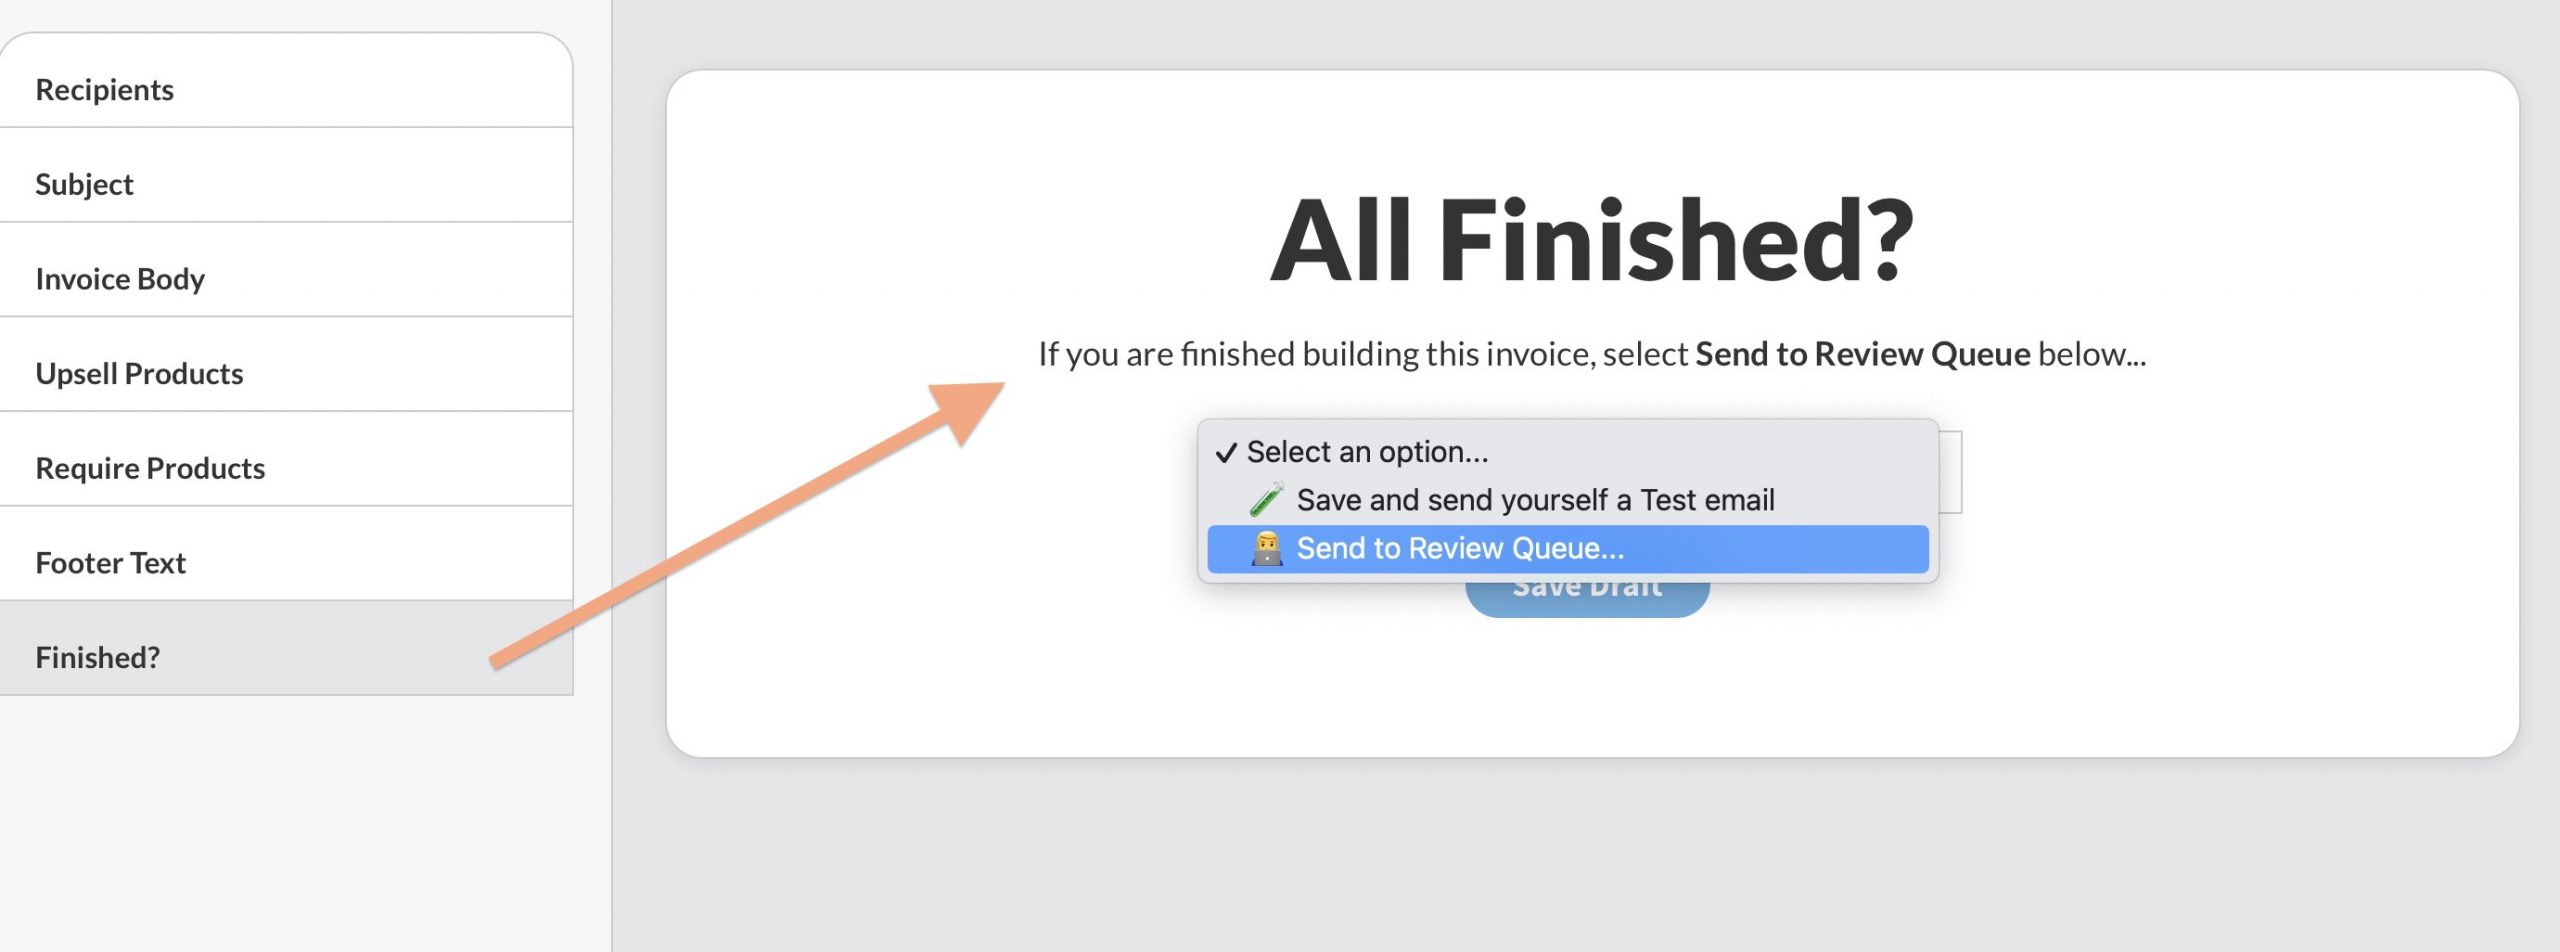
Finished?
If so, navigate to the “Finished?” section, and select Send to Review Queue. Once in the Review Queue you will see the exact list of everyone that will get an email.
You can also choose the “Save and send yourself a test email” if you want to see what the finished invoice looks like. Just don’t forget to actually send it to the recipient!
Don’t forget to hit Send in the Review Queue! The Review Queue has a batch of email ready to be sent, but will not automatically send it. If something does not look right (perhaps you spot a typo, or selected the wrong buyer list), the entire queue can be deleted, and you can go right back to editing again.