First Set your Hours
Hourly Sets can be used for reservation grids to have specific opening and closing times on an “exact-date” basis. This is useful if your opening and closing times don’t conform to a consistent daily time (such as Monday thru Friday 10am-8pm, Weekends 9am-10pm).
💡 Setting the allowed times for pool parties is a good example of when to create a unique Hourly Set as these times are not necessarily the same as the Pool Open hours. Clubs rarely allow pool parties on busy days like Saturdays or holidays. So it makes sense to create a separate hourly set for the facility reservation grid to adhere to.
Conversely, your tennis reservation grid probably will not need to sync to an Hourly Set, as courts are typically open year round and have the same opening / closing times every day of the week.
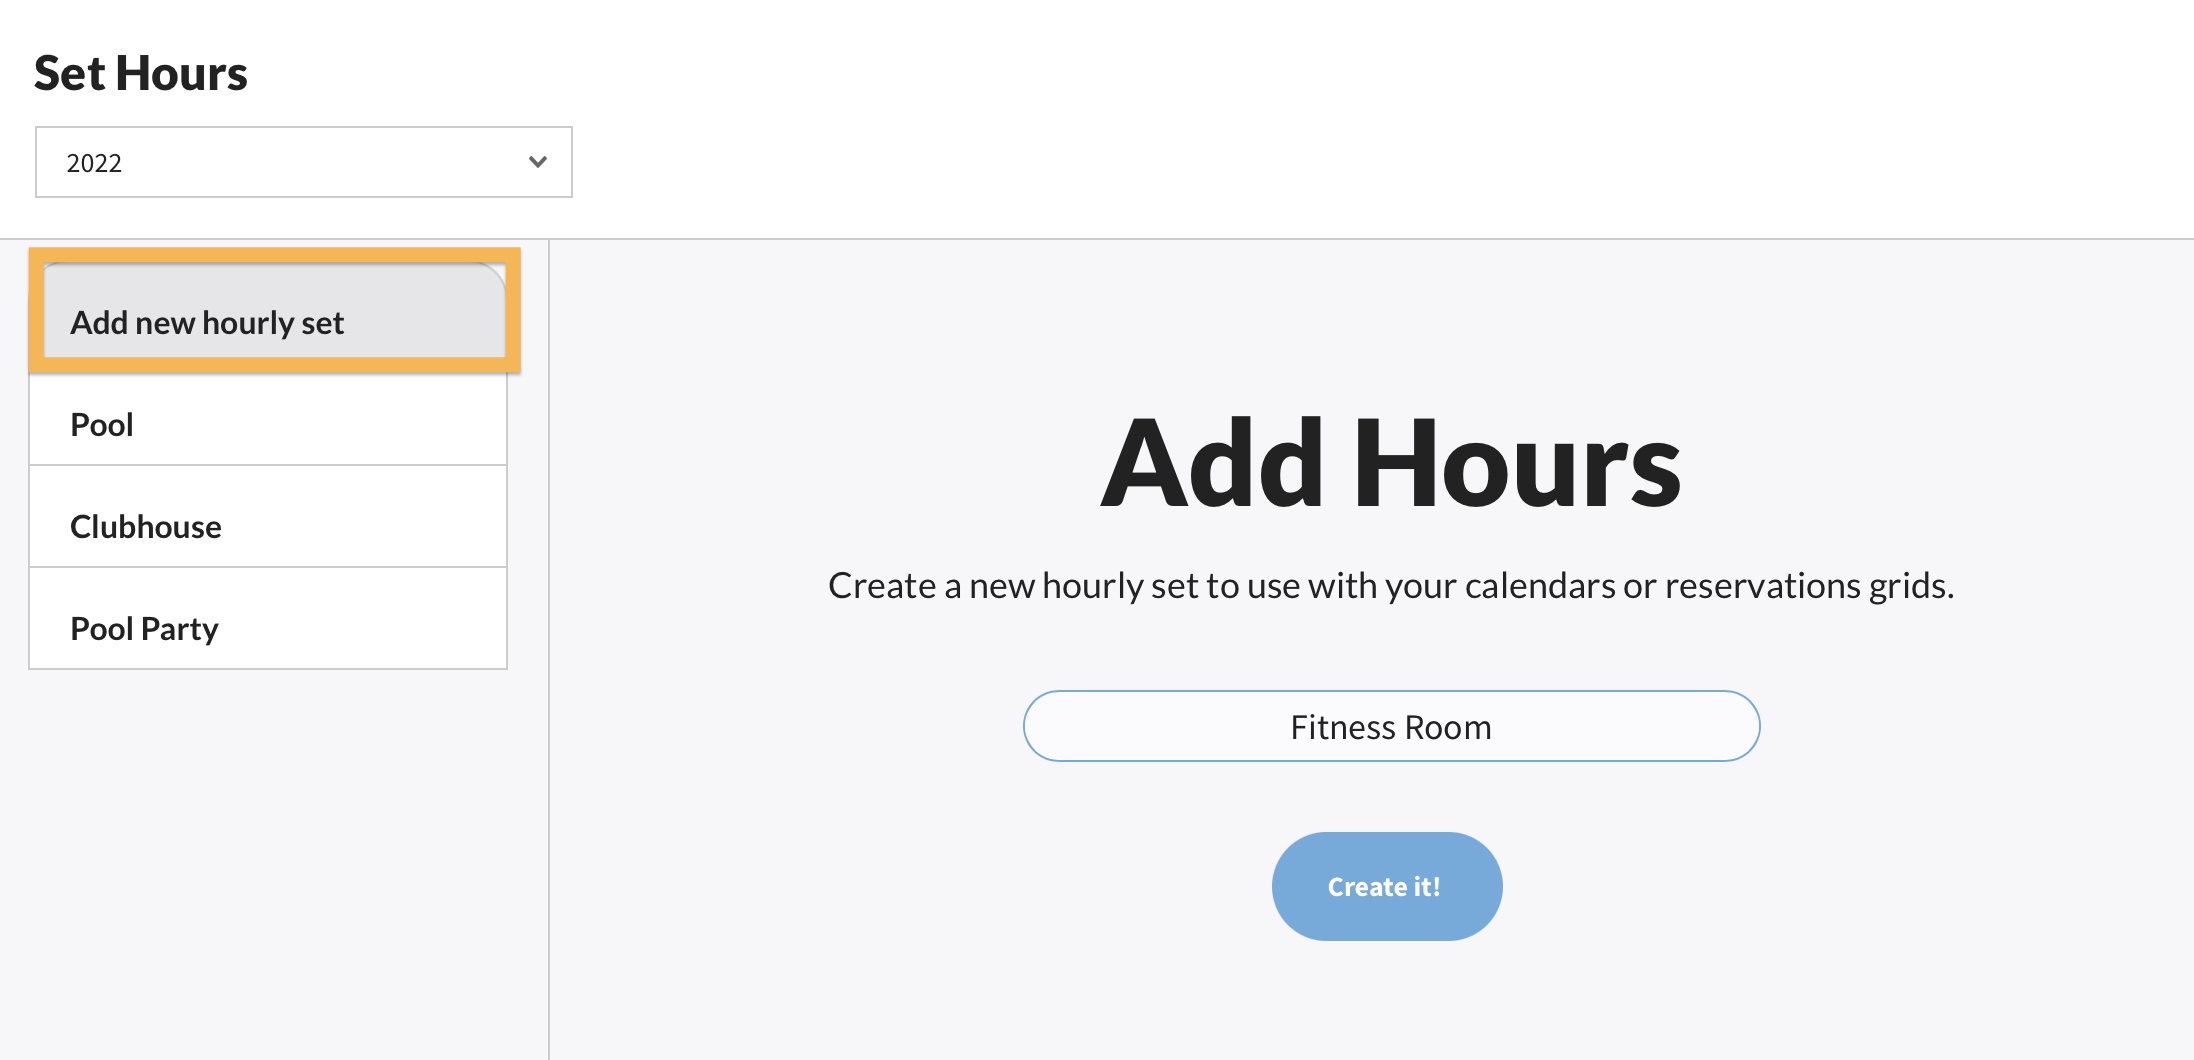
From the Board Member Dashboard go to Facility > Set Hours. By default, your club will only have an Hourly Set for the Pool. In the example screenshot below, you can see we’ve added Hourly Sets for the Clubhouse and one called Pool Party…
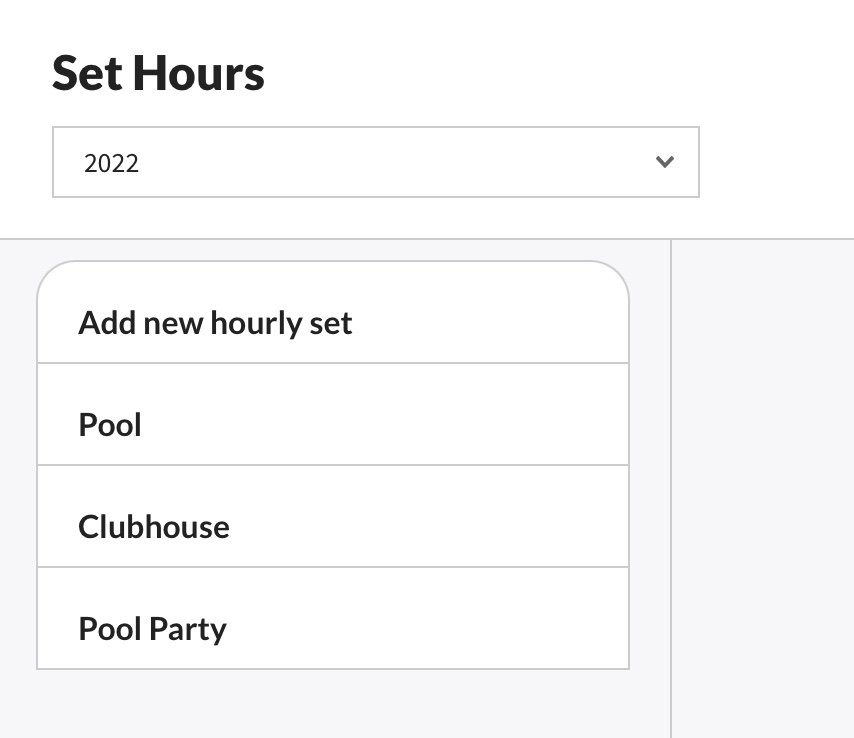
Tip: When naming your hourly sets keep in mind the calendar will append “Hours” at the end of the title.
User Interface Notes
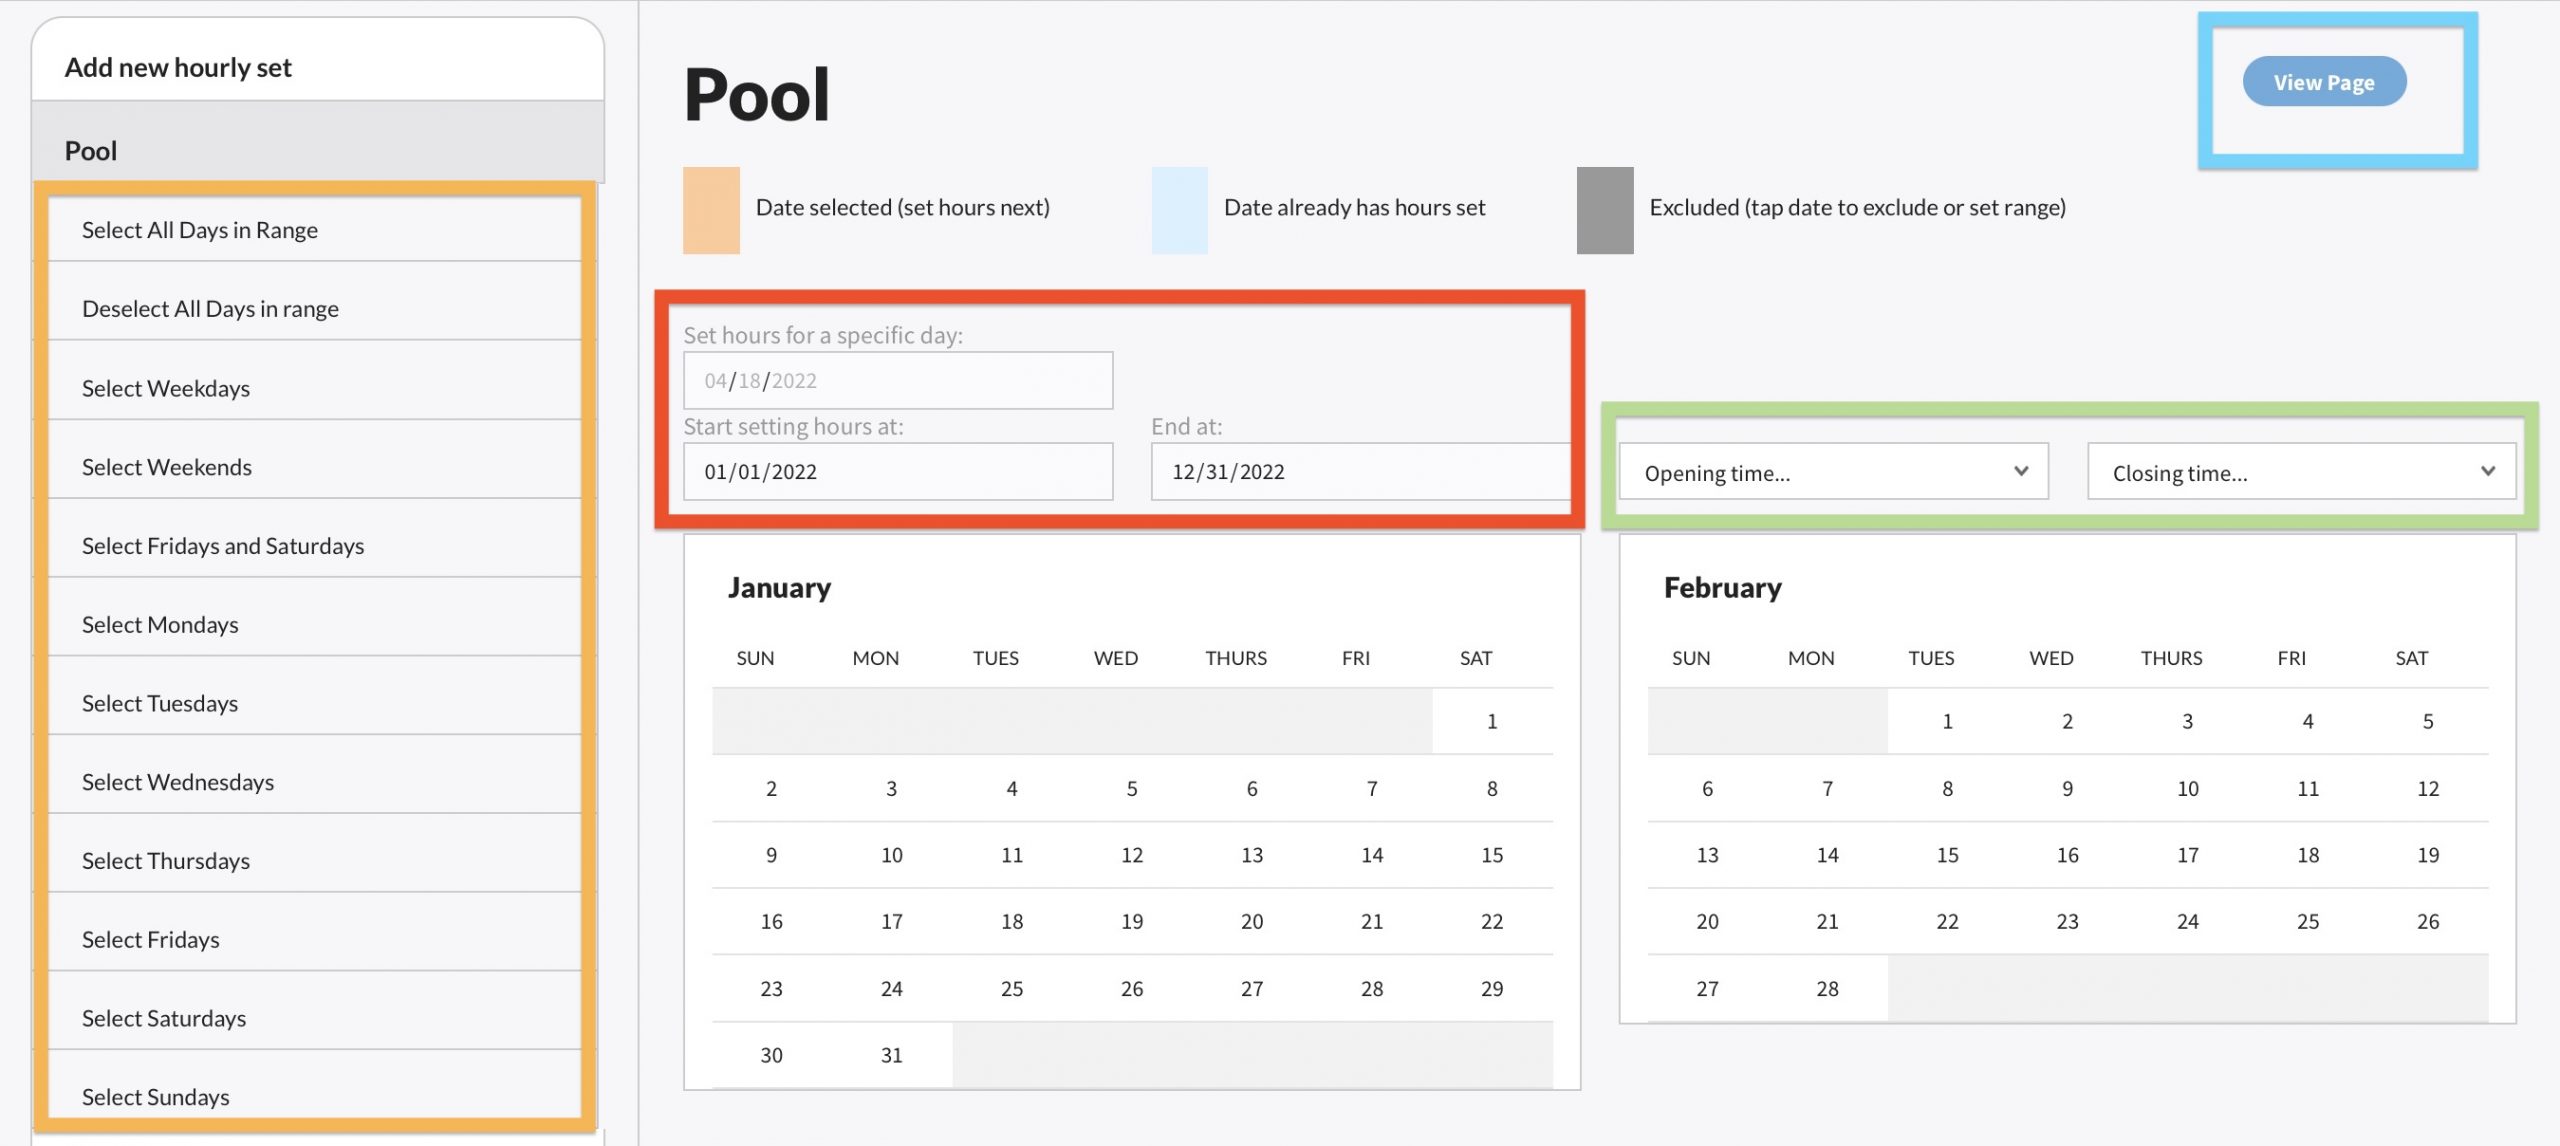
Before go into our step by step guide to adding hours, let’s look at the user interface. Select an Hourly Set, such as Pool, and you will see a screen similar to the example image below.
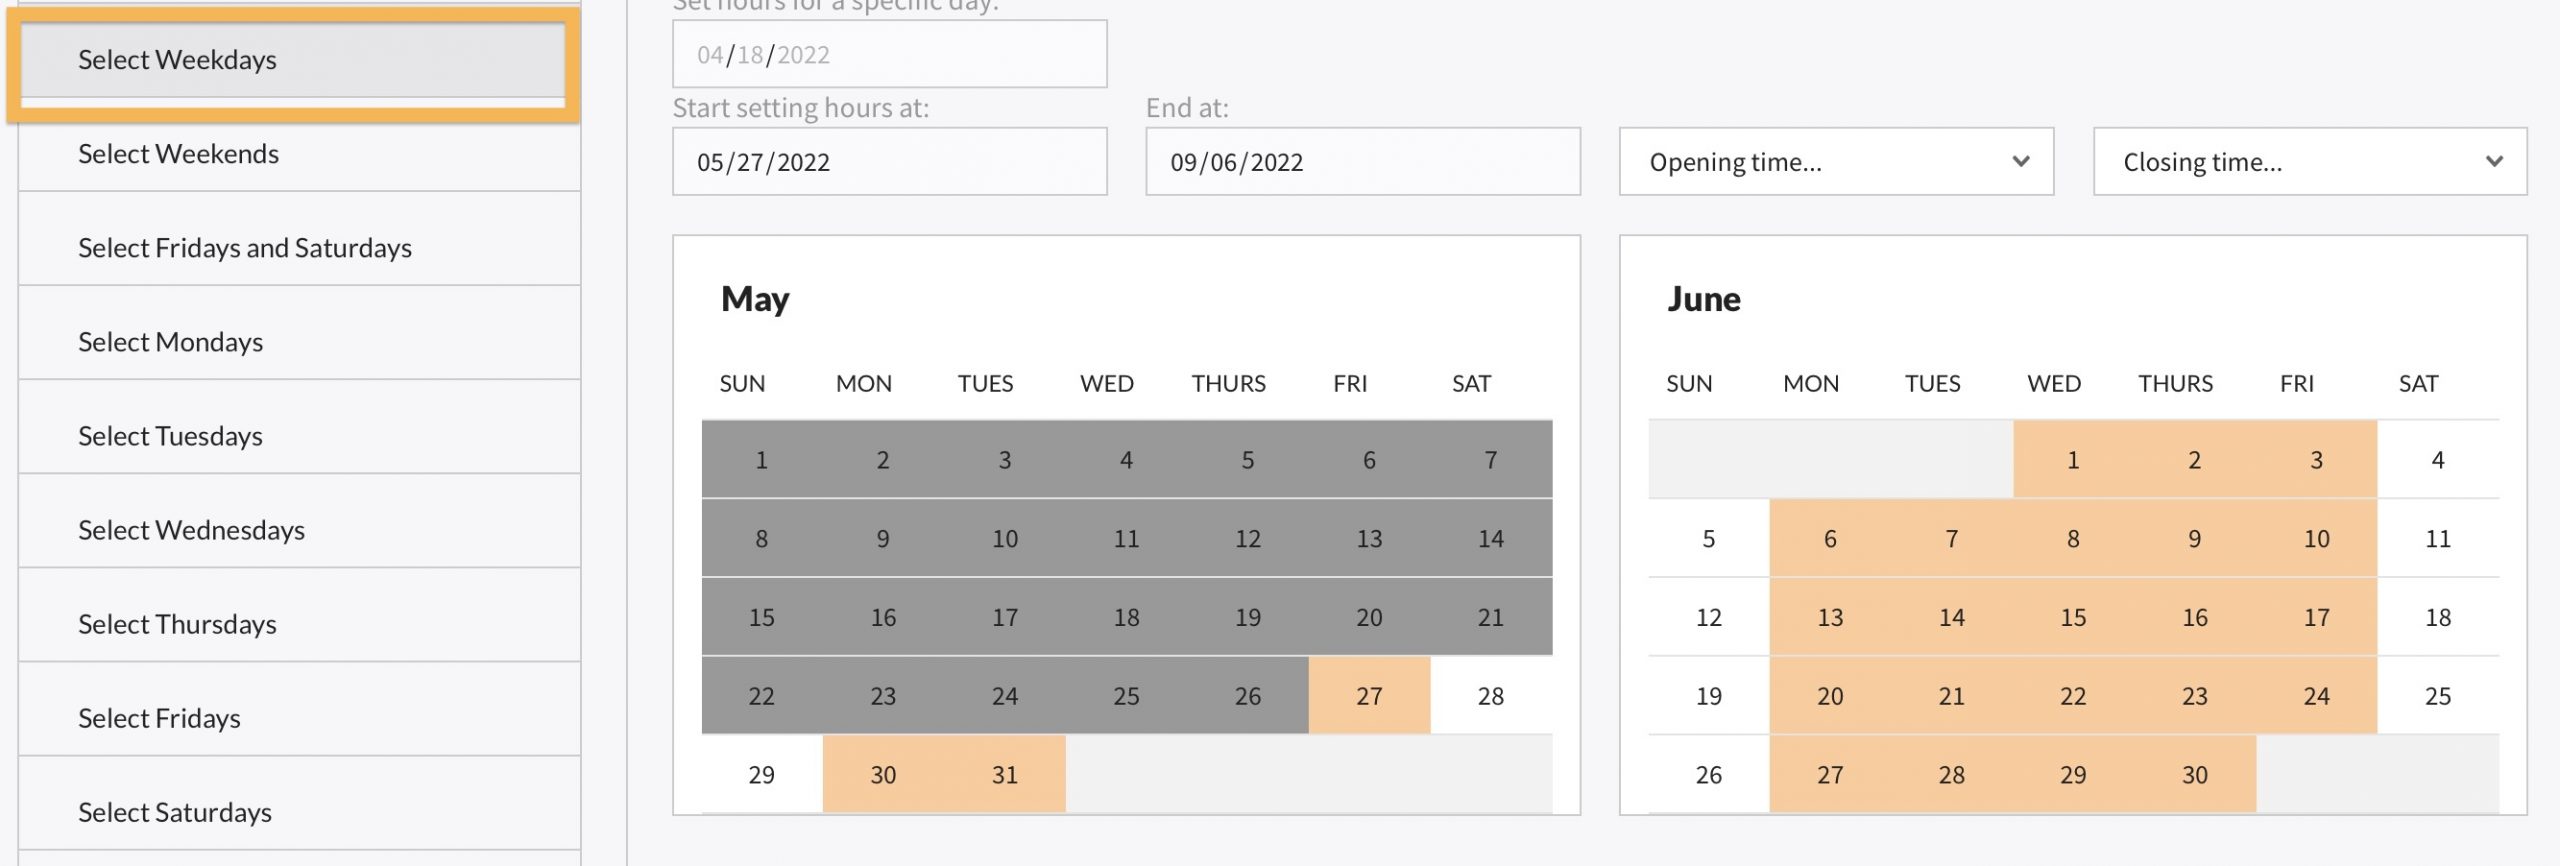
- Highlighted in the orange rectangle – Use these options to select days to apply opening and closing times to. For example, you could select just “Weekends”.
- Highlighted in the red rectangle – You can just to set hours on a single day only, or a broad range. For example, you will likely want to select Memorial Day to Labor Day when setting the pool hours. Doing so, will ensure you don’t accidentally apply opening and closing times in the middle of winter.
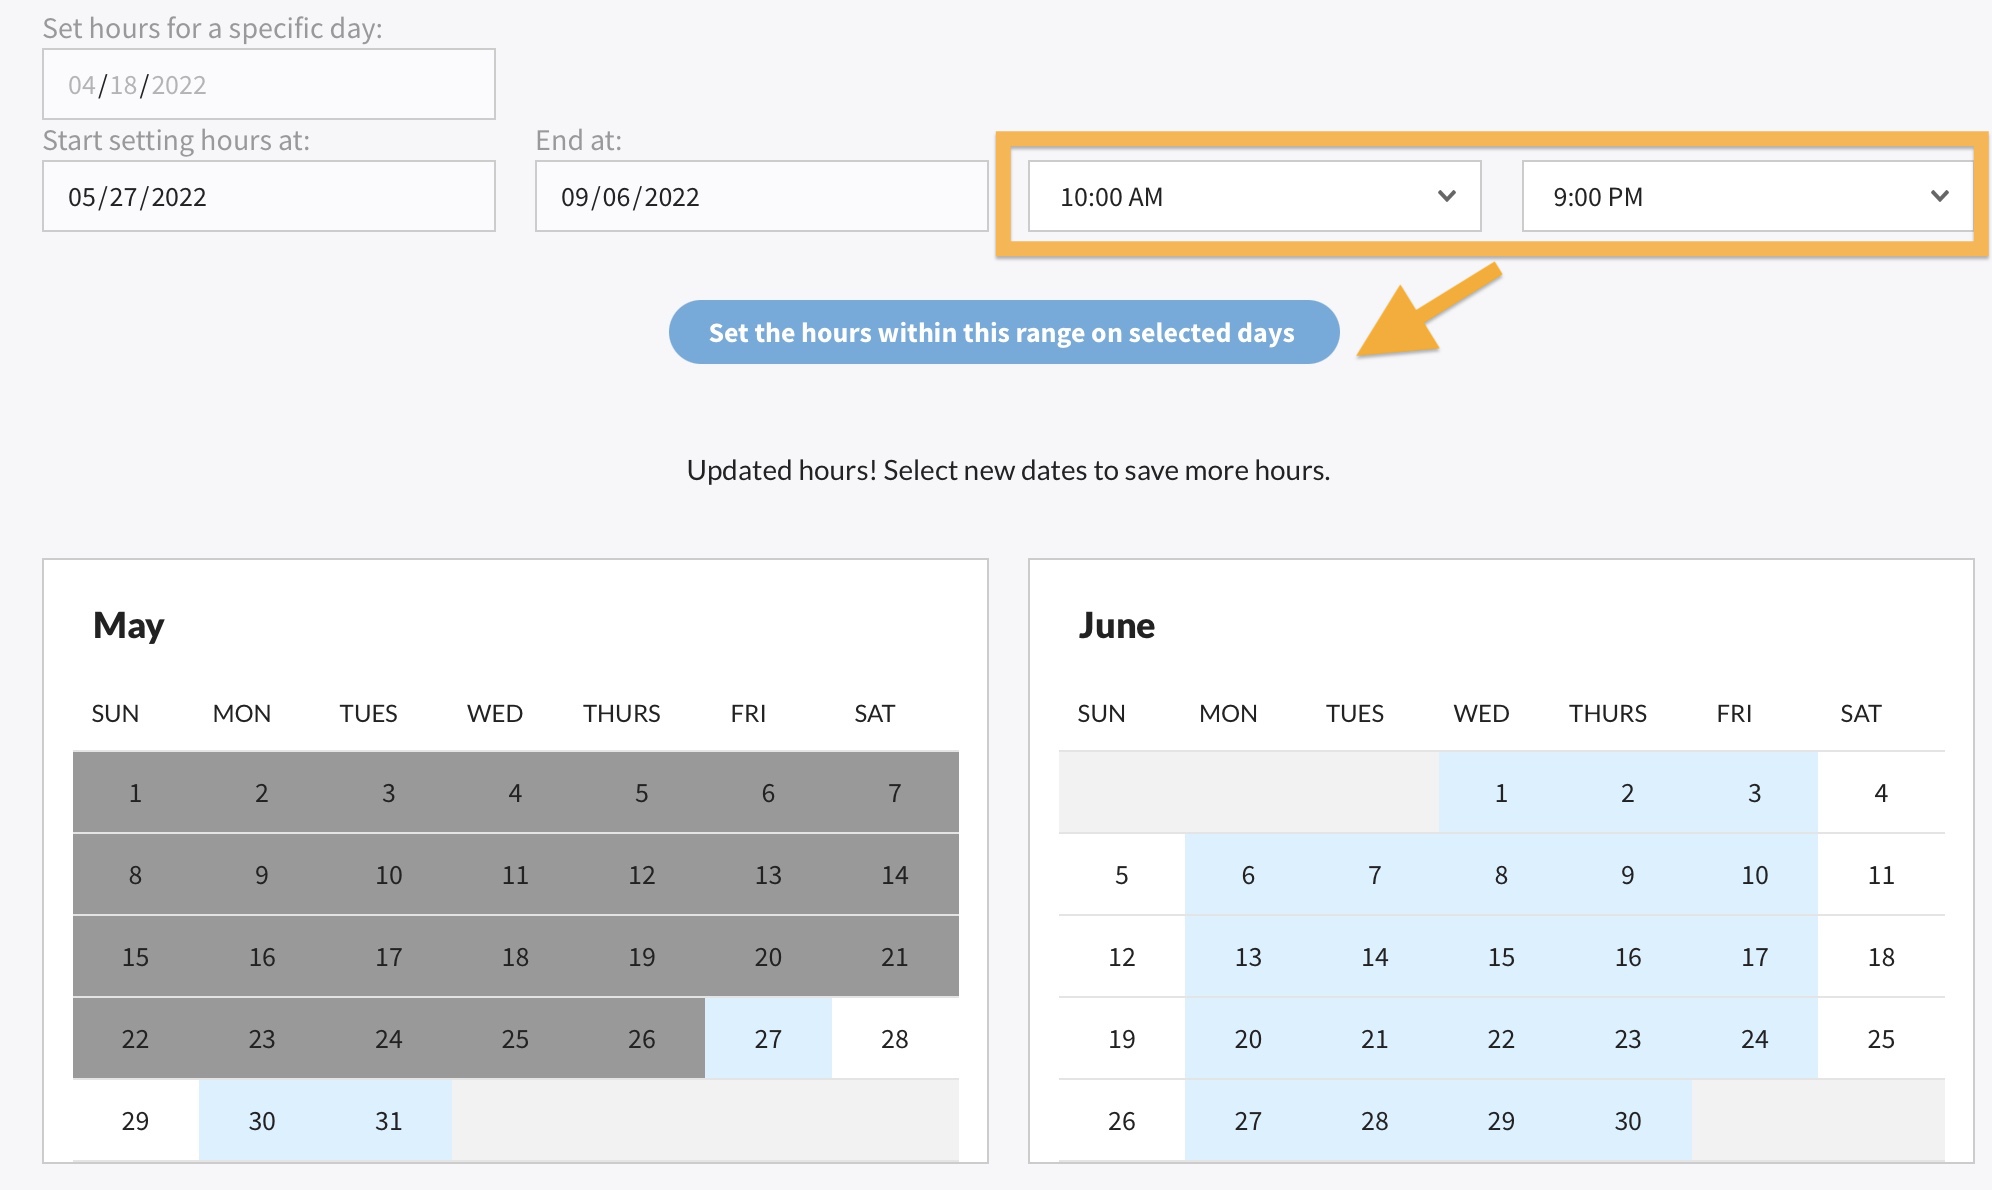
- Highlighted in the green rectangle – Once your date range and days of the week are in order, you will choose the open and closing times here. A button to save changes will appear once you select times.
- Highlighted in the blue rectangle – Tap “View Page” to see the finished hours for a particular set. This page this link goes to could be made public, but most of our clients add their open hours to the master “event” calendar.
Three Easy Steps to Set the Hours
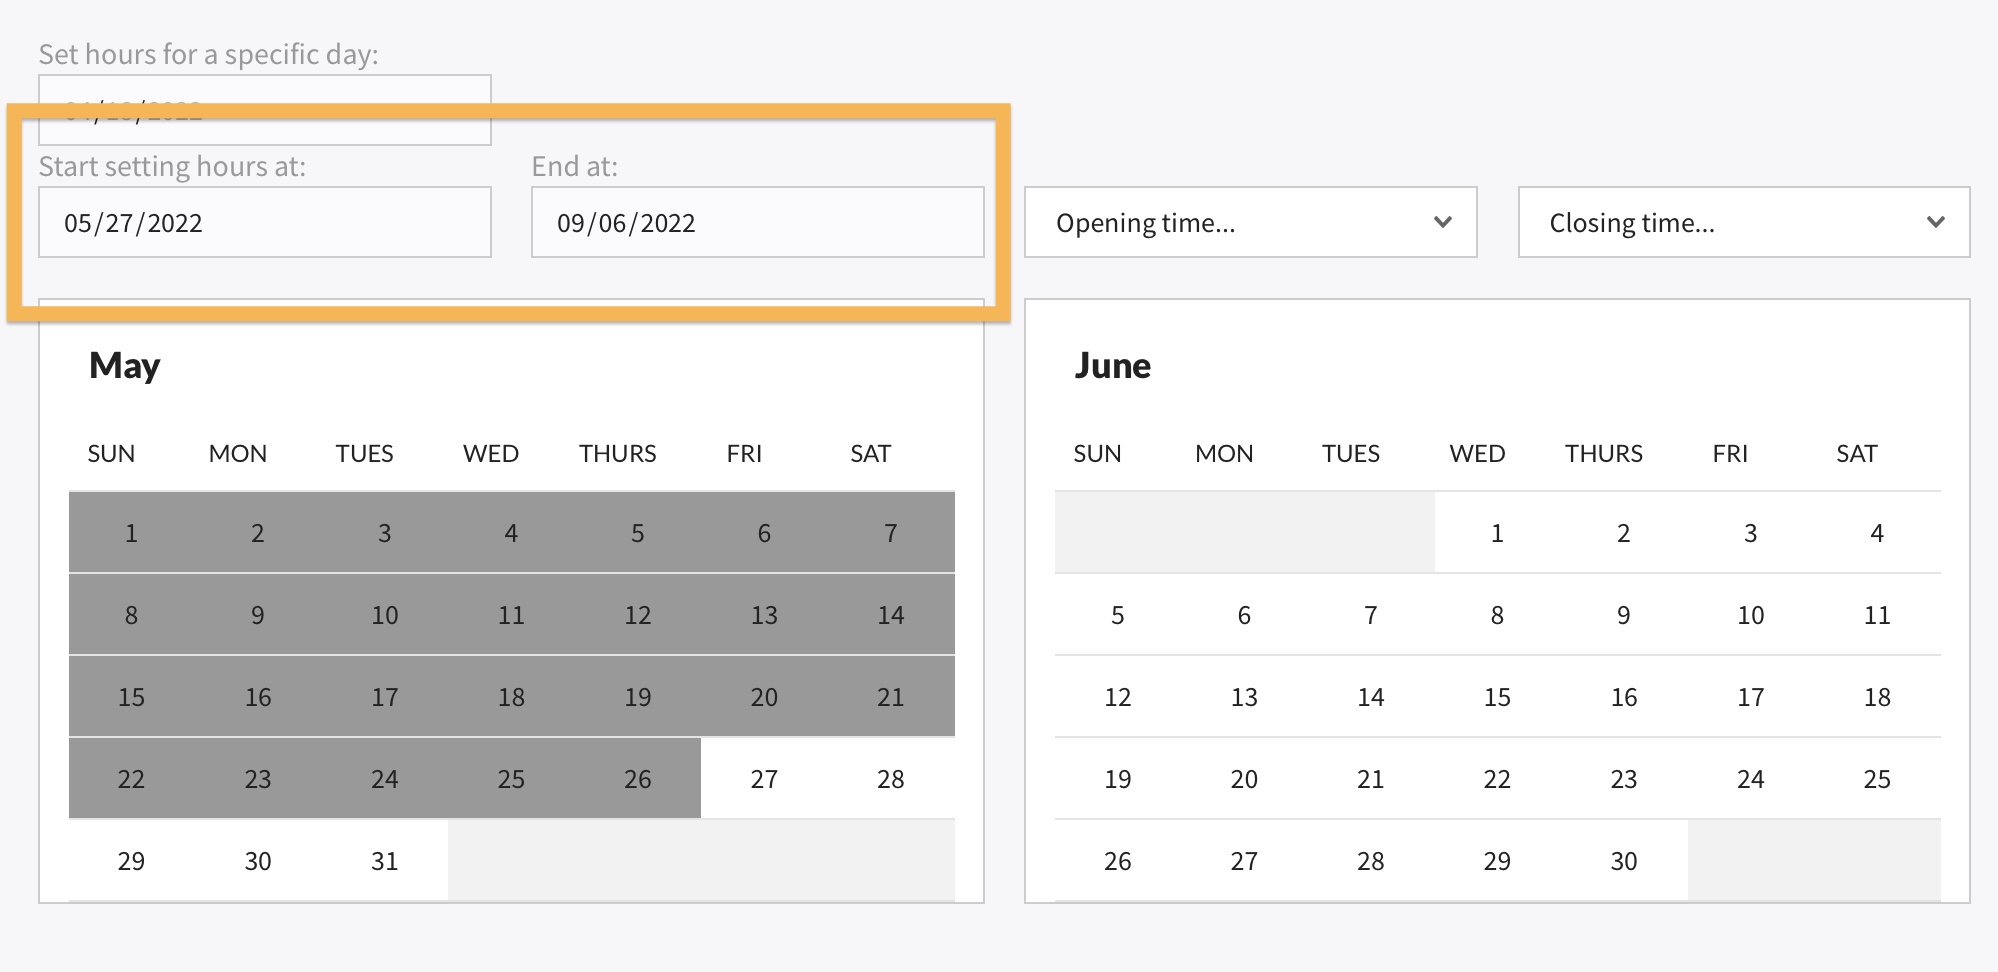
Step 1. Begin by selecting a date range. For this example, we will begin with the Friday before Memorial Day and end on Labor Day. Notice in the screenshot below, January to April are no longer shown as those months are completely out of range. Most of May is also excluded (greyed out).
Step 2. Next select “Weekdays” from the left menu. The weekdays will now be highlighted in orange within the date range selected in step 1.
Step 3. Select an Opening and Closing time, then click the blue button pointed to below. After doing so, the days selected will turn blue, indicating those days now have hours.
That’s it! Your weekday hours are now set. Repeat these steps for the Weekends or specific days of the week (Saturday only, Sunday only, etc).
Creating a new Hourly Set or changing the name of an existing set
Click “Add new hourly set” and give your new Hourly Set a name. Do not add “Hours” at the end, as this will be added automatically on the calendar.
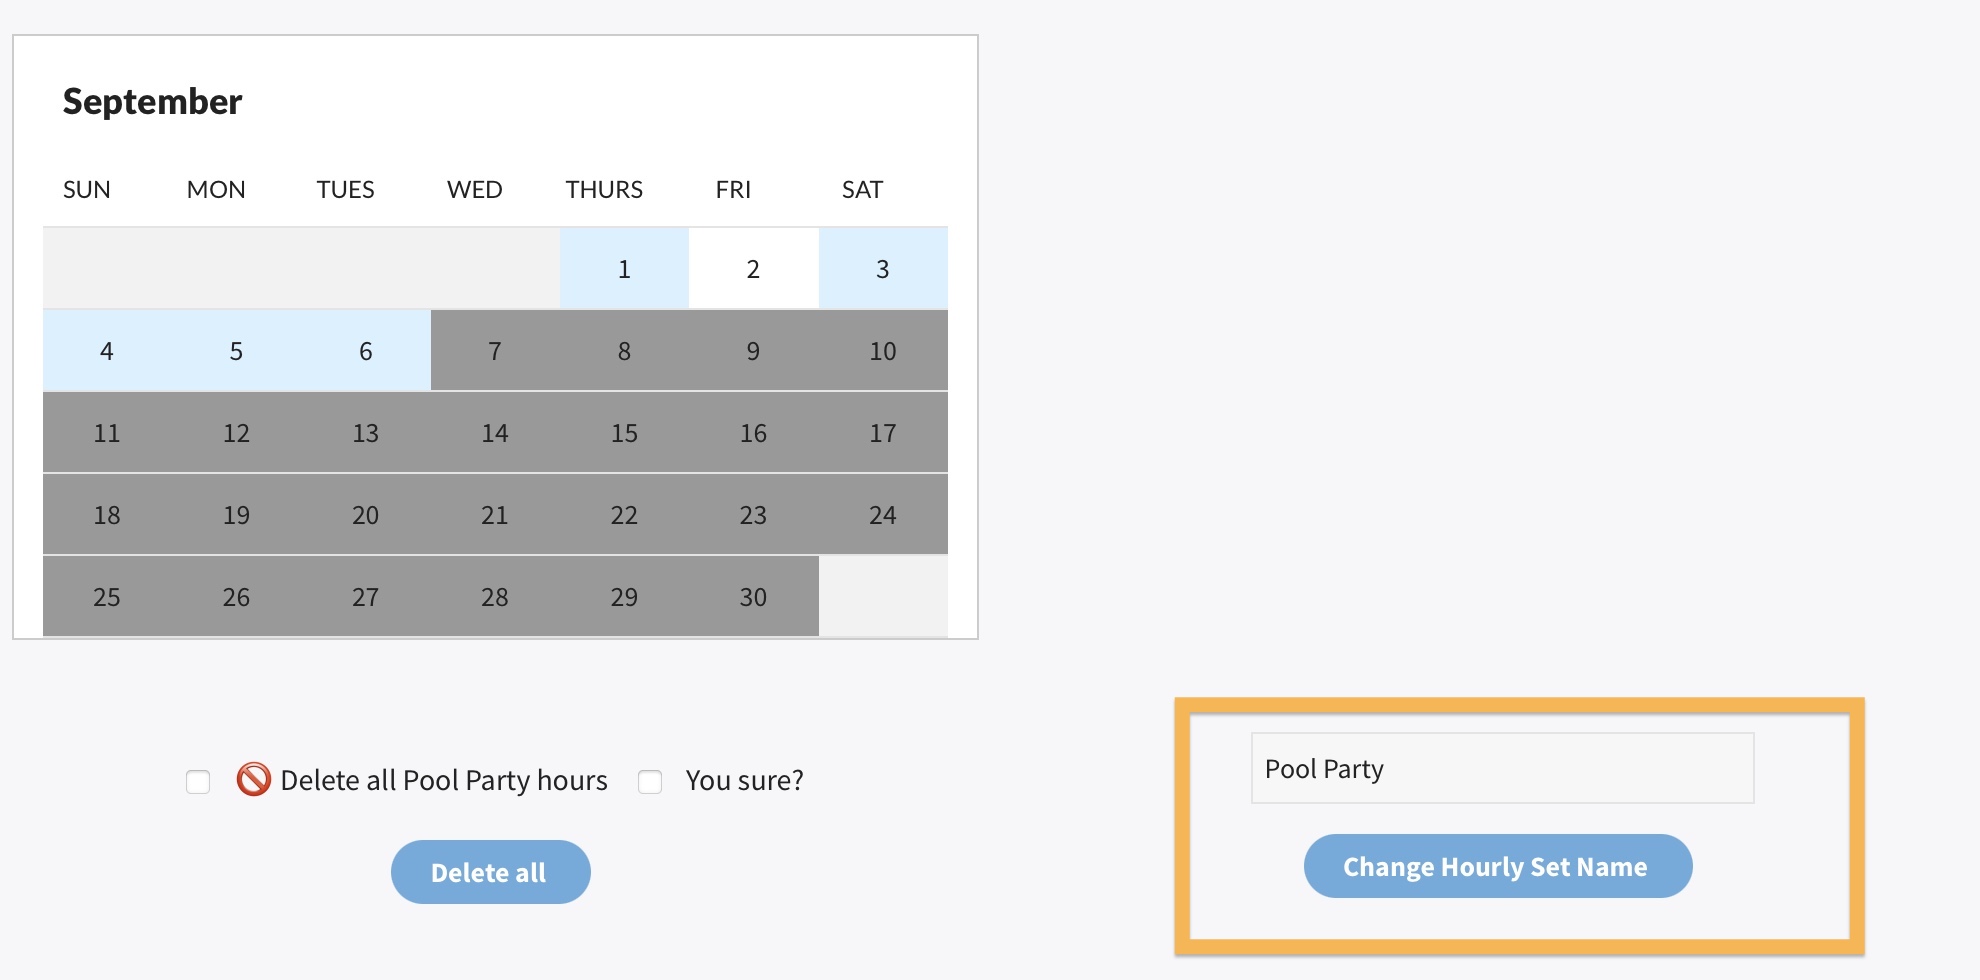
To change the name of an existing Hourly Set, scroll to the bottom of the page and enter a new name. You can also delete an Hourly Set from here too.
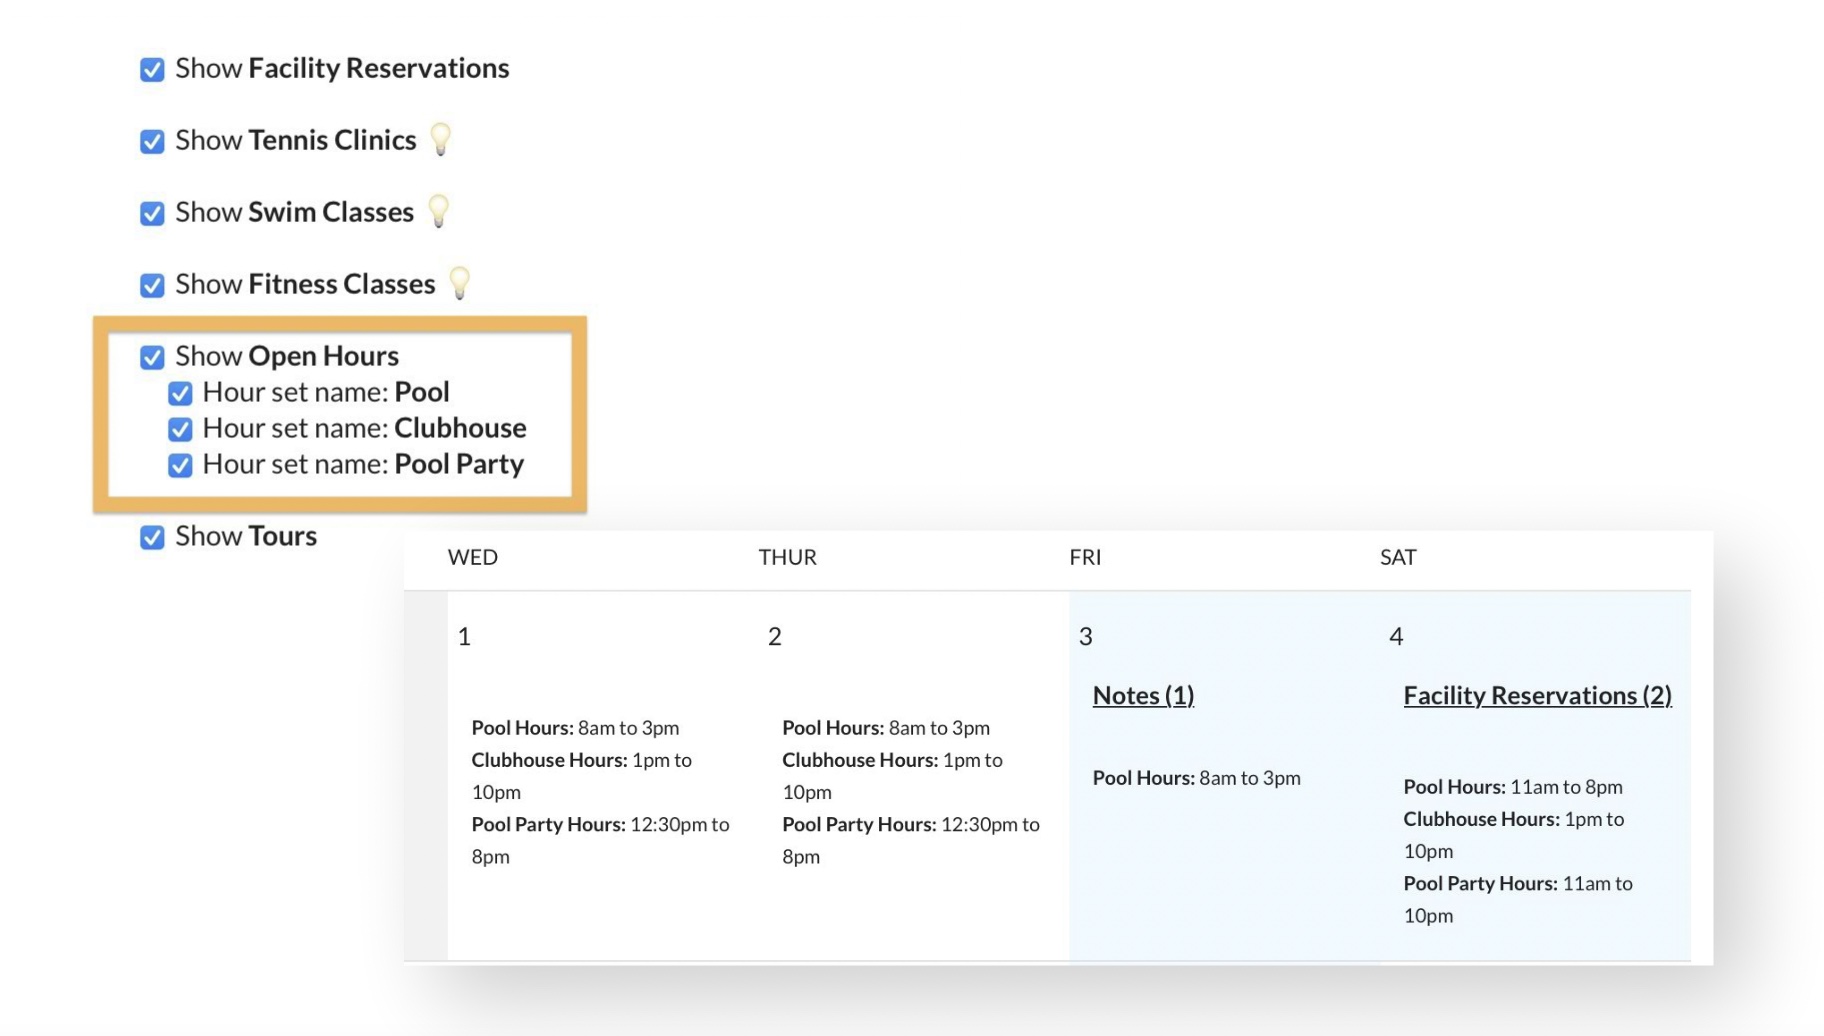
Hourly Sets on a Calendar
Any page can have its own unique Calendar which can display different Hourly Sets. In the example below, on you can see the Settings for this calendar are showing all three Hourly Sets. The image on the right shows how this would appear to someone viewing the calendar.