Your tennis, swim, or fitness grids can be a huge time-saver (and revenue generator) when used to schedule products instead of booking traditional reservations. Products, such as clinics, appear mixed in on the grid with member reservations, making self-discovery possible, and will also appear on a “Schedule” page that lists upcoming product-based reservations.
To read the pros and cons of scheduling products versus manually adding them in a Shop, we cover that here.
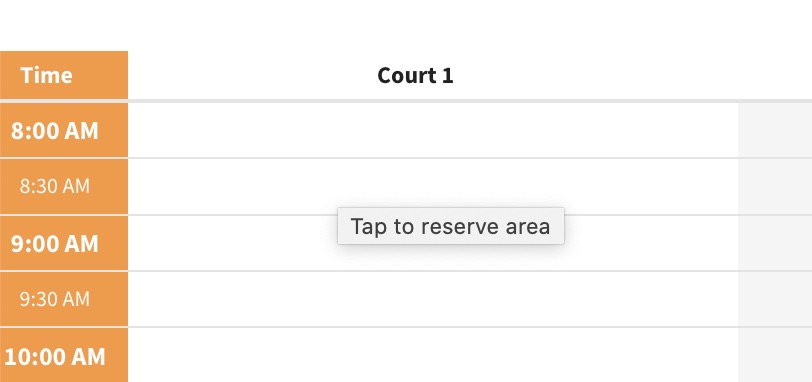
Start on your grid
Start by picking a court / area on one of your grids. For the sake of this article, we will assume you are scheduling on a tennis grid. Like you would for a regular reservation, just pick an available time…
The Reservation Type IS the Product
On the next screen you will know if your account has the right permissions based on the options you see in the Reservation Type pulldown. (For the tennis grid, your account should have the Tennis Director role, for the swim or fitness grids you should have the Operations role. More about Roles and setting them can be found here.)
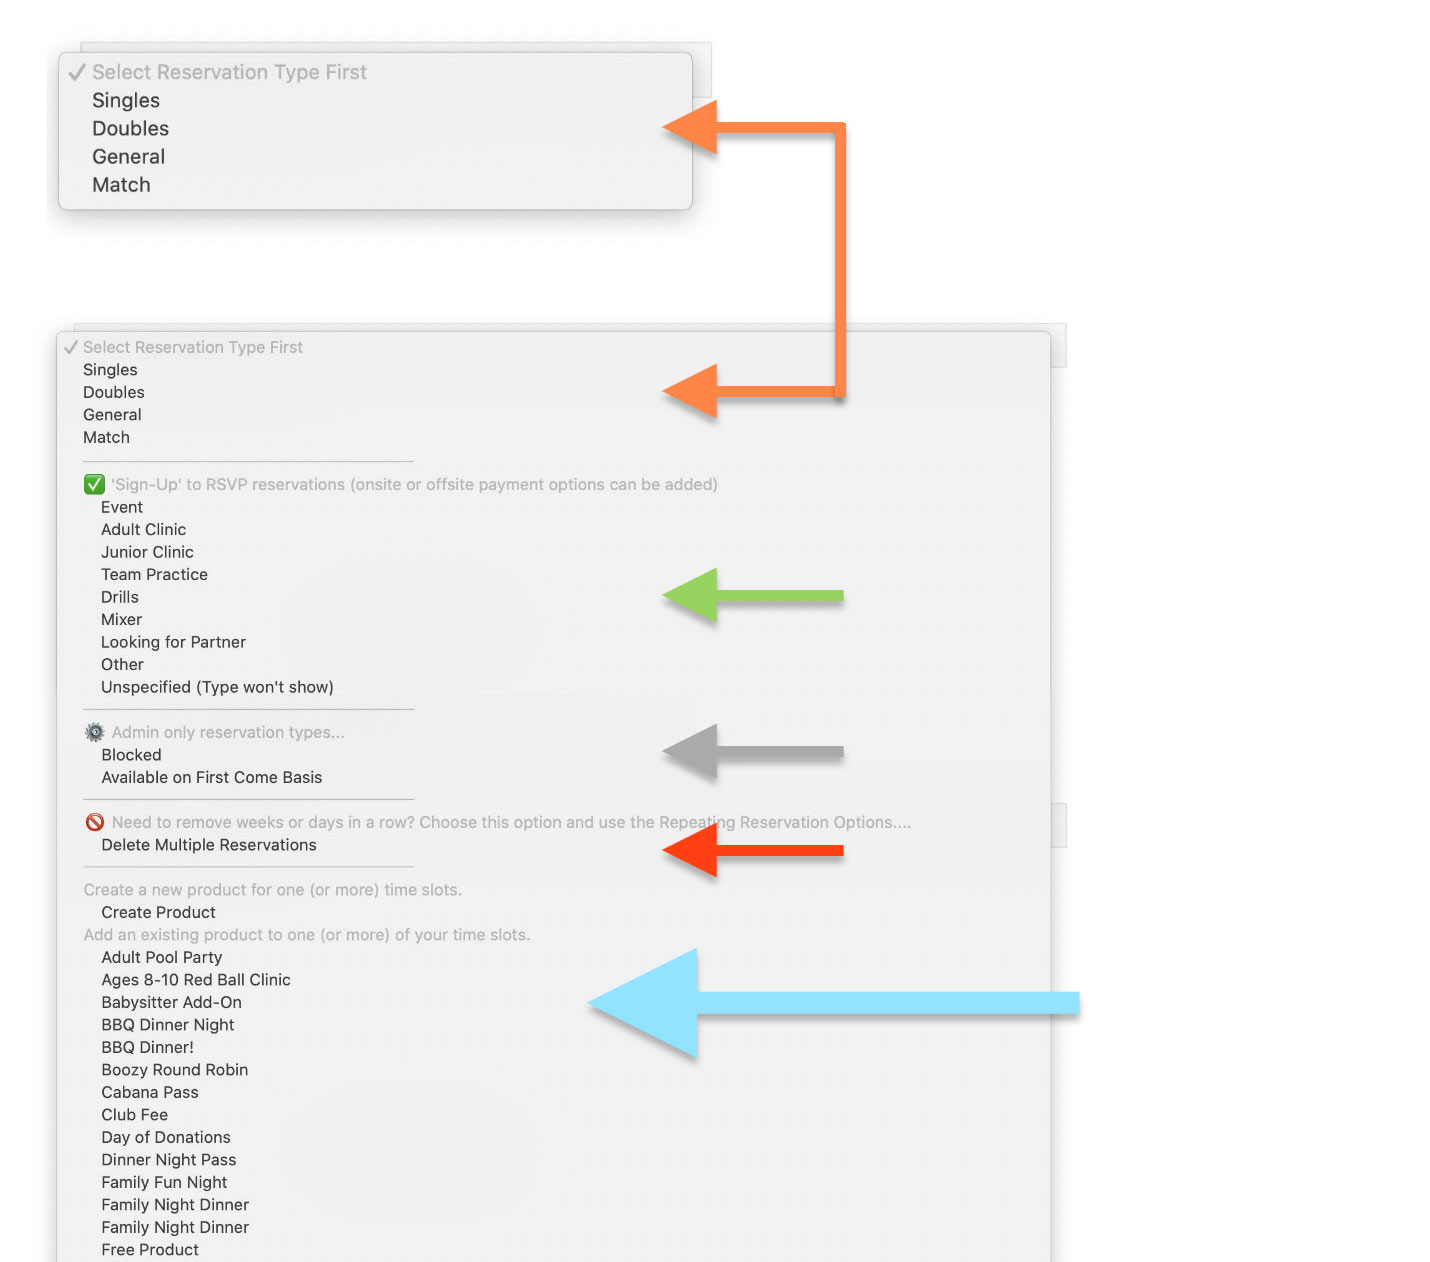
The first set of reservation options (pointed to in orange in the screenshot below) are what members can choose from. If this is all you see, you need to request an add-on role from the club President.
For future reference, the green arrow points to the “Sign Up” reservation types, the grey arrow points to admin-only types, the red arrow to a special type used to delete multiple reservations.
Scroll down to where the blue arrow is pointed, and you will find non-membership products in your store. Select the product to use as the Reservation Type.
Basic Reservation Settings
The first section of settings will look similar to most reservations, with the exception of the Member Name which is replaced by a Call to Action/Note field. Think of this note like a subtitle to your Product Name when seen on the grid. It could simply say “Enroll Now” or help describe the clinic further, for example, “Instructed by Coach Lasso”.

Finally, if you need to make some last minute changes to the product, click the Edit in new Window link.
It is important to get your product’s settings right before making a repeating reservation, as this base product will likely be duplicated many times, each one inheriting the same settings as the original. So for example, if the original product has custom checkout fields, duplicates will too.
Purchasing Options
Scrolling down further you will see a section title Purchasing Options which is primarily used to restrict or limit sales of your product on the grid. Some fields like Post-Purchase Note and Copy on Receipts help to remind you these product options are worth setting before making your repeated reservations / duplicated products..

- Members Only – only signed in members can see the purchase links on the grid.
- Max Available / Class Capacity – this is typically the max attendance size. For example, after 20 people are enrolled the grid will no longer show the purchase links. This is optional (sales do not have to be limited).
- Purchase Period Begins – An optional number of days prior to the reservation that enables the purchase period. So for example, if this value is “7 days before the reservation date“, buyers can begin purchasing a week before the reservation date.
- Variable Pricing Options – If the max available (class or clinic size) will be limited AND your product has multiple pricing options (1 Member Child, 2 Member Children, 1 Non-Member Child, 2 Non-Member Children), we will remind you how these options affect attendance. These values can be changed in the Product Editor.
- Post Purchase Note – this is an easy way to add a short note in the purchase receipt the member receives. For example, “Text our instructor with any questions at 555-123-4567”.
- Copy on Receipts – If you are creating reservations for someone else, for example, your club’s tennis pro, it is generally a good idea to include their email in this field so they get notified after each sale.
Repeating the reservation
In this final section, we can repeat this booking multiple weeks in a row, on extra days, and courts. Since you will most likely create a new product with each booking, it is important to understand the options here.
By default when you get to this section, it will look like the screenshot below. Notice that the only thecheckboxes toggled on correlate to the court and date you originally selected on the reservation grid (you can not uncheck these). Repeating reservations will start from this date.
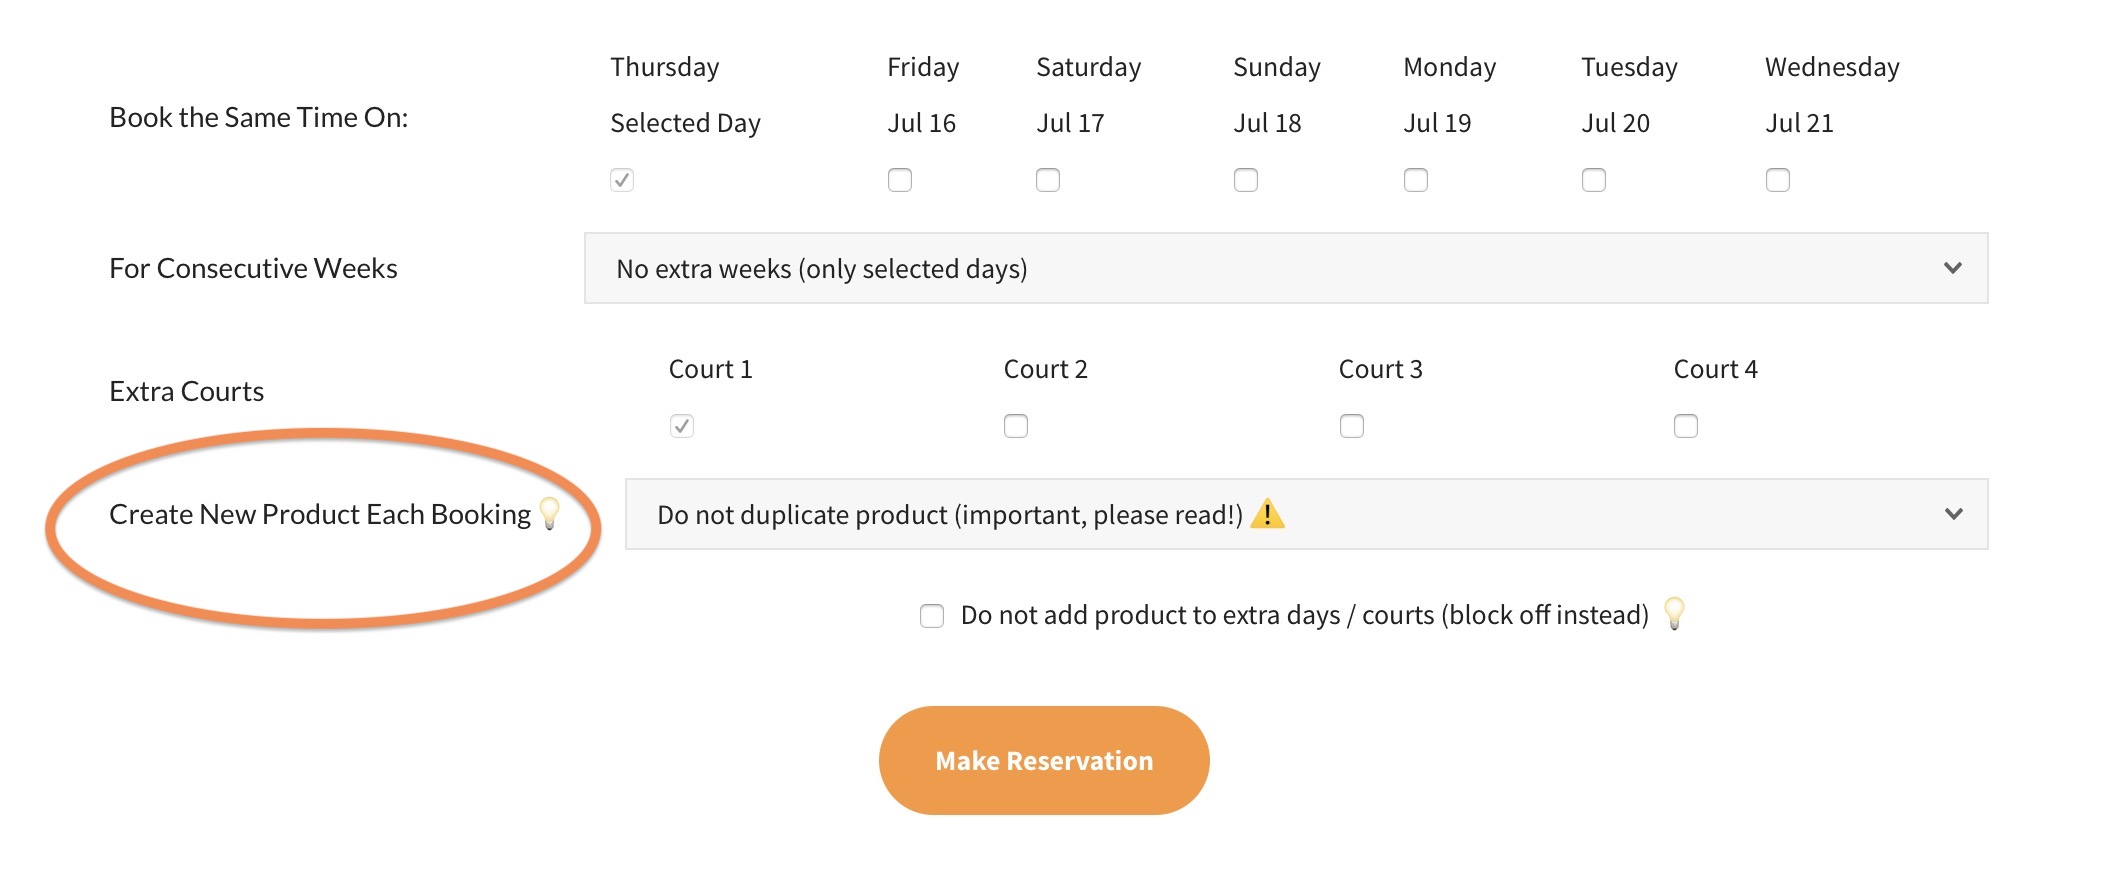
The Create New Product Each Booking row (circled above) determines if each repeated reservation duplicates the base product and how that cloned product will be named. See the options below…

If you are repeating the reservation, most likely you will want the recommended option – ✅ Product Name will be the base tile plus date. So for example, if the Reservation Type product is set to Tennis Camp the duplicated products will have the date affixed – Tennis Camp July 15, 2021, Tennis Camp – July 22, 2021, etc for each week.
As these products will be unique in your store’s backend, they will also have a unique sales history for each, buyer list, etc. And they could be changed after the fact to have different settings from the original.
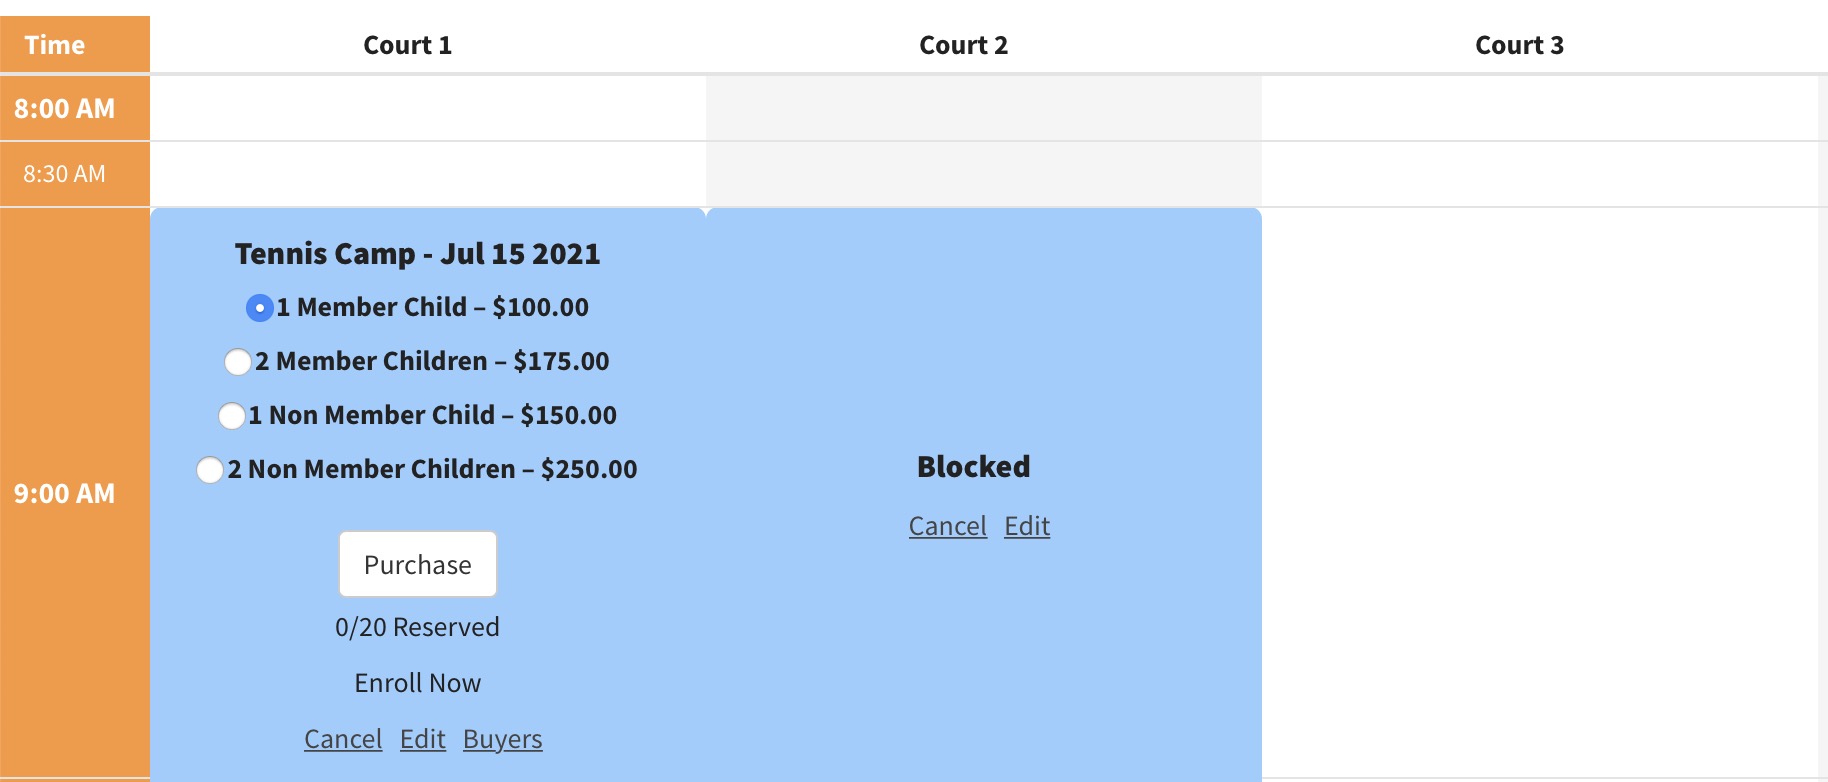
If we went ahead and booked our reservation, you would see something like the screenshot below on one of your dates…
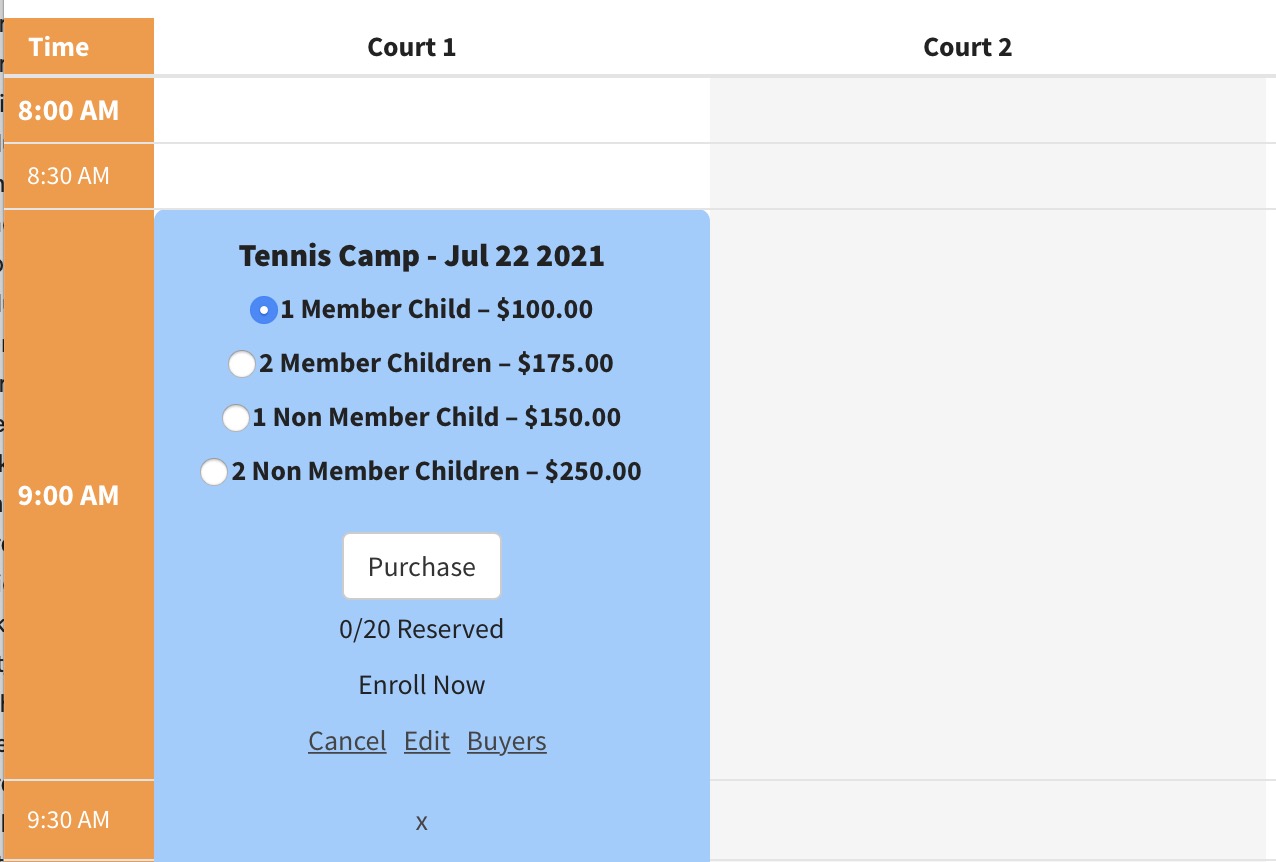
The grid shows the product name on top, variable pricing options, a purchase link (if it was currently available for sale), the current attendance (if you chose to limit capacity), and some bottom link options only available to admins.
Products scheduled on the grid can also be viewed as a simplified list of upcoming clinics, classes, camps, etc.
Blocking off extra courts…
When scheduling tennis clinics, you will most likely want to set aside extra courts. You probably do not want to add the product on each of these extra courts. To avoid this, toggle on the bottom-most checkbox titled “Do not add product to extra days / courts (block off instead)”.
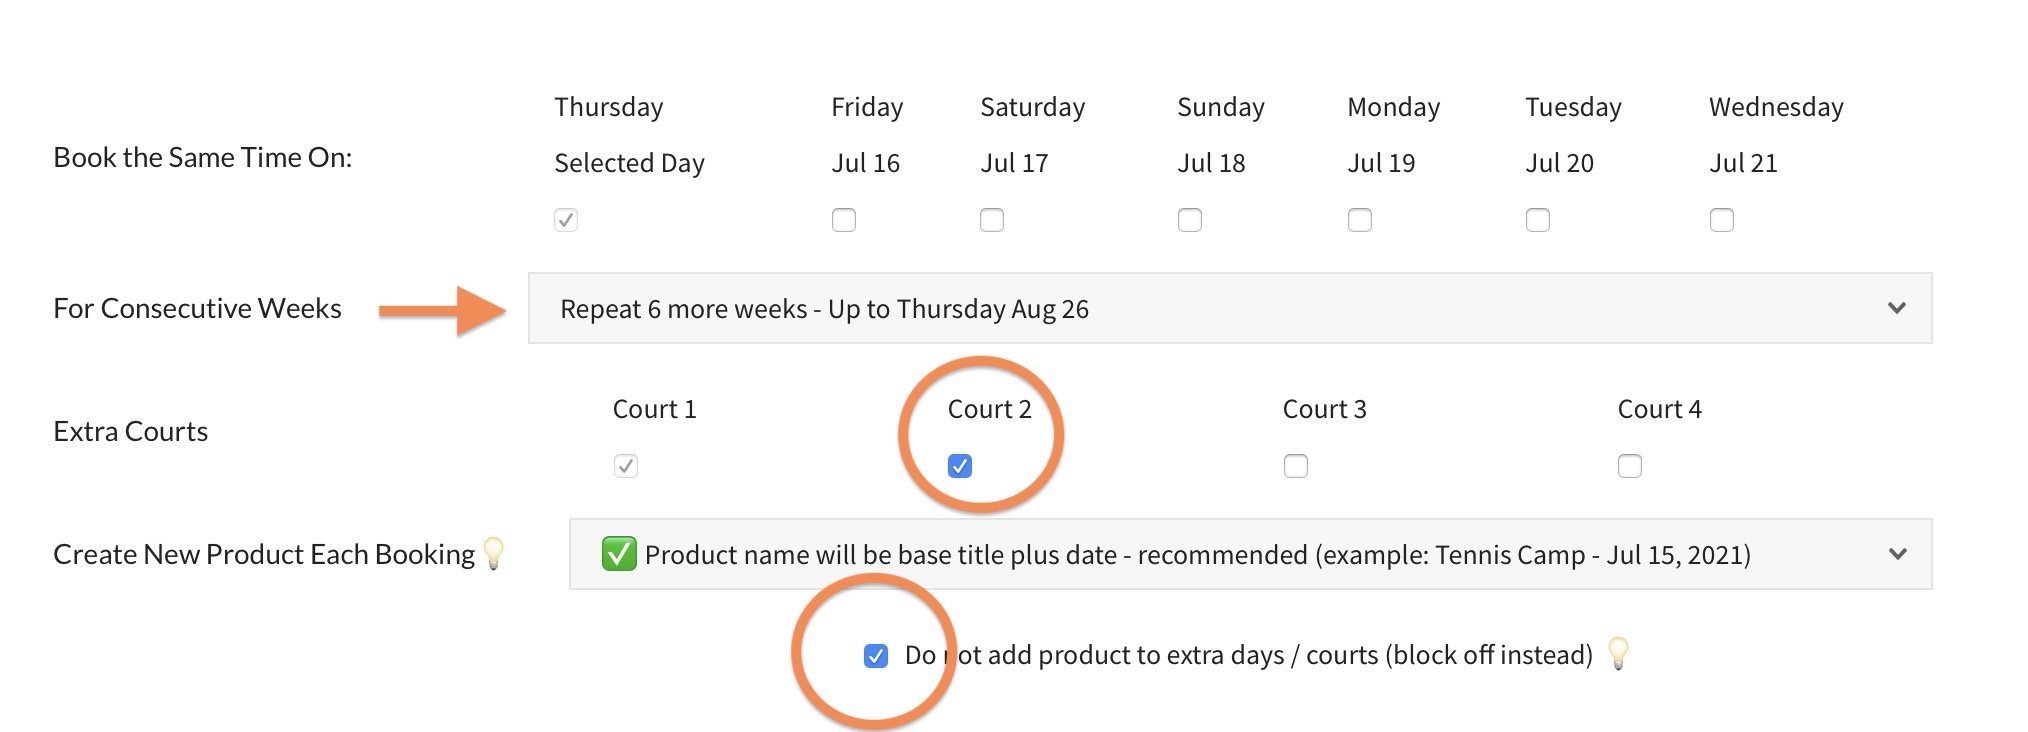
Let’s pick apart the example screenshot below. It will duplicate our Tennis Camp product for 6 more Thursdays on Court 1.
We toggled on Court 2 as an extra court to use, while also toggling on “Do not add product to extra days / courts (block off instead)“.
The end result looks like this on each Thursday…