Once you have created a Calendar you will want to add shifts to it. They are a two ways to quickly populate your calendar with assigned shifts or empty shifts that people can sign up for. In this article we will discuss using the weekly view of your calendar to do this. An alternate option would be to use the Auto-Create Shifts tools.
As an admin your view of the calendar is slightly different than members. You will notice when you hover over a week, it will turn blue to indicate you are about to select that week…
Click the week you want to start adding shifts to and you will move over to the calendar’s Weekly View (again, this is a page only for administrators like yourself).
Adding Shifts from the Weekly View
Pretty empty, huh? Your only option right now is to create an initial shift. Click on a day in the row labeled Add Shifts to see a popup like the one in the screenshot below.
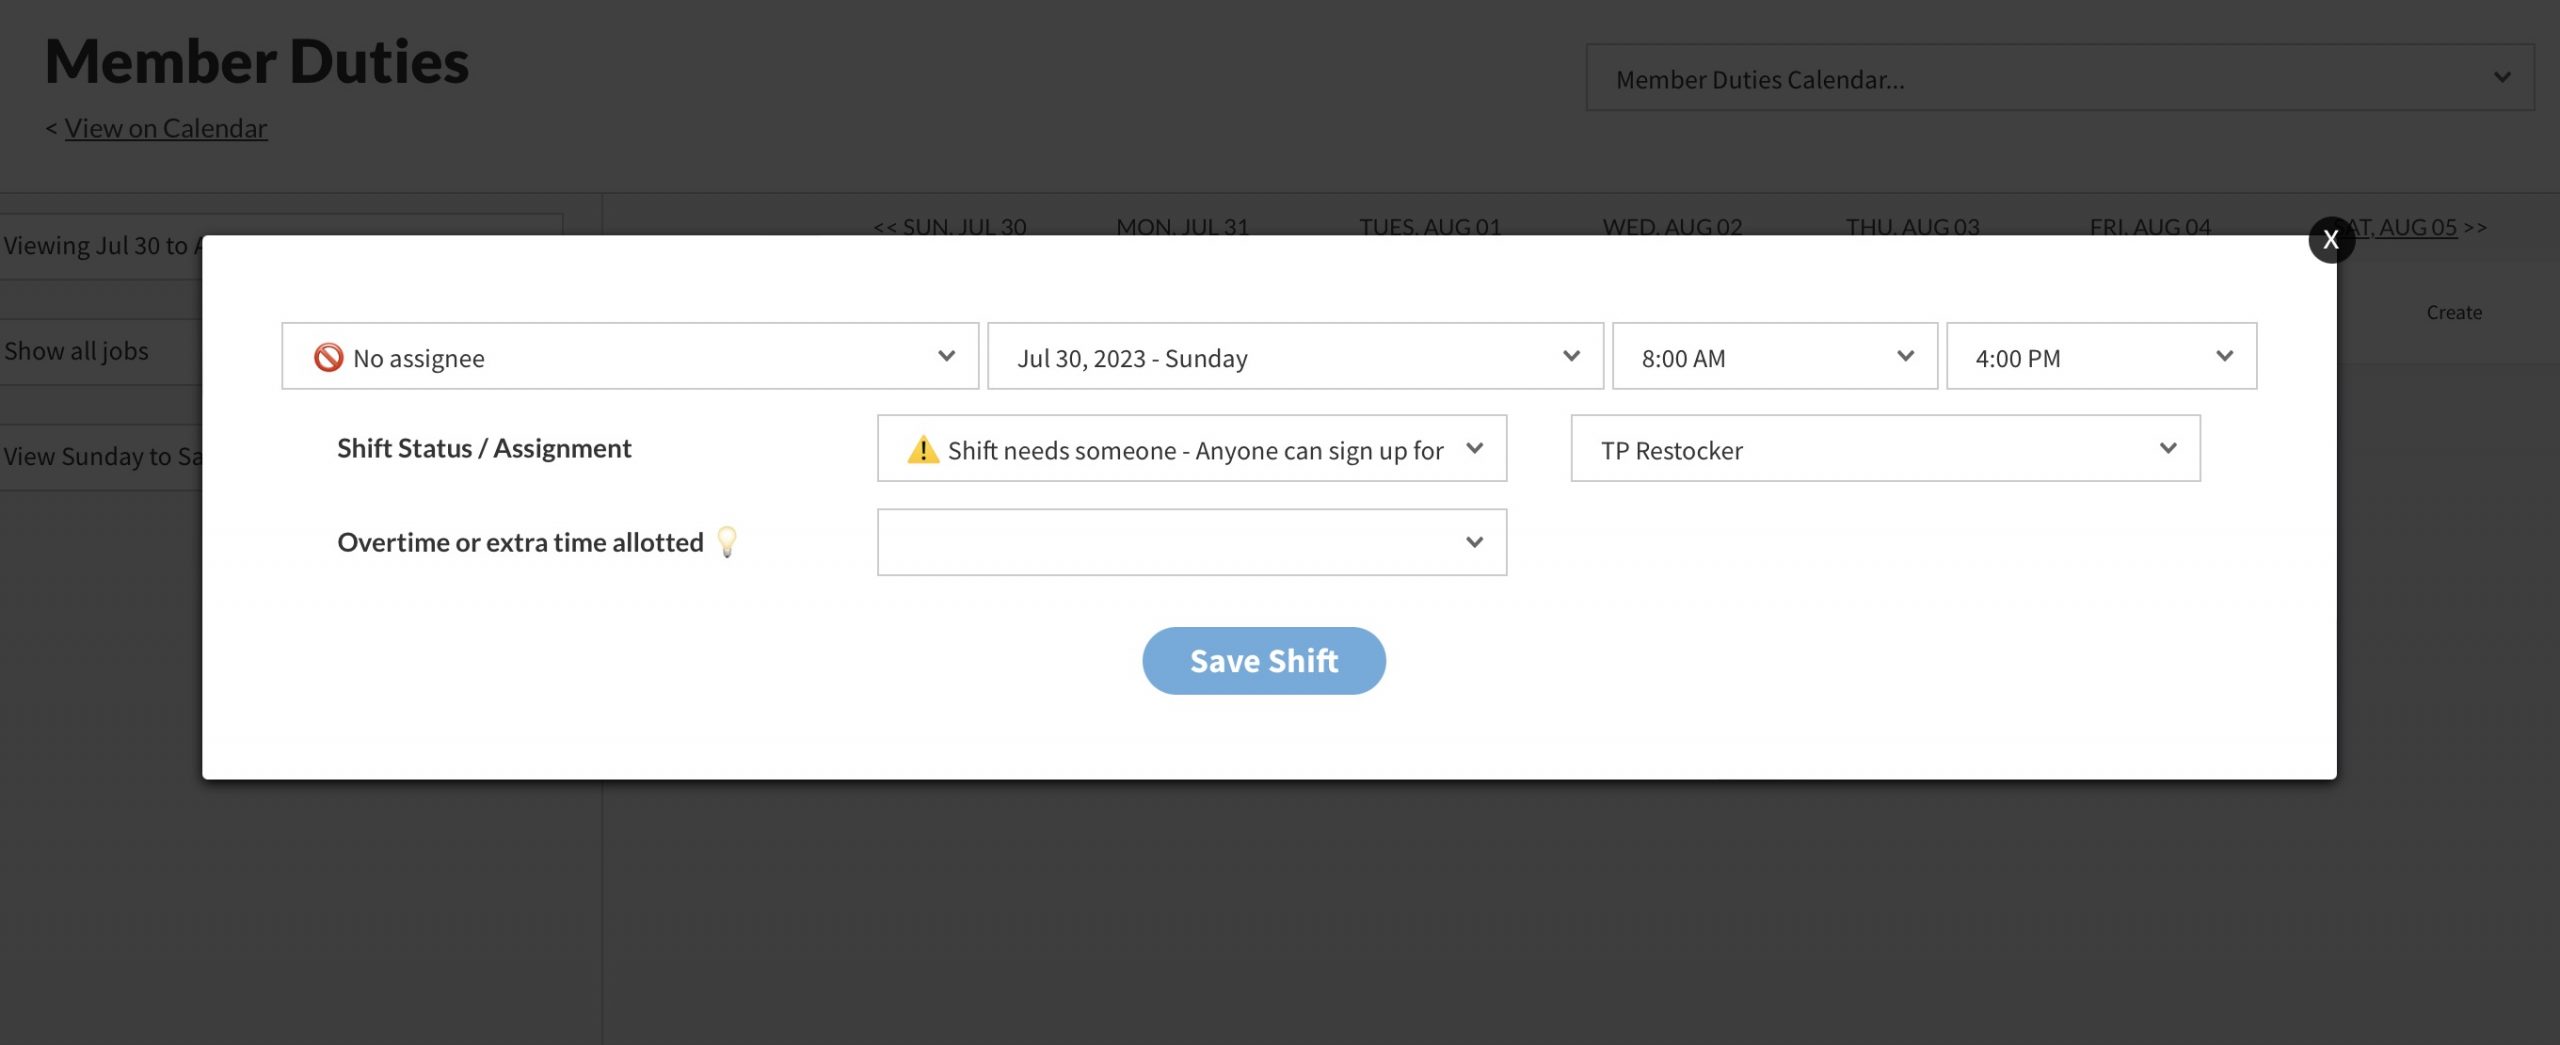
If you want to create an unassigned shift, select No assignee in the top left pulldown.
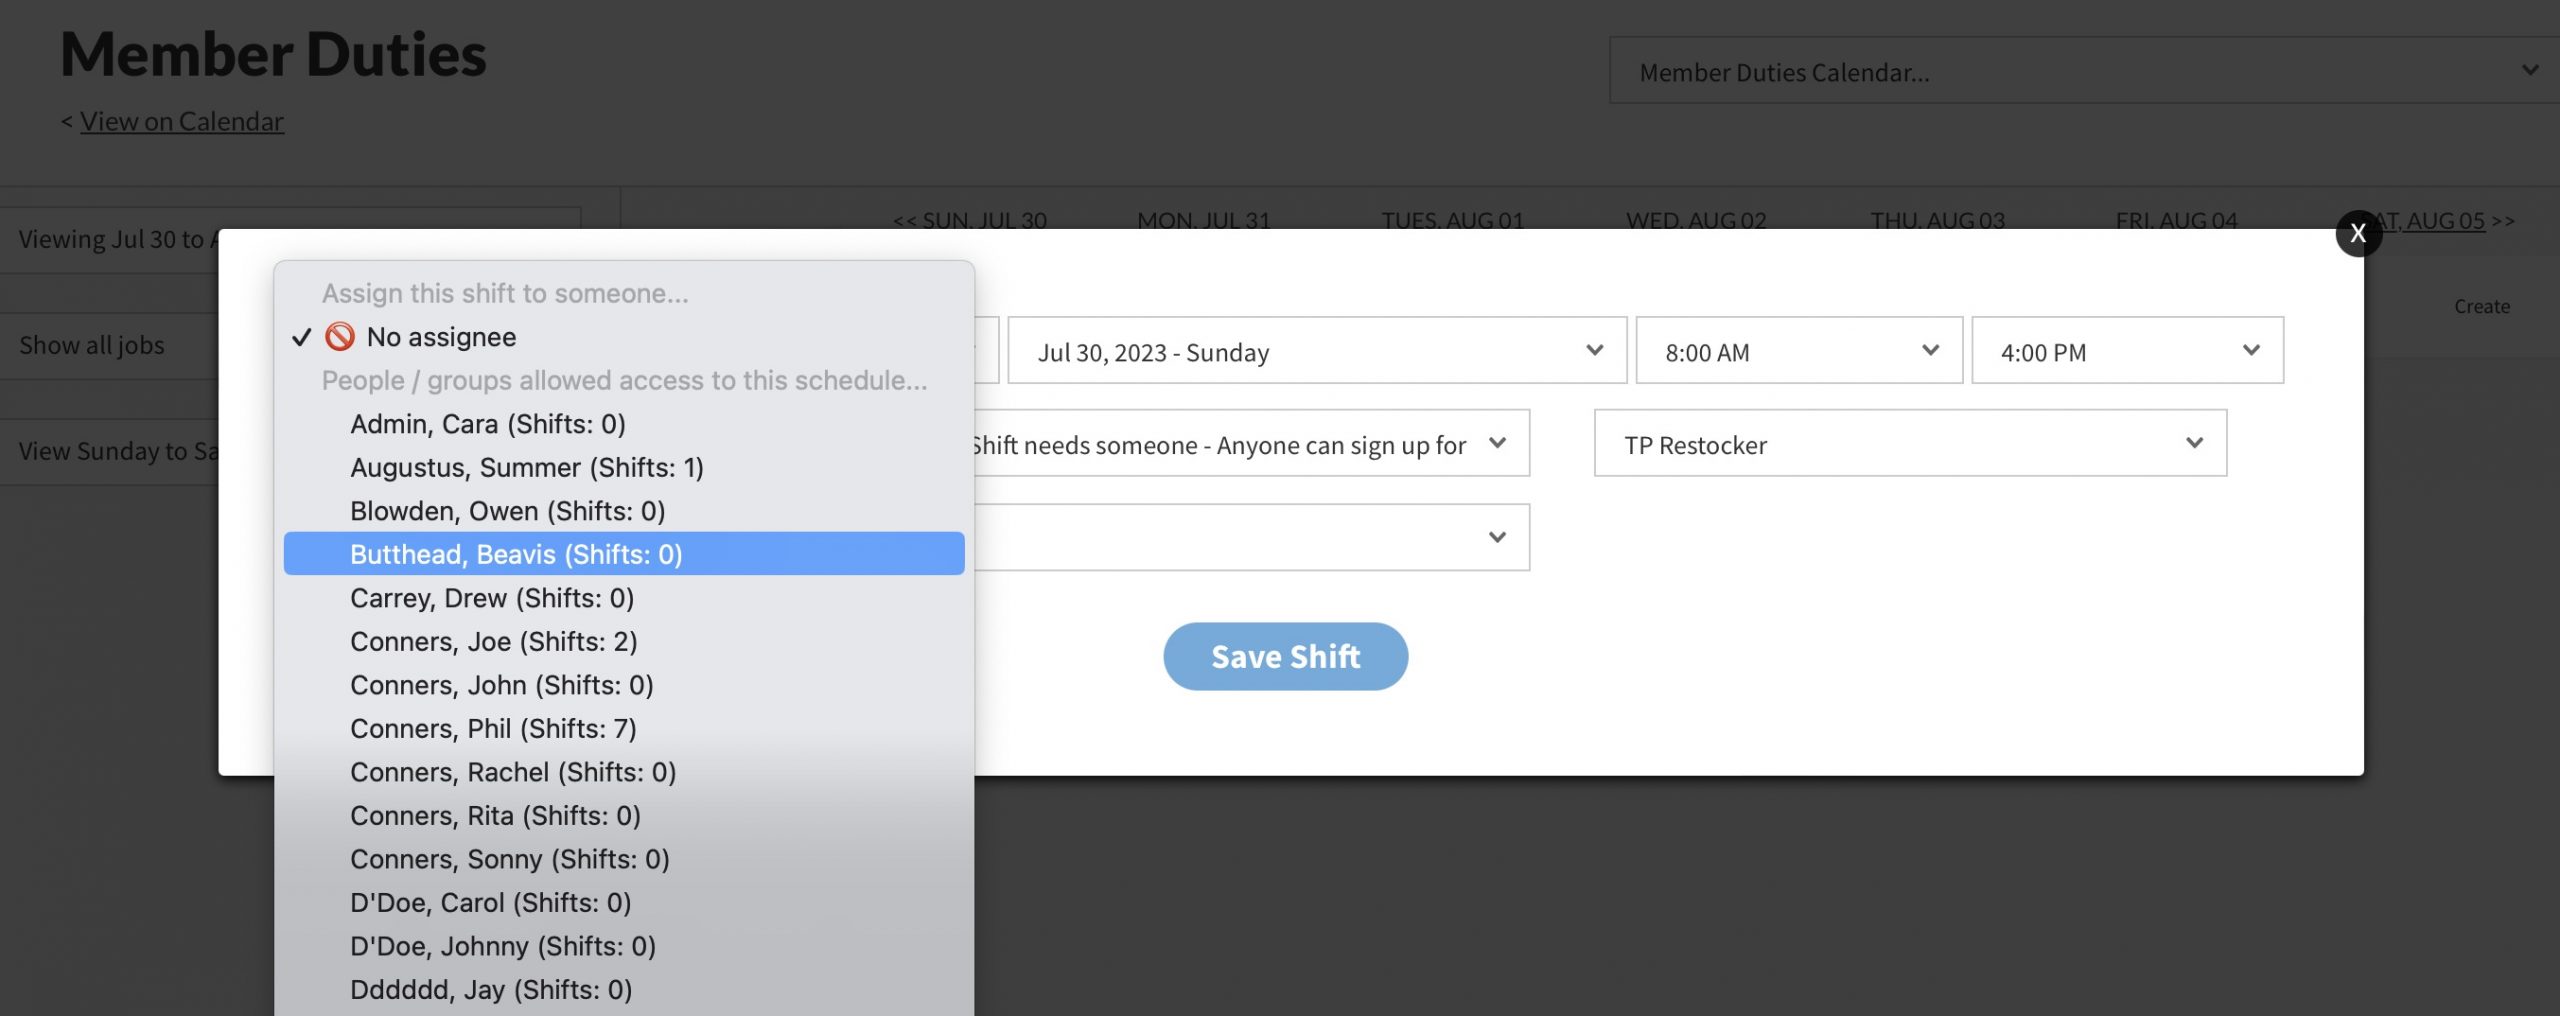
If you do not want to create an unassigned shift, select someone to work it. The names populated in this pulldown will be based on the Calendar Access option in Settings. In the screenshot below you can see a list of potential assignee names and the number of upcoming shifts they have assigned.
To save this shift you will also need to set the Start time, End time and Job Name. Some job names were likely setup when you created your calendar. If you need to add a new job name you can do so from this window. Each calendar can have up to 20 job names.
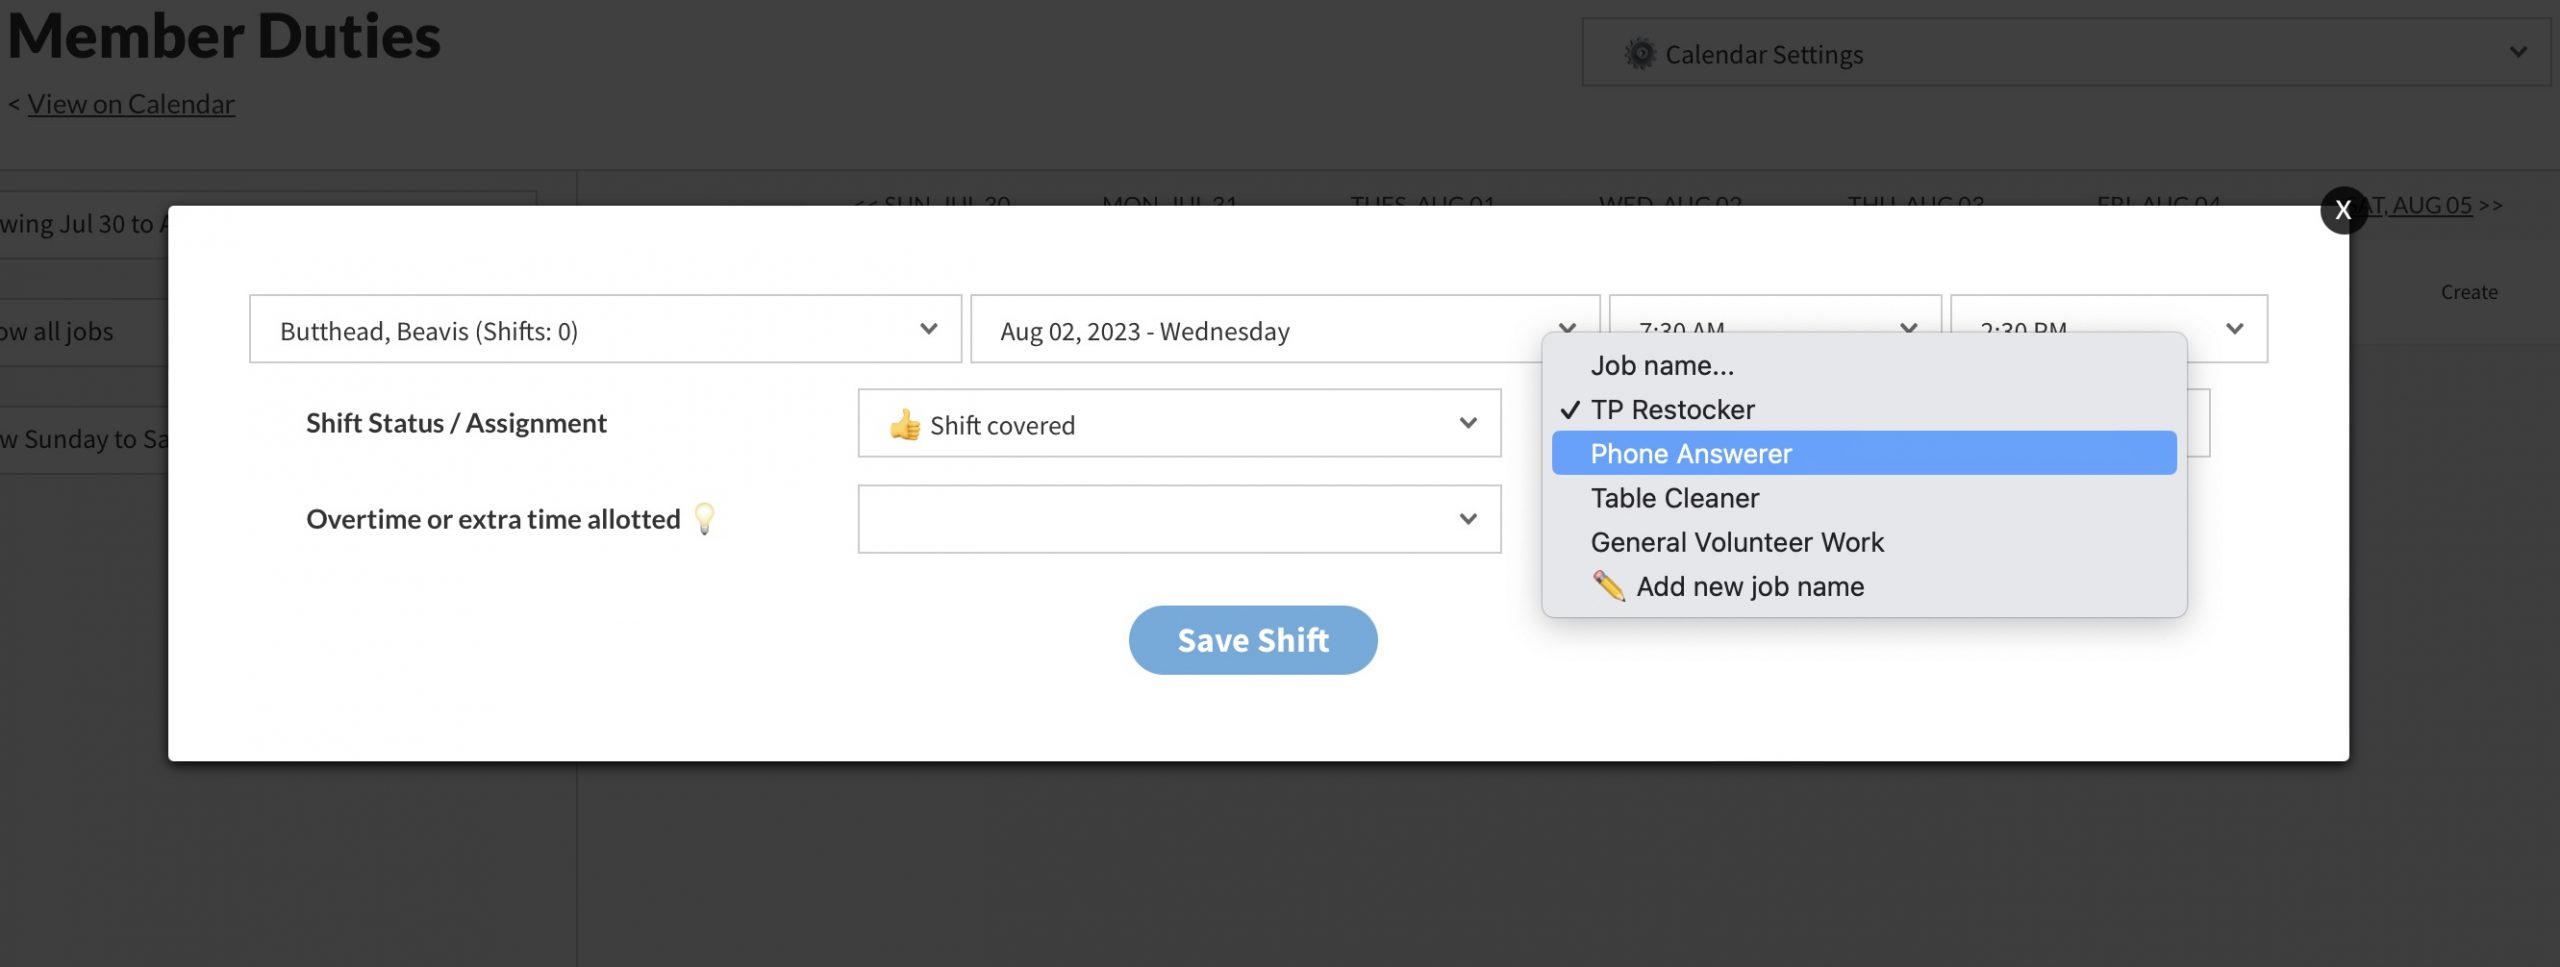
Finally, you can set the Status of the shift. If you assigned the shift to someone, most likely you want the status to be “Shift covered” (which is what it will default to). If you did not assign the shift to someone, most likely you want the status to be “Shift needs someone – anyone can sign up for it”. This will allow people to sign up for the shift on the calendar. You can see some of the other options in the screenshot below…

Hit Save Shift and you will have made your first shift.
Duplicating Shifts
Now that you have one shift, you can Duplicate it to other days. Before we do that, notice in the screenshot below our shift was created without an assignee and as such it is at the top of the page in a row labeled Unassigned. This will help you keep an eye on all shifts that need to be fulfilled.
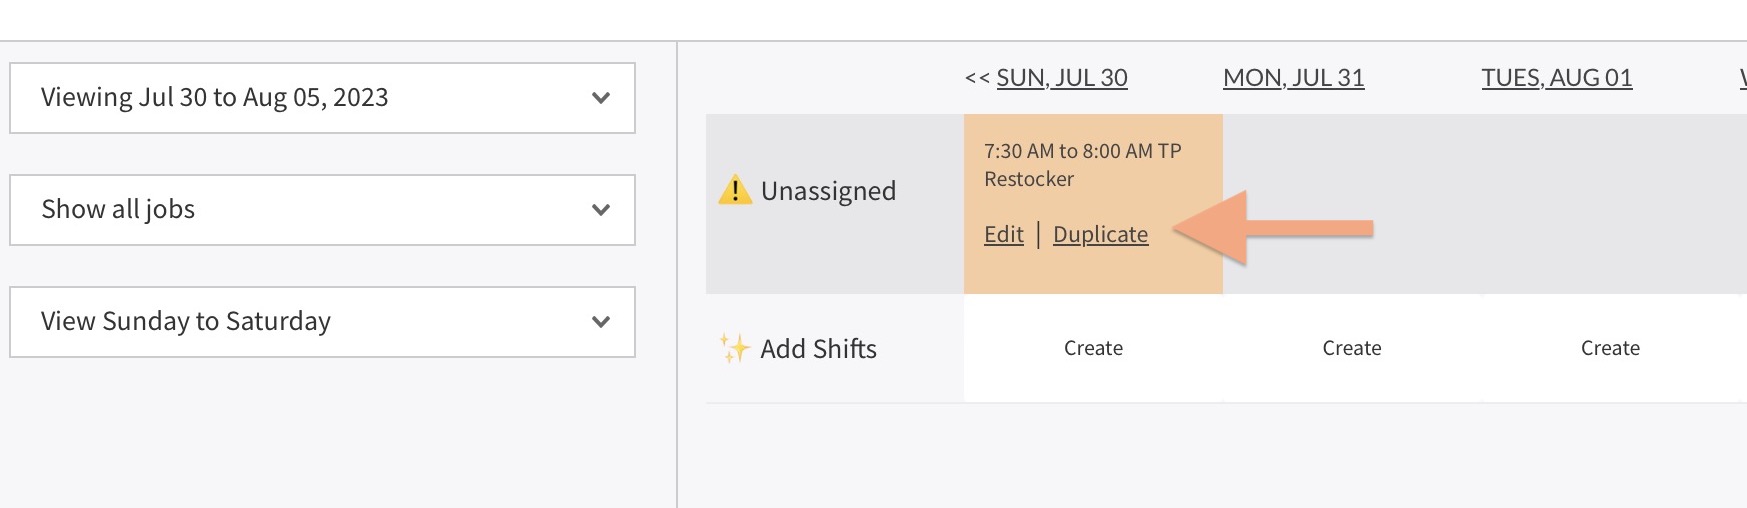
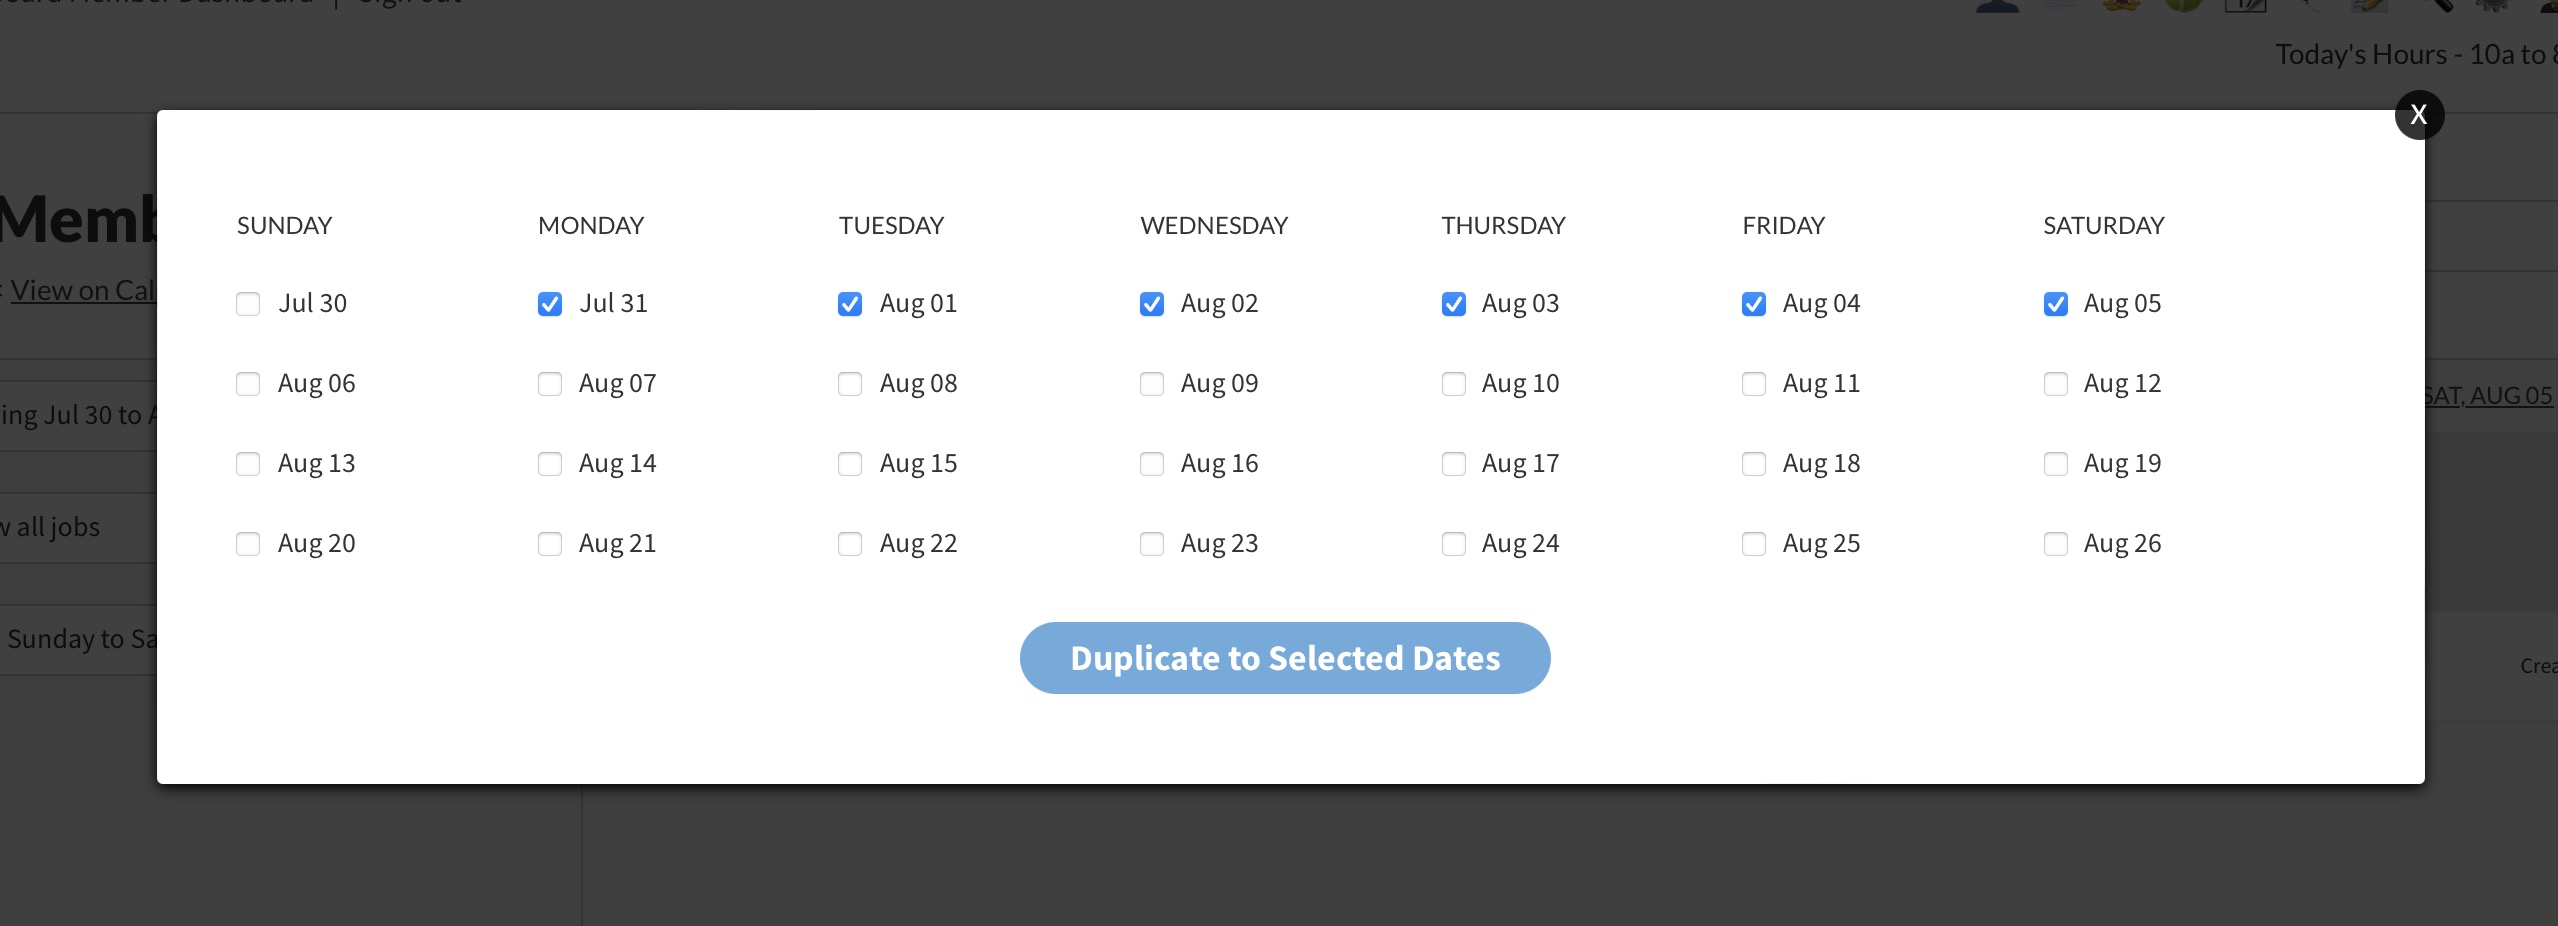
Tap the Duplicate link and you will see a popup to copy this shift up to 4 weeks in advance. For this example, we will duplicate the shift from Monday to Saturday…
Wah-lah. Our week has filled up pretty quick…

What it will eventually look like…
As your shifts get filled in, your calendar’s weekly view will eventually display a column of people assigned shifts below the Unassigned row. You will always be able to add more shifts or edit / delete existing ones.
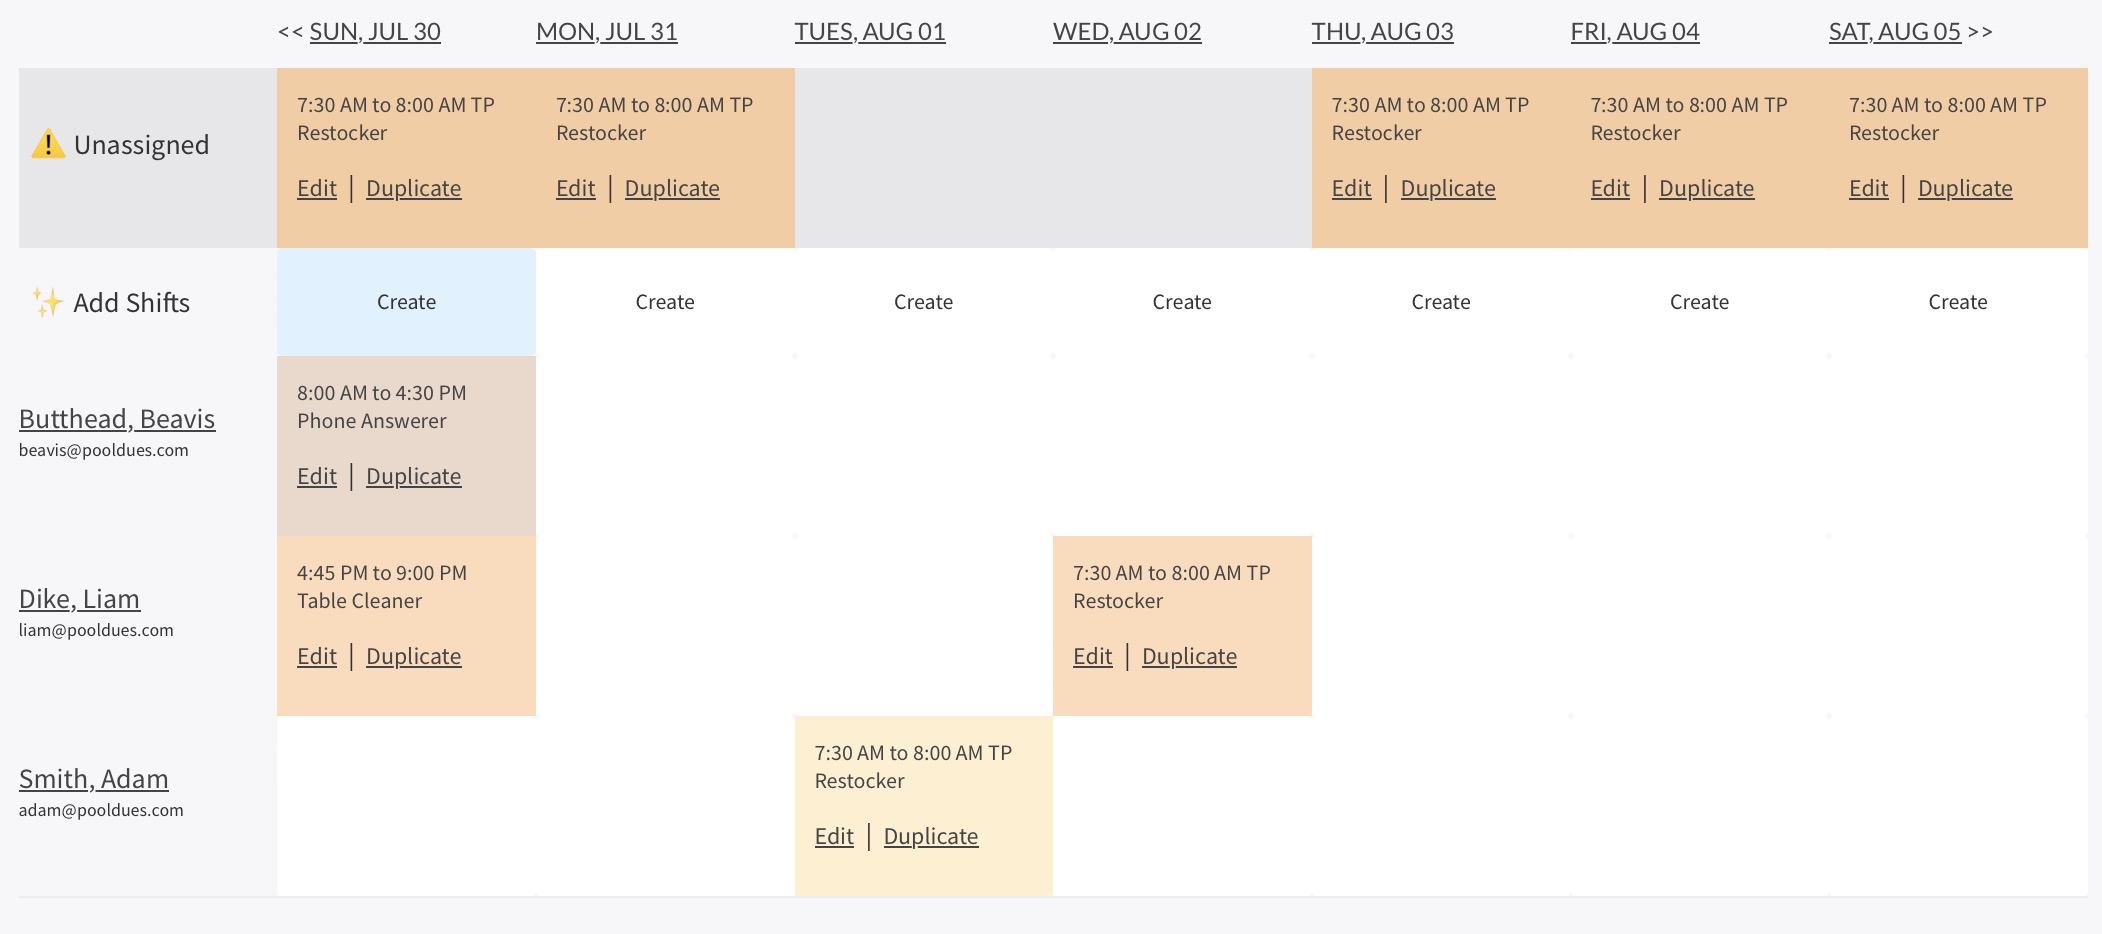
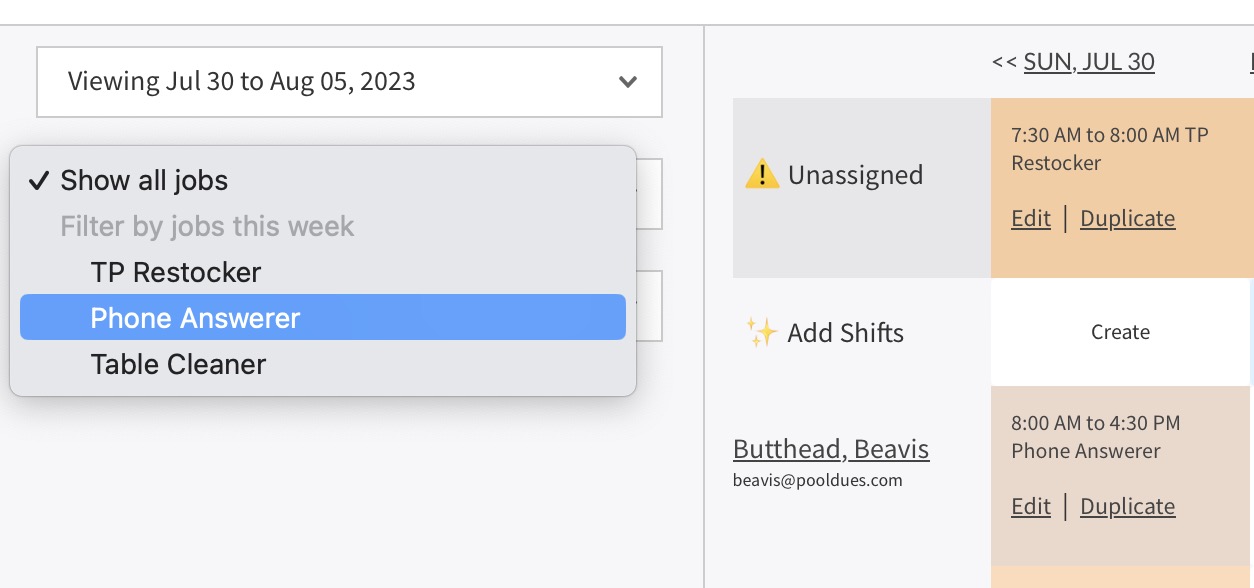
If you want to focus on a particular job, use the pulldown menu in the screenshot below. The page will refresh to only show shifts for that job.
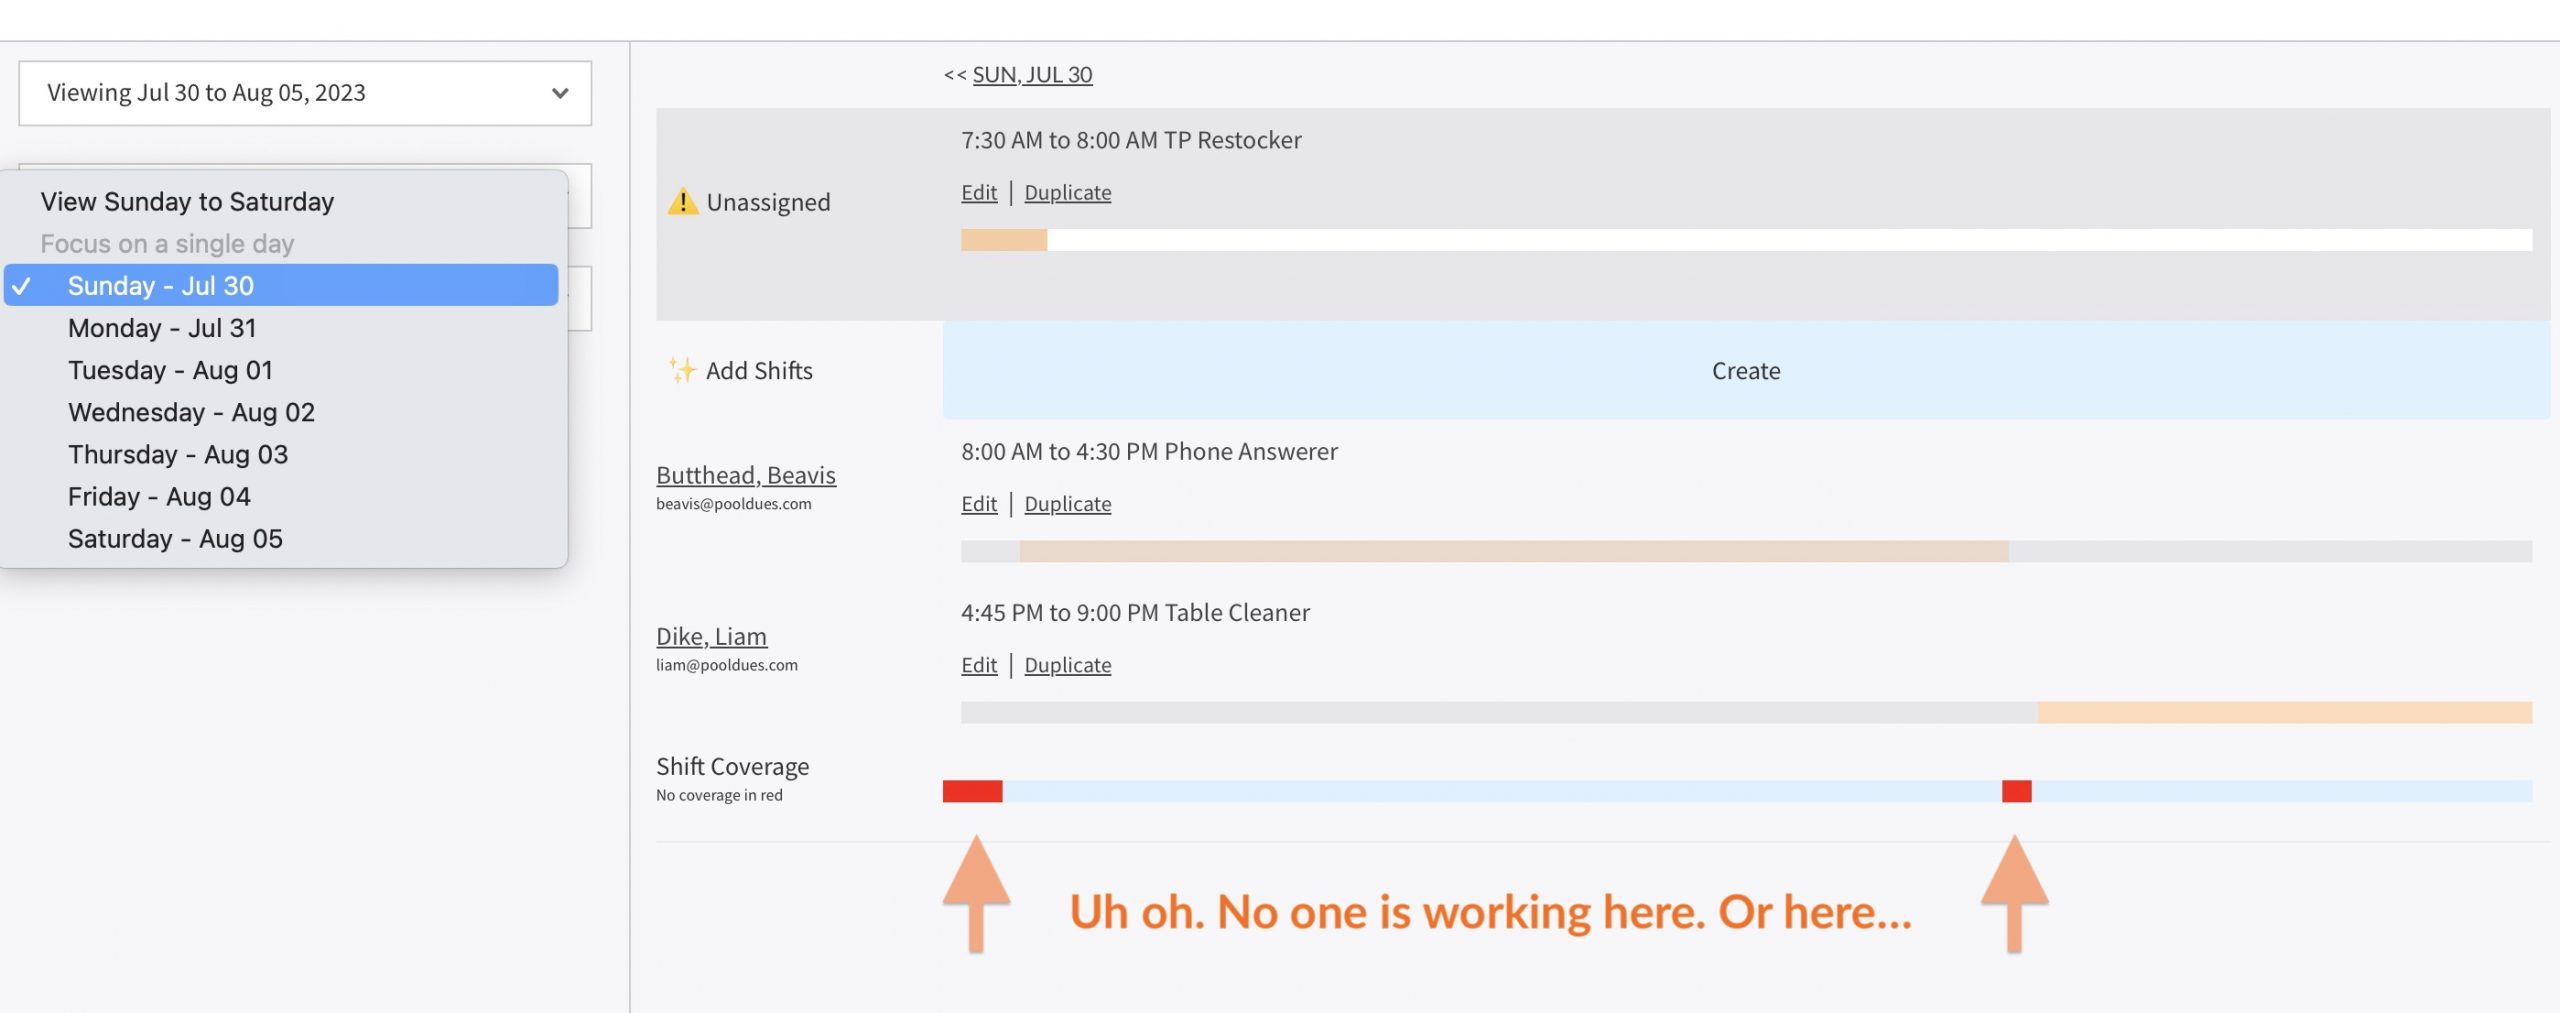
Pro tip: You can also filter to show a particular day of the week. When viewing a specific day, you can see in red if there are any gaps when no one is working…